6
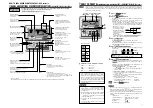
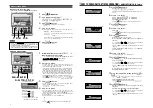
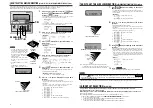
HOW TO PERFORM THE TIMER OPERATION
< WIRED REMOTE CONTROL (RC-E series) >
1
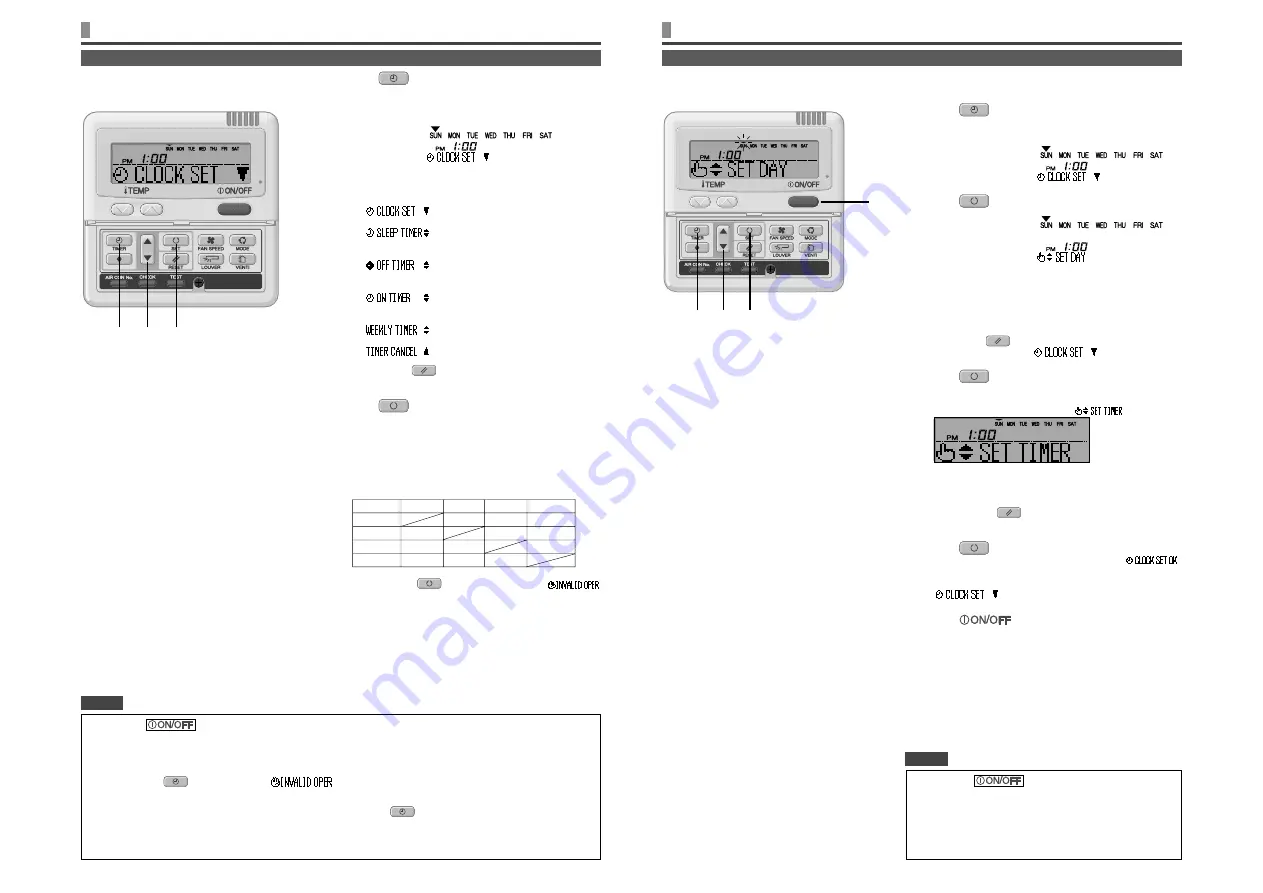
Press
TIMER button.
The mode changes to timer mode.
“Current day of the week” and “Current time” are displayed.
Display area :
[
]
[
]
[
]
2
Press
SET button.
The display area shows : [
]
(
ź
fl ashes)
[
] (current time)
[
]
3
Press
Ÿ
or
ź
button.
Place the “
ź
” mark above the day of the week to the current
day.
Press
Ÿ
and
ź
mark to move to the right and the left respectively.
If you press the
RESET button, the remote control will return to the
previous screen and display “
”.
4
Press
SET button.
The day of the week is fi xed, and the fl ashing of
ź
mark stops
and lights.
The “current time” value fl ashes, and “
” is displayed.
5
Press
Ÿ
or
ź
button.
Set to the current time.
If you press the
RESET button, the display is returned to
the one in step
1
.
6
Press
SET button.
The fl ashing for time display stops and lights, and “
”
is displayed to show that the current time is set.
Two seconds later, the display in step
1
returns, and
“
” is displayed.
7
Press
button.
The timer mode is fi nished.
2
3
1
•
•
4
5
•
6
7
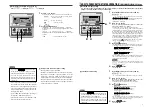
Timer operation is performed based on the time of the clock which is set by the following steps. Make sure to
set the time to the current time correctly.
SETTING THE TIME
•
If you press
button while timer mode is under
setting, timer mode is canceled and the display will return
to the original one. Note that the setting which has not been
completed is canceled.
•
If you do not press any button for several minutes after
entering the timer mode, the timer mode ends and the
display returns to the original one.
NOTICE
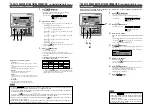
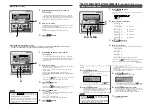
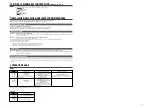
HOW TO PERFORM THE TIMER OPERATION
< WIRED REMOTE CONTROL (RC-E series) >
1
Press
TIMER button.
The mode changes to timer mode.
“Current day of the week” and “Current time ” are displayed.
[EXAMPLE] Sunday : 1 o’clock in the afternoon
Display area :
[
]
[
]
[
] (lights)
2
Press
Ÿ
or
ź
button.
By pressing
ź
or
Ÿ
button, it is possible to choose the item to set.
[
] (set to current time)
È
[
] (Every operation stops after a certain period
of time has elapsed.)
È
[
] (The unit stops operating at the setting
time.)
È
[
] (The unit starts operating at the setting
time.)
È
[
] (Timer set for each day of the week)
È
[
] (Cancel the timer setting)
If you press the
RESET button, timer mode ends and return
to original status.
3
Press
SET button.
The selected timer mode is set.
For setting of each timer mode, see the following pages.
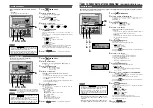
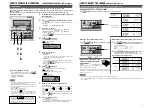
The possible combination of the timer function is mentioned in the
following table.
Combination of modes that can be set together
(
{
: possible ×: impossible)
•
If you select a combination of modes that cannot be set together
and press the
SET button, the message “
(invalid operation)” is displayed for 3 seconds and then the
display returns to the one selected in step
2
.
3
2
1
•
If you press
button while timer mode is under setting, timer mode is canceled and the display will return
to the original one. Note that the setting which has not completed is canceled.
•
If you have set the ON timer mode and either the OFF timer or Sleep timer mode at the same time, the OFF timer
(or Sleep timer) precedes the ON timer.
•
If you press the
Timer button and “
” is displayed, the button can not be operated because the
button operation is disabled. If you want to make the button effective , consult your dealer.
•
If you do not press any button for several minutes after pressing the
Timer button, Timer mode ends and the
display returns to the original one.
•
When the weekly timer setting recovers from power failures, the setting data (four settings per day) remain stored,
but holiday settings will automatically override the settings for each day.
THE SELECTION OF TIMER MODE
J
Functions of each timer operation
• Sleep timer
When the specified period of time elapses, operation
stops.
10 settings are available, from “an hour later OFF” to “10 hours
later OFF”.
The unit will stop when the setting time is reached.
• OFF timer
The unit stops operating at the setting time.
It will operate one time per setting.
• ON timer
The unit star ts to operate at the setting time. The
temperature can be set together. It will operate one time
per setting.
• Weekly timer
You can set up to four ON/OFF timers per day.
Once Weekly timer is set, it repeats every week.
NOTICE
OFF timer
×
{
×
Sleep timer
×
{
×
Weekly timer
×
×
×
ON timer
{
{
×
Sleep timer
OFF timer
ON timer
Weekly timer
Summary of Contents for FD Series
Page 2: ......

