-
229
-
'12 • PAC-T-173
Control box
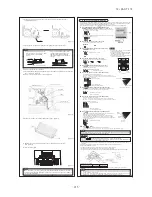
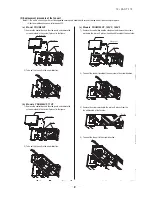
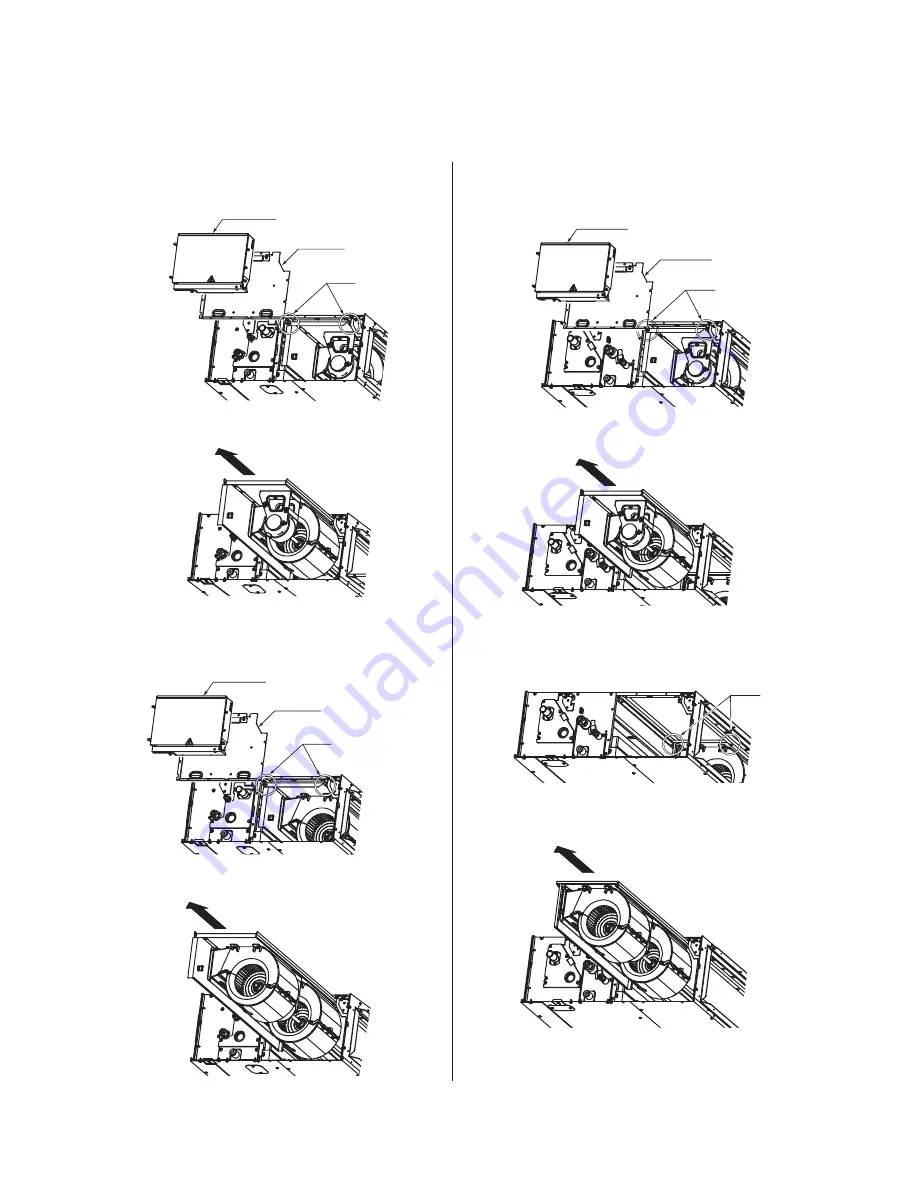
(2) Replacement procedure of the fan unit
Notes(1) The unit is a heavy item. It must be supported securely and handled with care not to drop when it is necessary to replace.
(2) For the maintenance space, refer to page 225.
(a) Model FDUM50VF
1) Remove the control box and the side panel, and remove the
screws marked in the circles (2 places) in the figure.
(c) Models FDUM100VF, 125VF, 140VF
1) Remove the control box and the side panel, and remove the screws
marked in the circles (2 places) from the unit located at the near side.
2) Take out the fan unit in the arrow direction.
2) Take out the fan unit located at the near side in the arrow direction.
(b) Models FDUM60VF, 71VF
1) Remove the control box and the side panel, and remove the
screws marked in the circles (2 places) in the figure.
2) Take out the fan unit in the arrow direction.
3) Remove the screws marked in the circles (2 places) from the
fan unit located at the far side.
4) Take out the fan unit in the arrow direction.
Control box
Side panel
Screw
Screw
Control box
Side panel
Screw
Side panel
Screw
Summary of Contents for FDC Series
Page 95: ... 94 12 PAC T 173 Models FDT100VF 125VF 140VF H H H H H C B A F G D G PJF000Z285 ...
Page 98: ... 97 12 PAC T 173 Models FDEN60VF 71VF C 2 C 1 A B A B D C 1 C 2 C 1 C 2 E G F B PFA003Z817 ...
Page 113: ... 112 12 PAC T 173 b Wireless remote controller RCN E1R 60 17 150 Unit mm ...
Page 278: ... 277 12 PAC T 173 ー K ...
Page 346: ... 345 12 PAC T 173 Power PCB 1BSU OVNCFS 4GRNCEG VJG 2 ...
Page 518: ... 517 12 PAC T 173 3 5 SUPER LINK E BOARD SC ADNA E F SL2NA E and SL3N AE BE to control ...
Page 519: ... 518 12 PAC T 173 ...

