-
247
-
'12 • PAC-T-173
ԙ
Wiring for the remote controller (Continued)
Ԛ
Function Setting by Remote Controller
Ԛ
Function Setting by Remote Controller (Continued)
Ԙ
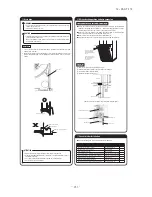
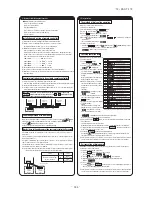
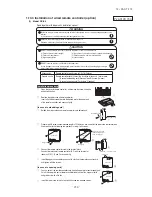
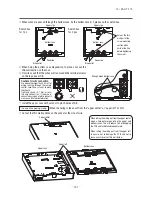
Open the remote controller cover and remove the screw without fail.
ԙ
Remove the upper case of remote controller. Attach a flat head screwdriver at the upper part of remote controller
and pry lightly. It will come off easily.
Use some cushion to protect the center panel.
Installation and wiring of remote controller
Ԙ
Wiring of remote controller should use 0.3mm
2
× 2 core wires or cables. (on-site configuration)
ԙ
Maximum prolongation of remote controller wiring is 600 m.
If the prolongation is over 100m, change to the size below.
But, wiring in the remote controller case should be under 0.5mm
2
. Change the wire size outside of the case
according to wire connecting. Waterproof treatment is necessary at the wire connecting section. Be careful about
contact failure.
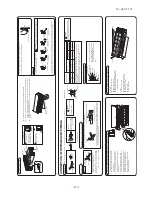
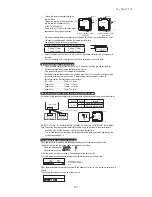
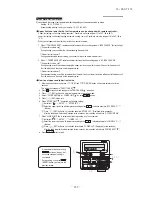
The indication when power source is supplied
How to set function
When power source is turned on, the following is displayed on the remote controller until the
communication between the remote controller and indoor unit settled.
At the same time, a mark or a number will be displayed for two seconds first.
This is the software's administration number of the remote controller, not an error cord.
When remote controller cannot communicate with the indoor unit for half an hour, the below indication willappear.
Check wiring of the indoor unit and the outdoor unit etc.
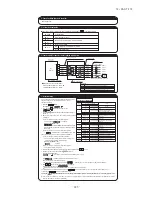
100 - 200m.........................0.5mm
2
s
2 cores
Under 300m
.......................0.75mm
2
s
2 cores
Under 400m
.......................1.25mm
2
s
2 cores
Under 500m
.......................2.0mm
2
s
2 cores
Master remote controller : " "
Slave remote controller : " "
The left mark is only an
example. Other marks may
appear.
Screw
(View after removing the cover)
Terminal setting SW
Press or button.
Make sure which do you want to set, " FUNCTION " (remote
controller function) or "I/U FUNCTION " (indoor unit function).
2.
1.
3.
4.
5.
Stop air-conditioner and press (SET) (MODE) buttons at
the same time for over three seconds, and the "FUNCTION SET "
will be displayed.
Press (SET) button.
Selecct " FUNCTION " (remote controller function) or "I/U FUNCTION " (indoor unit function).
Press (SET) button.
6.
"DATA LOADING" (Indication with blinking)
Display is changed to "01 GRILLE SET".
"DATA LOADING" (Blinking for 2 to 23 seconds to read the data)
(1)
Press (SET) button.
On the occasion of remote controller function selection
On the occasion of indoor unit function selection
Press or button.
"No. and function"are indicated by turns on the remote controller function table, then you can select from them.
(For example)
Press or button.
Select the setting.
The current setting of selected function is indicated.
(for example) "AUTO RUN ON" If "02 AUTO RUN SET" is selected
Press (SET) button.
"SET COMPLETE" will be indicated, and the setting will be completed.
Then after "No. and function" indication returns, Set as the same procedure if you want to set continuously ,and if to finish, go to 7.
Indication is changed to "02 FAN SPEED SET". Go to .
[Note]
If plural indoor units are connected to a remote controller,
the indication is "I/U 000" (blinking) The lowest number of the indoor unit connected is indicated.
Setting
Function No.
Function
Operation message
Function description: ,
setting description:
Function No.
Fixing button
Finishing button
7
2
1
6
Starting button
Previous screen button
Indoor unit selection button
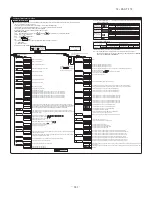
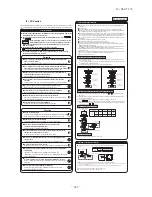
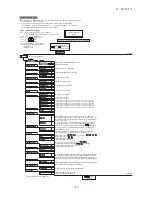
The initial function setting for typical using is performed automatically by the indoor unit connected, when remote
controller and indoor unit are connected.
As long as they are used in a typical manner, there wiil be no need to change the initial settings.
If you would like to change the initial setting marked “ ”, set your desired setting as for the selected item.
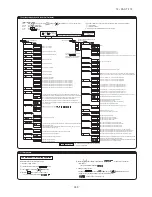
The procedure of functional setting is shown as the following diagram.
Sequence of the function setting is as follows.
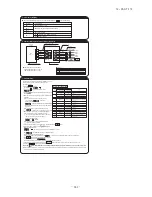
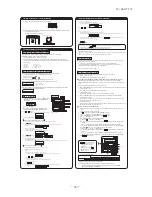
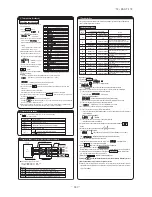
When shipped, the range of set temperature differs depending on the operation mode as below.
Heating : 16~30ûC (55~86ûF)
Except heating (cooling, fan, dry, automatic) : 18~30ûC (62~86ûF)
Upper limit and lower limit of set temperature can be changed with remote controller.
Upper limit setting: valid during heating operation. Possible to set in the range of 20 to 30ûC (68 to 86ûF).
Lower limit setting: valid except heating (automatic, cooling, fan, dry) Possible to set in the range of 18 to 26ûC (62 to
79ûF).
When you set upper and lower limit by this function, control as below.
1. When TEMP RANGE SET, remote controller function of function setting mode is "INDN CHANGE" (factory setting),
During heating, you cannot set the value exceeding the upper limit.
During operation mode except heating, you cannot set the value below the lower limit.
2. When TEMP RANGE SET, remote controller function of function setting mode is "NO INDN CHANGE"
During heating, even if the value exceeding the upper limit is set, upper limit value will be sent to the indoor unit.
But, the indication is the same as the temperature set.
During except heating, even if the value lower than the lower limit is set, lower limit value will be sent to the indoor unit.
But, the indication is the same as the temperature set.
How to set upper and lower limit value
1. Stop the air-conditioner, and press (SET) and (MODE) button at the same time for over three
seconds .
The indication changes to "FUNCTION SET ".
2. Press button once, and change to the "TEMP RANGE " indication.
3. Press (SET) button, and enter the temperature range setting mode.
4. Select "UPPER LIMIT " or "LOWER LIMIT " by using button.
5. Press (SET) button to fix.
6. When "UPPER LIMIT " is selected (valid during heating)
Press (SET) button to fix. Indication example: "UPPER 26ûC" (Displayed for two seconds)
After the fixed upper limit value displayed for two seconds, the indication will return to "UPPER LIMIT ".
7. When "LOWER LIMIT " is selected (valid during cooling, dry, fan, automatic)
Indication: " SET UP" "LOWER 18ûC "
8. Press ON/OFF button to finish.
Previous button
If upper limit value is set
If upper limit value is set
If lower limit value is set
If lower limit value is set
Indication: " SET UP" "UPPER 30ûC "
Select the upper limit value with temperature setting button . Indication example: "UPPER 26ûC "
(blinking)
Select the lower limit value with temperature setting button . Indication example: "LOWER 24ûC "
(blinking)
Press (SET) button to fix. Indication for example: "LOWER 24ûC" (Displayed for two seconds)
After the fixed lower limit value displayed for two seconds, the indication will return to "LOWER LIMIT ".
It is possible to finish by pressing
ON/OFF button on the way, but
unfinished change of setting is
unavailable.
During setting, if you press
(RESET) button, you return to the
previous screen.
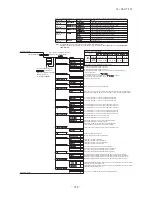
Note 2: As for plural indoor unit, set indoor functions to each master and slave indoor unit.
But only master indoor unit is received the setting change of indoor unit function “05 EXTERNAL
INPUT” and “06 PERMISSION / PROHIBISHION”.
Note 1: Fan setting of “HIGH SPEED”
Initial function setting of some indoor unit is “HIGH SPEED”
STANDARD
FAN SPEED SET
Fan tap
HIGH SPEED1, 2
UH - Hi
UH - Me
UH - Hi - Me
Hi - Lo
Hi - Me
Hi - Me - Lo
UH - UH - Hi - Me
UH - Hi - Me - Lo
Indoor unit air flow setting
-
-
-
-
-
-
-
The functional setting
The range of temperature setting
It is possible to finish by pressing ON/OFF button on the way, but unfinished change of setting is unavailable.
During setting, if you press (RESET) button, you return to the previous screen.
Setting is memorized in the controller and it is saved independently of power failure.
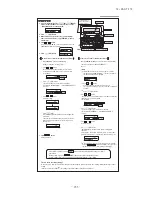
How to check the current setting
When you select from "No. and funcion" and press set button by the previous operation, the "Setting" displayed first is the current
setting.
(But, if you select "ALL UNIT ", the setting of the lowest number indoor unit is displayed.)
7.
Press or button.
Select the setting.
Press (SET) button.
Press ON/OFF button.
Setting is finished.
The current setting of selected function is indicated.
(For example) "STANDARD" If "02 FAN SPEED SET" is selected.
Press (SET) button.
"SET COMPLETE" will be indicated, and the setting will be completed.
Then after "No. and function" indication returns, set as the same procedure if you want to set continuously , and if to finish, go to 7.
When plural indoor units are connected to a remote controller, press the AIRCON NO. button, which allows you to go back to the
indoor unit selection screen. (example "I/U 000 ")
Setting
(2)
(3) Press (SET) button.
Press or button.
Press or button.
Select the number of the indoor unit you are to set
If you select "ALL UNIT ", you can set the same setting with all unites.
"No. and function" are indicated by turns on the indoor unit function table, then you can select from them.
(For example)
Function No.
Function
Ԙ
Ԝ
ԛ
Ԛ
ԙ
Ԙ
ԙ
Ԛ
ԛ
Ԝ
Summary of Contents for FDC Series
Page 95: ... 94 12 PAC T 173 Models FDT100VF 125VF 140VF H H H H H C B A F G D G PJF000Z285 ...
Page 98: ... 97 12 PAC T 173 Models FDEN60VF 71VF C 2 C 1 A B A B D C 1 C 2 C 1 C 2 E G F B PFA003Z817 ...
Page 113: ... 112 12 PAC T 173 b Wireless remote controller RCN E1R 60 17 150 Unit mm ...
Page 278: ... 277 12 PAC T 173 ー K ...
Page 346: ... 345 12 PAC T 173 Power PCB 1BSU OVNCFS 4GRNCEG VJG 2 ...
Page 518: ... 517 12 PAC T 173 3 5 SUPER LINK E BOARD SC ADNA E F SL2NA E and SL3N AE BE to control ...
Page 519: ... 518 12 PAC T 173 ...

