'14 • KX-SM-200
–
130
–
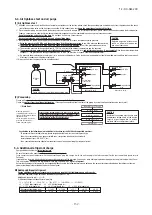
Bolt
Gasket
Accessory pipe
High/low
gas line
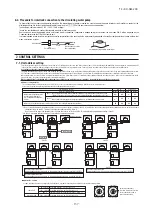
Use the accessory gasket when connecting the flange pipe.
A
The accessory
pipe is not
connection to B
B
Bolt
(Reuse)
(Reuse)
5-6. Heating and condensation prevention
①
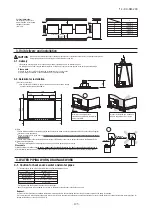
Dress refrigerant pipes (both gas and liquid pipes) for heat insulation and prevention of dew condensation.
Perform the heat insulation work after completing the airtight test when it will be detected if there is any leak.
When a pipe joint used on the way of piping which is buried, provide an inspection hole, or the like, for maintenance.
Inspection hole must be provided also when a pipe joint is located in the ceiling.
Improper heat insulation/anti-dew dressing can result in a water leak or dripping causing damage to household effects, etc.
②
Use a heat insulating material that can withstand 120
℃
or a higher temperature. Poor heat insulating capacity can cause heat insulation problems or cable deterioration.
a) The gas pipe can cause during a cooling operation dew condensation, which will become drain water causing a possible water-leak accident, or reach during a heating
operation as high a temperature as 60
℃
to 110
℃
, posing a risk of burns, when touched accidentally. So, do not fail to dress it with a heat insulation material.
b) Wrap indoor units’ flare joints with heat insulating parts (pipe cover) for heat insulation (both gas and liquid pipes).
c) Give heat insulation to both gas and liquid side pipes. Bundle a heat insulating material and a pipe tightly together so that no gaps may be left between them and wrap them
together with a connecting cable by a dressing tape.
CAUTION
Be sure to record the refrigerant volume,
because the information is necessary to
perform the installation’s maintenance
service.
Pay attention to the following points in addition to the above for the R410A and compatible machines.
●
To prevent a different oil from entering, please assign dedicated tools, etc. to each refrigerant type. Under no circumstances must a gauge manifold and a charge hose in
particular be shared with other refrigerant types (R22, R407C, etc.).
●
Refrigerant types are indicated by color at the top of the cylinder (Pink for R410A). Always confirm this.
●
Do not use a charge cylinder under any circumstances. There is a danger that the composition of the refrigerant will change when R410A is transferred to a cylinder.
●
When charging refrigerant, use liquid refrigerant from a cylinder. If refrigerant is charged in a gas form, the composition may change considerably.
Please note
Put down on the refrigerant charge volume recording plate provided on the back of the front panel the amount of refrigerant calculated from the pipe length
.
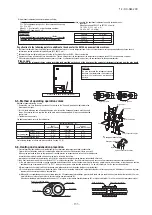
Wires for connecting indoor
and outdoor units
Exterior tape
Gas piping
insulation
Liquid piping
Band (accessory)
Pipe cover (accessory)
d) Although this air conditioning unit has been tested under the JIS condensation test conditions, pipes for both liquid and gas need to be heat insulated with material of 20 mm or
more in thickness, in the ceiling, or other, where the relative humidity exceeds 70%.
When the ambient dew point temperature becomes 28
℃
or higher, or the relative humidity becomes 80% or higher, add further 10 to 20 mm thick heat insulation material.
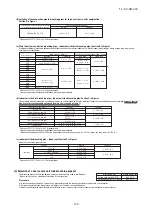
When the Additional refrigerant quantity (A+B) is over the
following table, please separate the refrigerant line.
B
: Additional refrigerant quantity for indoor units (kg)
If the total indoor units capacity is larger than the heat source unit capacity, then calculate the additional refrigerant quantity for indoor units.
D
= (Total indoor units capacity) - (Heat source unit capacity)
B
=
D
x 0.01
When
D
> 0, calculate
B
using the above equation;
When
D ≦
0, take it as
B
= 0.
Important
Capacity
A+B
(kg)
224-335
450-670
730-1000
25
50
75
It is located in back of this front panel.
<Example>
When you connect FDC335 to FDT140 x 3 units:
D
= 140 x 3 - 335 = 85 (> 0)
B
= 85 x 0.01 = 0.85 (kg)
Heat source unit
Heat source unit
A
B
Important
●
Please take care so that installed pipes may not touch components within a unit.
●
In laying pipes on the installation site, keep the operation valves shut all the time
.
●
Give
sufficient protections
(compressed and brazed or by an adhesive tape)
to pipe ends so that any water or foreign matters may not enter the pipes
.
●
In bending a pipe, bend it
to the largest possible radius (at least four times the pipe diameter)
. Do not bend a pipe repeatedly to correct its form.
●
Heat source unit’s liquid pipe and liquid refrigerant piping are to be flare connected. Flare a pipe after engaging a flare nut onto it. A flare size for R410A is
different from that for conventional R407C. Although we recommend the use of flaring tools developed specifically for R410A, conventional flaring tools can also
be used by adjusting the measurement of protrusion B with a protrusion control gauge.
●
Tighten a flare joint securely
with two spanners
. Observe flare nut tightening torque specified in the table below.
●
Do not apply any oil on a flare joint.
●
Use the accessory pipe to connect the refrigerant pipe to the gas valve of the heat source unit.
The gasket must be used between their flanges.
Tightening torque for bolts is 25-30 N·m. Gas might leak if they are tightened beyond the specified range.
Try to tighten bolts homogeneously. Tighten alternately a pair of bolts located opposite to each other across the center of flange. After tightening all bolts in this
way, tighten them again to the specified torque.
(2) Piping work
Flared pipe end: A (mm)
Copper pipe protrusion for flaring: B (mm)
φ
6.35
φ
9.52
φ
12.7
φ
15.88
Copper
pipe outer
diameter
0
-0.4
A
9.1
13.2
16.6
19.7
φ
6.35
φ
9.52
φ
12.7
φ
15.88
Copper
pipe outer
diameter
In the case of a rigid (clutch) type
With an R410A tool
With a conventional tool
0
ー
0.5
0.7
ー
1.3
●
When there is a danger that a small animal enters from the pipe port, cover the port with appropriate blocking materials (to be arranged on the user’s part).
●
Use an elbow (locally procured) to connect control valves to the piping.
●
In anchoring piping on the installation site, give 1.5m or a longer distance between heat source unit and an anchoring point where the piping is secured as
illustrated below. (A failure to observe this instruction may result in a pipe fracture depending on a method of isolating vibrations employed.)
●
The pipe should be anchored every 1.5m or less to isolate the vibration.
Over 1.5m
Pipe fastening position
●
Pipes are to be blazed to connect the accessory pipe with refrigerant piping or refrigerant piping with a branching pipe set.
●
Blazing must be performed under a nitrogen gas flow
. Without nitrogen gas, a large quantity of foreign matters (oxidized film) are created, causing a critical
failure from capillary tube or expansion valve clogging.
●
Brazing of the operation valve and the pipes should be performed while cooling the valve body with a wet towel.
●
Perform flushing. To flush the piping, charge nitrogen gas at about 0.02MPa with a pipe end closed with a hand. When pressure inside builds up to a sufficient
level, remove the hand to flush. (in flushing a pipe, close the other end of the pipe with a plug).
CAUTION
If you tighten it without using double spanners, you may deform
the operation valve, which can cause an inflow of nitrogen gas
into the heat source unit.
Tightening torque (N
・
m)
Operation valve size
(mm)
Tightening angle
(° )
Tightening torque
(N
・
m)
Recommended length of tool handle
(mm)
φ
6.35
(
1/4"
)
14
ー
18
45
ー
60
150
φ
9.52
(
3/8"
)
34
ー
42
30
ー
45
200
φ
12.7
(
1/2"
)
49
ー
61
30
ー
45
250
φ
15.88
(
5/8"
)
68
ー
82
15
ー
20
300
φ
19.05 (3/4"
)
100
ー
120
15
ー
20
450
Use a torque wrench. If a torque wrench is not available,
fasten the flare nut manually first and then tighten it
further, using the left table as a guide.
Tighten equally it more than 2 times for
top and bottom alternation.
Afterwards, finally tighten it by specified
torque once again.
Do not hold the valve cap area with a spanner.
High/low gas line (A)
φ
19.05
φ
22.22
φ
25.4
335
280
224
Capacity
Tightening torque 25-30 N·m
Plug the end of the pipe with tape, or other
material, and fill the pipe with nitrogen gas.
Only use nitrogen gas (N2)
Taping
<
N
2>
Nitrogen
Brazing
Brazing
Flatten
Adhesive tape
Operation procedure
①
In laying pipes on the installation site, keep the operation valves shut all the time
.
②
Blazing must be performed under a nitrogen gas flow
. Without nitrogen gas, a large quantity of foreign matters (oxidized film) are created, causing a critical
failure from capillary tube or expansion valve clogging.
③
Give
sufficient protections
(compressed and brazed or with an adhesive tape)
so that water or foreign matters may not enter the piping
.
Station valve
Primary side
Secondary side
0.02MPa
Hand
Relief valve
Nitrogen
gas
④
Perform flushing. To flush the piping, charge nitrogen gas at about 0.02MPa with a pipe end closed with a hand. When pressure inside builds up to a sufficient
level, remove the hand to flush. (in flushing a pipe, close the other end of the pipe with a plug).
⑤
In brazing an operation valve and a pipe,
braze them with the valve main body cooled with a wet towel or the like
.
Vacuum gauge check
Pay attention to the following points in addition to the above for the R410A and compatible machines.
○
To prevent a different oil from entering, please assign dedicated tools, etc. to each refrigerant type.
Under no circumstances must a gauge manifold and a charge hose in particular be shared with
other refrigerant types (R22, R407C, etc.).
○
Use a counterflow prevention adapter to prevent vacuum pump oil from entering the refrigerant system.
Nitrogen
gas
(1) Air tightness test
①
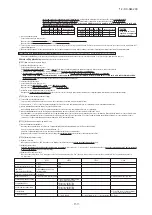
Although a heat source unit itself has been tested for air tightness at the factory, please check the connected pipes and indoor units for air tightness from the check
joint of the operation valve on the heat source unit side. While conducting a test,
keep the operation valve shut all the time
.
②
Since refrigerant piping is pressurized to the design pressure of a unit with nitrogen gas for testing air tightness, please connect instruments according the drawing below.
Under no circumstances should chlorine-based refrigerant, oxygen or any other combustible gas be used to pressurize a system.
Keep the operation valve shut all the time
. Do not open it under any circumstances.
Be sure to pressurize all of the liquid, gas and oil equalizing pipes
.
③
In pressurizing the piping, do not apply the specified level of pressure all at once, but gradually raise pressure.
a)
Raise the pressure to 0.5 MPa, and then stop. Leave it for five minutes or more
to see if the pressure does not drop.
b)
Then raise the pressure to 1.5 MPa, and stop. Leave it for five more minutes
to see if the pressure does not drop.
c) Then raise the pressure to the specified level (4.15 MPa), and record the ambient temperature and the pressure.
d)
If no pressure drop is observed with an installation pressurized to
the specified level
and left for about one day
,
it is acceptable
. When the ambient temperature
changes 1
℃
, the pressure also changes approximately 0.01 MPa. The pressure, if changed, should be compensated for.
e) If a pressure drop is observed in checking a) – d), a leak exists somewhere. Find a leak by applying bubble test liquid to welded parts and flare joints and repair it.
After repair, conduct an air-tightness test again.
④
Always pull air from the pipes after the airtightness test.
(2) Vacuuming
Please pull air
from the check joints of the operation valves on both liquid and gas sides
.
Please also
pull air from the oil equalization pipe
. (Please pull air separately from the rest of the piping by using the oil equalization valve check joint)
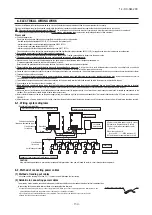
To indoor unit
Gauge manifold
Lo
Lo knob
Hi
Hi knob
Operation valve
Liquid pipe
Oil equalization
pipe
Gas pipe
Heat source unit 1
Service point
(check joint)
Operation valve
Liquid pipe
Oil equalization
pipe
Gas pipe
Heat source unit 2
CAUTION
Applying excessive pressure can
cause an inflow of nitrogen gas
into a heat source unit.
CAUTION
Please also pull air from the oil equalization pipe.
Airtight (pressurized) piping
5-3. Air tightness test and air purge
<
Work flow
>
When the system has
remaining moisture inside or a
leaky point, the vacuum gauge
indicator will rise.
Check the system for a leaky
point and then draw air to
create a vacuum again.
CAUTION
Insufficient vacuuming may result in poor
performance falling short of the design
capacity, pipe clogging due to residue
moisture and/or a compressor failure.
Airtighteness test completed
Vacuuming begins
Vacuuming completed
Fill refrigerant
Please run the vacuum pump for at least one hour after the
vacuum gauge shows -101kPa or lower. (-755mmHg or lower)
Confirm that the vacuum gauge indicator does not rise
after leaving the system for an hour or more
.
●
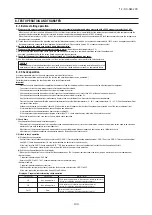
Adding additional refrigerant
Charge additional refrigerant according to the size and length of the liquid piping and unit capacity
.
Determine additional charge volume by rounding to the nearest 0.1 kg.
Additional fill quantity (kg) =
A+B
5-4. Additional refrigerant charge
Charge additional refrigerant
in the liquid state
.
Be sure to measure the quantity
with a scale in adding refrigerant
.
If you cannot charge all refrigerant with the heat source unit lying idle, charge it with the unit running in the test run mode. (For the test run method, please refer to
Section 8)
If operated for a long time with insufficient refrigerant the compressor will be damaged. (In particular, when adding refrigerant during operation, complete the job within 30min.)
This unit contains
<224-335: 9.9 kg, 450-670: 19.8 kg, 730-1000: 29.7 kg> of refrigerant
.
Determine the amount of refrigerant to be charged additionally using the following formula and put down the amount of refrigerant added on the refrigerant charge
volume recording plate provided on the back the front panel.
A =(
L1×0.26
)+(
L2×0.18
)+(
L3×0.12
)+(
L4×0.059
)+(
L5×0.022
)
L1
:
φ
19.05 total length (m)
L2
:
φ
15.88 total length (m)
L3
:
φ
12.7 total length (m)
L4
:
φ
9.52 total length (m)
L5
:
φ
6.35 total length (m)
Refrigerant liquid pipe size
Additional fill quantity (kg/m)
φ
19.05
0.26
φ
15.88
0.18
φ
12.7
0.12
φ
9.52
0.059
φ
6.35
0.022
A
: Additional refrigerant quantity for piping (kg)
5-5. Method of operating operation valves
Method of opening/closing a valve
○
Remove the cap, turn the gas pipe side until it comes to the “Opened” position as indicated in the
drawing on the right.
○
For the liquid side pipe and oil equalization pipe side, turn with a hexagonal wrench until the shaft
stops. If excessive force is applied, the valve main body can be damaged. Always use a dedicated
special tool.
○
Tighten the cap securely.
For tightening torque, refer to the table below.
For gas pipes
For oil equalization pipe
7 or less
6-8
14-16
6-8
30 or less
20-30
25-35
20-30
Tightening torque N
・
m
13
10-12
10-12
10-12
Shaft
(valve main body)
Cap
(lid)
Cap nut
(check joint section)
For fastening torque of a flare nut, please refer to Section 5-2 (2).
For liquid pipes
φ
9.52 (3/8”)
φ
12.7 (1/2”)
S
O
S
O
Closed position
Opened position
Hexagonal wrench
Liquid/oil equalization valves
Open
Hexagonal wrench type
▲
Cap
For oil equalization pipe
For cap nut
For liquid pipe
For gas pipe
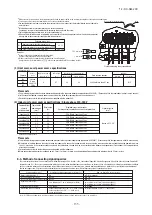
Branch pipe section
500 mm or more
(Branch pipe 2)
L
3
L
4
L
C
La
L
1
L
2
Lb
(Branch pipe 1)
Thin pipe
Thick pipe
Branch pipe section
500 mm or more
To indoor unit
Oil equalization
pipes
●
Connect pipes between combined units, with care for the followings.
(a) On combination units, it must be secured a straight pipe section of 500 mm or more before a branch pipe (Type DOS) for both gas pipe and liquid pipe as shown below.
(b) On the pipe connection system for combination of three units, use a branch pipe of which the pipe diameter is different after the pipe branching, for the branch pipe
(branch pipe 1) located the closest to the indoor unit. It is necessary also to connect a thin pipe to the heat source unit and to connect a thick pipe to next branch pipe.
(c) It must be no longer than 5m the length of pipe from the branching pipe 1 to the heat source unit. (L
1
5 m, L
2
+L
4
5 m, L
3
+L
4
5 m)
It must be no longer than 10 m the length of oil equalization pipes between heat source units. (La+Lb 10 m, Lb+Lc 10 m, La+Lc 10 m)
In case of P950 three combination unit:
<
=
<
=
<
=
<
=
<
=
<
=
Heat source unit
Heat source unit
Heat source unit
P335
P280
P335
Summary of Contents for FDC1000KXZWE1
Page 171: ... 14 KX SM 200 169 ...
Page 172: ... 14 KX SM 200 170 ...
Page 173: ... 14 KX SM 200 171 ...
Page 174: ... 14 KX SM 200 172 ...


