-
147
-
'14 • KX-SM-204
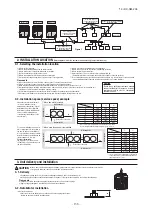
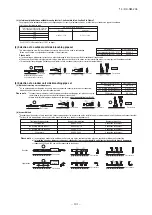
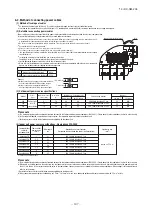
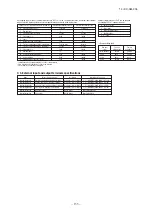
Wires for connecting indoor
and outdoor units
Exterior tape
Gas piping
insulation
Liquid piping
Band (accessory)
Pipe cover (accessory)
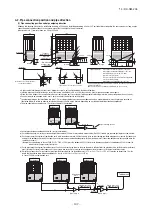
Remote control unit
Outdoor unit power source 3 phase 4wiring 380-415V
Indoor unit
Outdoor unit
Earth leakage breaker
(Impulse withstanding type)
Circuit breaker
for cabling
Circuit breaker
for cabling
Earth leakage breaker
R
R
R
R
R
R
Grounding
wire
A
A
C
D
B
B
Distributed, separate power source system
●
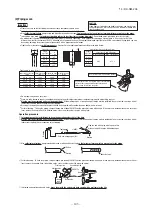
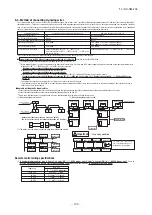
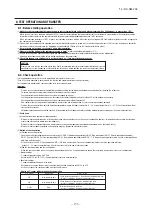
Adding additional refrigerant
Charge additional refrigerant according to the size and length of the liquid piping and unit capacity
.
Determine additional charge volume by rounding to the nearest 0.1 kg.
Additional fill quantity (kg) = S
+P+
I
4-4. Additional refrigerant charge
Charge additional refrigerant
in the liquid state
.
Be sure to measure the quantity
with a scale in adding refrigerant
.
If you cannot charge all refrigerant with the outdoor unit lying idle, charge it with the unit running in the test run mode. (For the test run method, please refer to Section 8)
If operated for a long time with insufficient refrigerant the compressor will be damaged. (In particular, when adding refrigerant during operation, complete the job within 30min.)
This unit contains
<224 : 11.0 kg, 280, 335 : 11.5kg, 450 : 22.0 kg, 500 : 22.5 kg, 560-670 : 23.0 kg, 735 : 33.5 kg, 800 : 34.0 kg, 850-1000 : 34.5 kg> of
refrigerant
.
Determine the amount of refrigerant to be charged additionally using the following formula and put down the amount of refrigerant added on the refrigerant charge
volume recording plate provided on the back the front panel.
P =(
L1×0.37
)+(
L2×0.26
)+(
L3×0.18
)+(
L4×0.12
)+(
L5×0.059
)+(
L6×0.022
)
L1
:
φ
22.22 total length (m)
L2
:
φ
19.05 total length (m)
L3
:
φ
15.88 total length (m)
L4
:
φ
12.7 total length (m)
L5
:
φ
9.52 total length (m)
L6
:
φ
6.35 total length (m)
φ
22.22
0.37
Refrigerant liquid pipe size
Additional fill quantity (kg/m)
φ
19.05
0.26
φ
15.88
0.18
φ
12.7
0.12
φ
9.52
0.059
φ
6.35
0.022
For gas pipes
For liquid pipes
For oil equalizing pipe
Tightening torque N
・
m
Shaft (valve main body)
7 or less
6-8
14-16
6-8
φ
9.52
φ
12.7
Cap (lid)
30 or less
20-30
25-35
20-30
Cap nut (check joint section)
13
10-12
10-12
S: standard additional refrigerant quantity (kg)
P: Additional refrigerant quantity for piping (kg)
When the Additional refrigerant quantity (P
+
I
) is over the
following table, please separate the refrigerant line.
I
: Additional refrigerant quantity for indoor units (kg)
If the total indoor units capacity is larger than outdoor unit capacity, then calculate the additional refrigerant quantity for indoor units.
D = {(Total indoor units capacity) - (outdoor unit capacity)}
I
= D x 0.01
When D > 0, calculate
I
using the above equation;
When D
≦
0, take it as
I
= 0.
Important
Outdoor unit
S+P+
I
(kg)
224-670
735-1000
45
90
Outdoor unit
280
335
450
500
560
615
670
735
S (kg)
2.1
2.1
0
2.1
4.2
4.2
4.2
2.1
Outdoor unit
800
850
900
950
1000
S (kg)
4.2
6.3
6.3
6.3
6.3
For fastening torque of a flare nut, please refer to Section 4-2 (2) Piping work on site.
<Example>
When you connect FDC400 to FDT140 x 3 units:
D= 140 x 3 - 400= 20 (> 0)
I
= 20 x 0.01 = 0.2 (kg)
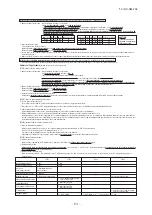
Vacuum gauge check
S
O
S
O
Pay attention to the following points in addition to the above for the R410A and compatible machines.
○
To prevent a different oil from entering, please assign dedicated tools, etc. to each refrigerant type.
Under no circumstances must a gauge manifold and a charge hose in particular be shared with
other refrigerant types (R22, R407C, etc.).
○
Use a counterflow prevention adapter to prevent vacuum pump oil from entering the refrigerant system.
(2) Vacuuming
Please pull air
from the check joints of the operation valves on both liquid and gas sides
.
Please also
pull air from the oil equalizing pipe
. (Please pull air separately from the rest of the piping by using the oil equalizing valve check joint)
(4) Method of operating operation valves
Method of opening/closing a valve
○
Remove the cap, turn the gas pipe side until it comes to the “Open” position as indicated in the
drawing on the right.
○
For the liquid side pipe and oil equalizing pipe side, turn with a hexagonal wrench until the shaft
stops. If excessive force is applied, the valve main body can be damaged. Always use a dedicated
special tool.
○
Tighten the cap securely.
For tightening torque, refer to the table below.
For gas pipes
For cap nut
Cap
For oil equalizing pipe
For liquid pipes
Closed position
Opened position
<
Work flow
>
When the system has
remaining moisture inside or a
leaky point, the vacuum gauge
indicator will rise.
Check the system for a leaky
point and then draw air to
create a vacuum again.
CAUTION
Insufficient vacuuming may result in poor
performance falling short of the design
capacity, pipe clogging due to residue
moisture and/or a compressor failure.
Airtighteness test completed
Vacuuming begins
Vacuuming completed
(Fill oil)
Fill refrigerant
Please run the vacuum pump for at least one hour after the
vacuum gauge shows -101kPa or lower. (-755mmHg or lower)
Confirm that the vacuum gauge indicator does not rise
after leaving the system for an hour or more
.
(3) Additional oil charge
When the total pipe length is longer than 510 m, charge 1,000 cc of M-MA32R refrigeration machine oil
from the check joint of gas pipe operation valve after the vacuuming.
Nitrogen
gas
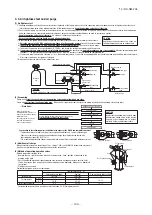
(1) Air tightness test
①
Although an outdoor unit itself has been tested for air tightness at the factory, please check the connected pipes and indoor units for air tightness from the check
joint of the operation valve on the outdoor unit side. While conducting a test,
keep the operation valve shut all the time
.
②
Since refrigerant piping is pressurized to the design pressure of a unit with nitrogen gas for testing air tightness, please connect instruments according the drawing below.
Under no circumstances should chlorine-based refrigerant, oxygen or any other combustible gas be used to pressurize a system
Keep the operation valve shut all the time
. Do not open it under any circumstances.
Be sure to pressurize all of the liquid, gas and oil equalizing pipes
.
③
In pressurizing the piping, do not apply the specified level of pressure all at once, but gradually raise pressure.
a)
Raise the pressure to 0.5 MPa, and then stop. Leave it for five minutes or more
to see if the pressure drops.
b)
Then raise the pressure to 1.5 MPa, and stop. Leave it for five more minutes
to see if the pressure drops.
c) Then raise the pressure to the specified level (4.15 MPa), and record the ambient temperature and the pressure.
d)
If no pressure drop is observed with an installation pressurized to
the specified level
and left for about one day
,
it is acceptable
. When the ambient temperature
changes 1
℃
, the pressure also changes approximately 0.01 MPa. The pressure, if changed, should be compensated for.
e) If a pressure drop is observed in checking a) – d), a leak exists somewhere. Find a leak by applying bubble test liquid to welded parts and flare joints and repair it.
After repair, conduct an air-tightness test again.
④
Always pull air from the pipes after the airtightness test.
To indoor unit
Gauge manifold
Lo
Lo knob
Hi
Hi knob
Operation valve
Liquid pipe
Oil equalizing
tube
Gas pipe
Outdoor unit 1
Service point
(check joint)
Operation valve
Liquid pipe
Oil equalizing
tube
Gas pipe
Outdoor unit 2
CAUTION
Applying excessive pressure can cause an
inflow of nitrogen gas into an outdoor unit.
CAUTION
Please also pull air from the oil equalizing pipe.
Airtight (pressurized) piping
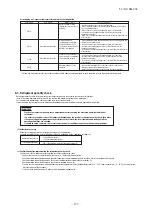
4-3. Air tightness test and air purge
6. ELECTRICAL WIRING WORK
5.
Drainage
4-5. Heating and condensation prevention
①
Dress refrigerant pipes (both gas and liquid pipes) for heat insulation and prevention of dew condensation.
Improper heat insulation/anti-dew dressing can result in a water leak or dripping causing damage to household effects, etc.
②
Use a heat insulating material that can withstand 120
℃
or a higher temperature. Poor heat insulating capacity can cause heat insulation problems or cable deterioration.
a) The gas pipe can cause during a cooling operation dew condensation, which will become drain water causing a possible water-leak accident, or reach during a heating
operation as high a temperature as 60
℃
to 110
℃
, posing a risk of burns, when touched accidentally. So, do not fail to dress it with a heat insulation material.
b) Wrap indoor units’ flare joints with heat insulating parts (pipe cover) for heat insulation (both gas and liquid pipes).
c) Give heat insulation to both gas and liquid side pipes. Bundle a heat insulating material and a pipe tightly together so that no gaps may be left between them and wrap them
together with a connecting cable by a dressing tape.
d) Although this air conditioning unit has been tested under the JIS condensation test conditions, the dripping of water may occur when it is operated in a high-humidity atmosphere
(23
℃
or a higher dew point temperature). In such a case, apply an additional heat insulation material of 10 to 20 mm thick to dress an indoor unit body, piping and drain pipes.
When the ambient dew point temperature becomes 28
℃
or higher, or the relative humidity becomes 80% or higher, add further 10 to 20 mm thick heat insulation material.
Electrical installation work must be performed by an electrical installation service provider qualified by a power provider of the country.
Electrical installation work must be executed according to the technical standards and other regulations applicable to electrical installations in the country.
Please install an earth leakage breaker without fail
. The installation of an earth leakage breaker is compulsory in order to prevent electric shocks or fire accidents.
(Since this unit employs inverter control, please
use an impulse withstanding type
to prevent an earth leakage breaker’s false actuation.)
Please note
a) Use only copper wires.
Do not use any supply cord lighter than one specified in parentheses for each type below.
- braided cord (code designation 60245 IEC 51), if allowed in the relevant part 2;
- ordinary tough rubber sheathed cord (code designation 60245 IEC 53);
- flat twin tinsel cord (code designation 60227 IEC 41)
- ordinary polyvinyl chloride sheathed cord (code designation 60227 IEC 53).
Please do not use anything lighter than polychloroprene sheathed flexible cord (cord designation 60245 IEC57) for supply cords of parts of appliances for outdoor use.
b)
Use separate power sources for the indoor and outdoor units
.
c) A grounding wire must be connected before connecting the power cable. Provide a grounding wire longer than the power cable.
d)
The power sources for indoor units in the same system should turn on and off simultaneously
.
e) Ground the unit. Do not connect the grounding wire to a gas pipe, water pipe, lightning rod or telephone grounding wire.
If improperly grounded, an electric shock or malfunction may result.
Never connect the grounding wire to a gas pipe because if gas leaks, it could cause explosion or ignition.
f)
The installation of an impulse withstanding type earth leakage breaker is necessary
. A failure to install an earth leakage breaker can result in an accident such as an electric
shock or a fire. Do not turn on the power until the electrical work is completed. Be sure to turn off the power when servicing.
g) Please do not use a condensive capacitor for power factor improvement under any circumstances. (It does not improve power factor, while it can cause an abnormal overheat accident)
h) For power source cables, use conduits.
i) Please
do not lay electronic control cables (remote control and signaling wires) and other high current cables together outside the unit
. Laying them together can result in
malfunctioning or a failure of the unit due to electric noises.
j) Power cables and signaling wires must always be connected to the power cable terminal block and secured by cable fastening clamps provided in the unit.
k) Fasten cables so that they may not touch the piping, etc.
l)
When cables are connected, please make sure that all electrical components within the electrical component box are free of loose connector coupling or terminal
connection
and then attach the cover securely. (Improper cover attachment can result in malfunctioning or a failure of the unit, if water penetrates into the box.)
CAUTION
Be sure to record the refrigerant volume,
because the information is necessary to
perform the installation’s maintenance
service.
Pay attention to the following points in addition to the above for the R410A and compatible machines.
●
To prevent a different oil from entering, please assign dedicated tools, etc. to each refrigerant type. Under no circumstances must a gauge manifold and a charge hose in
particular be shared with other refrigerant types (R22, R407C, etc.).
●
Refrigerant types are indicated by color at the top of the cylinder 5. (Pink for R410A). Always confirm this.
●
Do not use a charge cylinder under any circumstances. There is a danger that the composition of the refrigerant will change when R410A is transferred to a cylinder.
●
When charging refrigerant, use liquid refrigerant from a cylinder. If refrigerant is charged in a gas form, the composition may change considerably.
Please note
Put down on the refrigerant charge volume recording plate provided on the back of the front panel the amount of refrigerant calculated from the pipe length
.
●
Where water drained from the outdoor unit may freeze, connect the drain pipe using option drain elbow and drain grommet.
It is located in back of this front panel.
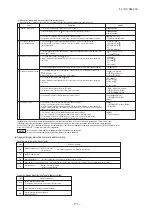
(3) Outdoor unit power source specifications
Model
Power
source
Cable size for power
source (mm
2
)
Wire length
(m)
Rated current
Switch capacity
Size (mm
2
)
Screw type
Moulded-case circuit breaker (A)
Earth wire
Earth leakage breaker
224
280
335
3 phase 4 wire
380-415V
50Hz/380V60Hz
8
14
14
74
86
86
30
50
50
30
50
50
3.5
5.5
5.5
M6
M6
M6
30A 30mA less than 0.1 sec
50A 100mA less than 0.1 sec
50A 100mA less than 0.1 sec
m)Make sure to use circuit breakers (earth leakage breaker and circuit breaker) of proper capacity. Use of breakers of larger capacity could result in trouble on components or fire
accident. The circuit breaker should isolate all poles under over current.
n) Install isolator or disconnect switch on the power supply wiring in accordance with the local codes and regulations. The isolator should be locked in OFF state in accordance with
EN60204-1.
o) After maintenance, all wiring, wiring ties and the like, should be returned to their original state and wiring route, and the necessary clearance from all metal parts should be secured.
CAUTION
If the earth leakage breaker is exclusively for ground fault protection, then you will need to install a circuit breaker for wiring work.
(1) Method of leading out cables
●
As shown on the drawing in Section 4-2 (1), cables can be laid through the front, right, left or bottom casing.
●
In wiring on the installation site, cut off a half-blank (
φ
50 or oblong hole measuring 40x80) covering a penetration of the casing with nippers.
(2) Notabilia in connecting power cables
Power cables must always be connected to the power cable terminal block and clamped outside the electrical component box.
In connecting to the power cable terminal block, use round solderless terminals.
●
Connect the ground wire before you connect the power cable. When you connect a grounding wire to a terminal block, use
a grounding wire longer than the power cable so that it may not be subject to tension.
●
Do not turn on power until installation work is completed. Turn off power to the unit before you service the unit.
●
Ensure that the unit is properly grounded.
●
Always connect power cables to the power terminal block.
●
To connect a cable to the power terminal block, use a round crimp contact terminal.
●
Use specified wires in wiring, and fasten them securely in such a manner that the terminal blocks are not subject
to external force.
●
In fastening a screw of a terminal block, use a correct-size driver.
Fastening a screw of a terminal block with excessive force can break the screw.
●
For the tightening torque of terminals, refer to the list shown at right.
●
When electrical installation work is completed, make sure that all electrical components within the electrical component
box are free of loose connector coupling or terminal connection.
Request
●
When connecting to the power source terminal block,
use the crimp terminals for M6 as shown at right.
●
When connecting to the signal terminal block,
use the crimp terminals for M3.5 as shown at right.
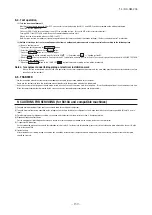
6-2. Method of connecting power cables
6-1. Wiring system diagrams
A: Power cable (Main power cable) [4 cores]
B: Signal wire (Superlink wire) [2 cores]
C: Power cable (indoor unit power cable)
[2 cores]
D: Remote control cord
[2 cores (FD
○△△
KXE6 indoor unit)]
Indoor unit power source: Single-phase 220-240V
(Example of combination)
* Do not connect N-phase wire to the unit when the power source is 3-phase and 4-wire.
Tightening torque (N
・
m)
0.9-1.2
2.5-2.8
M3.5
M6
Outdoor signal line terminal block
Power cable terminal block, Earth wire
18.5 mm or less
7 mm or less
(4) Indoor unit power source specifications : Single phase 220-240V
Please note
a) The method of laying cables has been determined pursuant to the Japanese indoor wiring regulations (JEAC8001). (Please adapt it to the regulations in effect in each country)
b) In the case of distributed, separate power source system, the listed data represent those of an outdoor unit.
c) For details, please refer to the installation manual supplied with the indoor unit.
Please note
a) The method of laying cables has been determined pursuant to the Japanese indoor wiring regulations (JEAC8001). (Please adapt it to the regulations in effect in each country)
b) Wire length in the table above is the value for when the indoor unit is connect to the power cable in series also the wire size and minimum length when the power drop is less
than 2% are shown. If the current exceeds the value in the table above, change the wire size according to the indoor wiring regulations. (Please adapt it to the regulations in
effect in each country)
c) For details, please refer to the installation manual supplied with the indoor unit.
d) Wires connected to indoor units are allowed up to 5.5 mm
2
. For 8 mm
2
or more, use a dedicated pull box and branch to indoor units with 5.5 mm
2
or less.
Combined total
capacity
of indoor units
Less than 7A
Less than 11A
Less than 12A
Less than 16A
Less than 19A
Less than 22A
Less than 28A
Cable size for
power source
(mm
2
)
Wire length
(m)
2
3.5
5.5
5.5
5.5
8
8
21
21
33
24
20
27
21
2cores x 0.75-2.0
※
Moulded-case circuit breaker
(For ground fault, overload and short circuit protection)
Signal wire size
(mm
2
)
20A 100mA less than 0.1 sec
20A 100mA less than 0.1 sec
20A 100mA less than 0.1 sec
30A 100mA less than 0.1 sec
40A 100mA less than 0.1 sec
40A 100mA less than 0.1 sec
50A 100mA less than 0.1 sec
※
Please use a shielded cable.
Round crimp contact terminal
Wire

