-
153
-
'14 • KX-SM-204
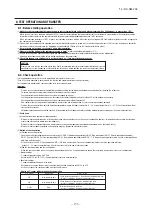
The switch will continuously change the display indication to the next one in every 0.25 seconds when it is pressed for 0.75 seconds or longer.
If the Reset switch is pressed during an operation, the display indication returns to the one that was shown before the last Set switch operation.
Even if an indoor unit No. is changed in this mode, the registered indoor unit No. before address change mode is displayed when [I/U SELECTION
▼
] is shown.
When “SET COMPLETE” is shown, indoor unit No. is registered.
(2) When plural indoor units are connected to the remote control.
When plural indoor units are connected, you can change their addresses without altering their cable connection.
Address change mode
Selecting an indoor unit
to be changed address
Setting a new indoor unit No.
1
2
3
Setting a new outdoor unit No.
Ending the session
4
5
①
Press the AIR CON Unit No. switch for 3 seconds or longer.
②
Each time when you press the switch, the display indication will be switched.
③
Press the SET switch when the display shows “CHANGE ADD.
▼
”
The lowest indoor unit No. among the indoor units connected to the remote control unit will be shown.
④
Pressing the switch will change the display indication cyclically to show the unit No.’s
of the indoor units connected to the remote control and the unit No.’s of the outdoor units
connected with them.
⑤
Then the address No. of the indoor unit to be changed is determined and the screen switches to the
display “ SET I/U ADD.”
⑥
Set a new indoor unit No. with the switch.
A number indicated on the display will increase or decrease by 1 upon pressing the
▲
or
▼
switch
respectively.
⑦
After selecting an address, press the SET switch. Then the address No.of the indoor unit is determined.
⑧
The display will indicate the determined indoor address No. for 2 seconds and then switch to the
“ SET O/U ADD.” screen.
A default value shown on the display is the current address.
⑨
Set a new outdoor unit No. with the switch.
A number indicated on the display will increase or decrease by 1 upon pressing the
▲
or
▼
switch
respectively.
⑩
After selecting an address, press the SET switch.
Then the address of the indoor unit and outdoor unit are determined.
⑪
If you want to continue to change addresses, return to step
④
.
⑫
If you want to end the session (and reflect new address settings)
In Step
⑩
, press the
▼
switch to select “END
▲
.”
If you have finished changing addresses, press the SET switch while “END
▲
” is shown. While new
settings are being transmitted, “SET COMPLETE” will be indicated. Then the remote control display will
change to the normal state.
⑬
If you want to end the session (without reflecting new address settings)
Before you complete the present address setting session, press the “ON/OFF” switch.
Then the display is change to exit from this mode and switch the display to the normal state.
All address settings changed in the session will be aborted and not reflected.
[
I/U
002
]
(2sec)
[
I/U 002
]
(2sec lighting)
⇔[
SET O/U ADD.
]
(1sec)
⇔[
O/U
01
]
(Blink)
[
O/U
00
▲]
⇔[
O/U
01
]
⇔[
O/U
02
]
⇔ ・・・
⇔[
O/U
31
▼]
[
I/U 002
O/U 02
]
(2sec lighting)
→[
SELECT
]
(1sec lighting)
→[
I/U SELECTION
▼]
(lighting)
[
Press the switch
]
(1sec)
→[
SET COMPLETE
]
(2
-
10sec
lighting)
[
END
▲]
→[
SET COMPLETE
]
(2
-
10sec lighting)
→
Normal state
[
ON/OFF
]
→
Forced termination
[
SELECT I/U
]
(1sec)
→[
I/U 001 O/U 01
▲]
(Blink)
[
CHANGE ADD
▼]
⇔[
MASTER I/U
▲]
[
CHANGE ADD
▼]
[
I/U 001 O/U 01
▲」
⇔[
I/U 002
O/U 01
]
⇔[
I/U 003
O/U 01
]
⇔ ・・・
⇔[
I/U 016 O/U 01
▼」
[
SET I/U ADD.
]
(1sec)
→[
I/U 001
]
(Blink)
[
I/U
000
▲]
⇔[
I/U
001
]
⇔[
I/U
002
]
⇔ ・・・
⇔[
I/U
127
▼]
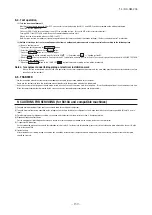
Turn on power to centralized control equipment after the addresses are determined.
Turning on power in wrong order may result in a failure to recognize addresses.
Item
Operation
Display
NOTICE
⑦
Set a new outdoor unit No. with the
switch.
A number indicated on the display will increase or decrease by 1 upon pressing the
▲
or
▼
switch respectively.
[
I/U 000
▲」
⇔
[
I/U 001
]
⇔
[
I/U 002
]
⇔ ・・・
⇔
[
I/U 127
▼
]
[
I/U 002] (2sec Lighting)
→
[ SET O/U ADD.]
(1sec)
→
[
O/U 01
]
(Blink)
[
I/U 001
O/U 01] (1sec)
→
[ SET I/U ADD.]
(1sec)
→
[
I/U
001
]
(Blink)
④
Set a new indoor unit No. with the
switch.
A number indicated on the display will increase or decrease by 1 upon pressing the
▲
or
▼
switch respectively.
Item
Operating procedure
Address change mode
To set a new indoor unit No.
To set a new outdoor unit No.
1
2
3
①
Press the AIR CON No. switch for 3 seconds or longer.
②
Each time when you press the
switch, the display indication will be switched.
[
O/U 00
▲
]
⇔
[
O/U 01
]
⇔
[
O/U 02
]
⇔ ・・・
⇔
[
O/U 31
▼
]
Operation
Display
③
Press the SET switch when the display shows “CHANGE ADD.
▼
”
and then start the address change mode, changing the display indication to the “Indoor Unit No.
Setting” screen from the currently assigned address.
⑤
After selecting an address, press the SET switch, and then the indoor unit address No. is defined.
⑥
After showing the defined indoor address No. for 2 seconds, the display will change to the “Outdoor
Address No. Setting” screen.
The currently assigned address is shown as a default value.
⑧
After selecting an address, press the SET switch, and then the outdoor unit No. and the indoor
unit No. are defined.
[CHANGE ADD.
▼
]
[CHANGE ADD.
▼
]
⇔
[MASTER I/U
▲
]
[
I/U 002 O/U 02] (2sec Lighting)
→
[
SET COMPLETE] (2sec Lighting)
→
Returns to normal condition.
[
I/U 002] (2sec)
Refrigerant pipe
Indoor unit
Indoor unit
Indoor unit
Indoor unit
Indoor unit
Indoor unit
・
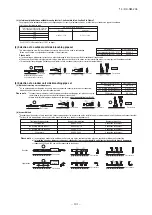
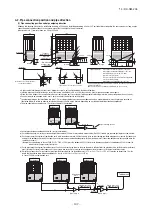
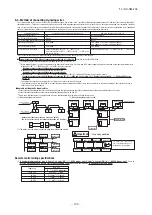
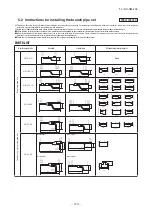
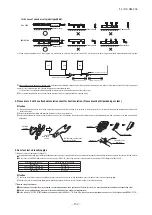
Within a refrigerant system, indoor units are assigned addresses in the order they are recognized by the outdoor unit. Therefore, they are not necessarily assigned addresses in
order from the nearest to the outdoor unit first as depicted in drawings above.
・
Make sure that power has been turned on to all indoor units.
・
When addresses are set, you can have the registered indoor unit address No. and the outdoor unit address No. displayed on the remote control unit by pressing its CHECK button.
・
Automatic address setting can be used for an installation in which prulal indoor units are controlled from one remote control unit.
・
Once they are registered, addresses are stored in microcomputers, even if power is turned off.
・
If you want to change an address after automatic address setting, you can change it from the remote control unit with its “Address Change” function or by means of manual
setting. Set a unique address by avoiding the address assigned to other indoor unit on the network when the address is changed.
・
Do not turn on power to centralized control equipment until automatic address setting is completed.
・
When addresses are set, be sure to perform a test run and ensure that you can operate all indoor and outdoor units normally. Also check the addresses assigned to the indoor units.
[
STEP1
]
[
STEP2
]
[
STEP3
]
[
STEP4
]
SW4-7 0FF
SW4-7 ON
SW4-7 0FF
SW4-7 ON
SW4-7 0FF
SW4-7 ON
SW4-7 0FF
SW4-7 ON
SW4-7 0FF
SW4-7 ON
SW4-7 0FF
SW4-7 ON
Start [01]
Number [03]
Start [04]
Number [03]
Indoor unit
(
00
)
+01
Indoor unit
(
01
)
+01
Indoor unit
(
02
)
+01
Indoor unit
(
00
)
+04
Indoor unit
(
01
)
+04
Indoor unit
(
02
)
+04
Indoor unit
01
Indoor unit
02
Indoor unit
03
Indoor unit
04
Indoor unit
05
Indoor unit
06
SW4-7 0FF
SW4-7 ON
SW4-7 0FF
SW4-7 ON
Indoor unit
01
Indoor unit
02
Indoor unit
03
Indoor unit
04
Indoor unit
05
Indoor unit
06
Outdoor unit
(Master) [01]
Outdoor unit
(Slave) [01 (02)]
Outdoor unit
(Master) [03]
Outdoor unit
(Slave) [(03)(04)]
Outdoor unit
(Master) [01]
Outdoor unit
(Slave) [01 (02)]
Outdoor unit
(Master) [03]
Outdoor unit
(Slave) [(03)(04)]
Outdoor unit
(Master) [01]
Outdoor unit
(Slave) [01 (02)]
Outdoor unit
(Master) [03]
Outdoor unit
(Slave) [(03)(04)]
Outdoor unit
(Master) [01]
Outdoor unit
(Slave) [01 (02)]
Outdoor unit
(Master) [03]
Outdoor unit
(Slave) [(03)(04)]
Network connector
Address change (available only with new SL)
Indoor No.SW
000
000
Outdoor No.SW
49
49
Indoor unit address setting
Outdoor unit address setting
Outdoor No.SW
49
00
-
31
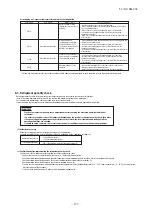
“Address Change” is used,
when you want to change an indoor unit address assigned with the “Automatic Address Setting” function from a remote control unit
.
Accordingly, the conditions that permit an address change from a remote control unit are as follows.
If “CHANGE ADD.
▼
” is selected with some addresses falling outside these conditions, the following indication will appear for 3 seconds on the
remote control ”INVALID OPER” .
Automatic address setting for multiple refrigerant systems installation
Automatic address setting forsingle refrigerant system installation
When the eco touch remote control is connected, refer to the installation setting in the installation manual which is packed along with the remote control.
(1) When single indoor unit is connected to the remote control.
●
7 segment display indication in automatic address setting
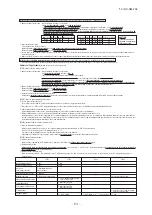
Code
Contents of a display
P30
P31
P32
P34
Code
Contents of a display
The number of the indoor units that can be actually communicated with is less
than the number specified in P33 on the 7 segment display panel.
The number of the indoor units that can be actually communicated with is
more than the number specified in P33 on the 7 segment display panel.
Starting address (P32) + Number of connected indoor units (P33) > 128
While some units are operating in the previous SL mode on the network, the
automatic address setting on multiple refrigerant systems is attempted.
Are signal lines connected properly without any loose connections?
Input the number of connected indoor units again.
Are signal lines connected properly without any loose connections?
Are the network connectors coupled properly?
Input the number of connected indoor units again.
Input the starting address again.
Input the number of connected indoor units again.
Perform manual address setting.
Separate previous SL setting unit from the network
Arrange all units to operate in the new SL.
Code
A01
A02
A03
A04
Contents of a display
Please check
Contents of a display
Cause
Code
E31
E46
Duplicating outdoor unit address.
Incorrect setting.
・
Plural outdoor units are exist as same address in same network.
・
Automatic address setting and manual address setting are mixed.
Items that are to be set by the customer
Communication protocol
0: Previous SL mode
1: New SL mode
Polarity difinition
0: Network polarity not defined.
1: Network polarity defined.
AUX
During automatic address setting.
X: The number of indoor units recognized by the outdoor unit.
AUE
Indoor unit address setting is completed normally.
End
Polarity is defined. (Automatic address)
Completed normally.
Automatic address start
Input starting address
Specify a starting indoor unit address in automatic address setting.
(The communication plotocol is displayed ; display only)
P33
Input number of connected indoor units
Specify the number of indoor units connected in the refrigerant system in automatic address setting.
7 segment display indication in automatic address setting.
Address setting failure indication
Error indication
Name
Purpose (Factory default)
Specification
Operating side connector
External input CnS1
External input CnS2
External input CnG1
External input CnG2
External output CnH
External output CnY
External operation input (Closed at shipping)
Demand input (Short-circuited at shipping)
Cooling / Heating forced input (Open at shipping)
Silencing mode input (Open at shipping)
Operation output
Error output
Non-voltage contactor (DC12V)
Non-voltage contactor (DC12V)
Non-voltage contactor (DC12V)
Non-voltage contactor (DC12V)
DC12V output
DC12V output
J. S. T (NICHIATSU) B02B-XAMK-1 (LF) (SN)
J. S. T (NICHIATSU) B02B-XARK-1 (LF) (SN)
J. S. T (NICHIATSU) B02B-XAEK-1 (LF) (SN)
J. S. T (NICHIATSU) B02B-XASK-1 (LF) (SN)
MOLEX 5286-02A-BU
MOLEX 5266-02A
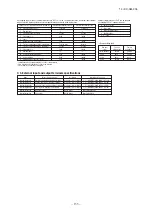
7-3. External input and output terminals specifications
7-2. Change of control
Contents of control for outdoor unit can be changed with dipswitches on PCB and P
○○
on 7-segment indicator.
When changing P
○○
on 7-segment indicator, it can be set by holding down SW8 (7-segment indicator UP: Ones digit), SW9 (7-segment indicator UP: Tens digit) and SW7 (Data write/Enter)
*1 When both of external input function assignment (P07 – 10) and SW are changed, the control is changed.
(Ex: When CnS1 is used for the input of forced cooling/cooling mode, set P07 at 2 and SW3-7 to ON. When CnS2 is used for the input of forced cooling/cooling mode, set P08
at 2 and SW3-7 to ON
*2 Under the energy save control, the capacity control becomes valid even if no signal is input to the external input terminal.
*1 Valid/invalid is changed depending on outdoor temperatures.
*2 It is always Valid, regardless of outdoor temperature.
*3 According to the demand setting table.
Method to change control
Contents of control change
SW setting on PCB
SW3-7 to ON*1
SW5-1 to ON + SW5-2 to ON
SW5-1 to ON + SW5-2 to OFF
Close the fluid operation valve on outdoor unit and set
as follows:
(1) SW5-2 of PCB to ON
(2) SW5-3 of PCB to ON
(3) SW5-1 of PCB to ON
SW5-5
J13: Shorted (Factory default), J13: Open
J15: Shorted (Factory default), J15: Open
—
—
—
—
—
—
—
—
—
—
—
—
—
P
○○
setting on 7-segmennt
Set external input function
allocation to “2”. *1
—
—
—
—
—
—
P01
P02
P03
P04
P05
P06
P07
P08
P09
P10
P11~
P14
P15
Forced cooling/heating mode
(It can be fixed at cooling with external input terminals open, or at heating with them closed.)
Cooling test run
Heating test run
Pump-down operation
Communication method select ON: Previous SL communication, OFF: New SL communication (SL
II
)
External input switing (CnS1, CnS2 only) shorted: Level input, open: Pulse input
Defrost start temperature shorted : normal, open: Cold weather district.
Operation priority select
0: First push preferred (Factory default)
1: Last push preferred
Outdoor fan snow protection control 0: Control invalid (Factory default)
1: Control valid
Outdoor fan snow protection ON time setting 30 sec (Factory default) 10, 30 to 600 sec
Demand ratio change value
OFF: Invalid (Factory default) 000, 040, 060, 080 [%]
Silent mode setting
0: at shipping-3: Larger values for larger effect
Allocation of external output (CnZ1)
Allocation of external input (CnS1)
Allocation of external input (CnS2)
Allocation of external input (CnG1)
Allocation of external input (CnG2)
Spare
2-step demand
OFF: Invalid (Factory default) 000, 040, 060, 080 [%]
3-step demand
OFF: Invalid (Factory default) 000, 040, 060, 080 [%]
“0” : External operation input
“1” : Demand input
“2” : Cooling / heating force input
“3” : Silent mode 1 *1
“4” : Spare
“5” : Outdoor fan snow control input
“6” : Test run external input 1 (SW5-1 equivalent)
“7” : Test run external input (SW5-2 equivalent)
“8” : Silent mode 2 *2
“9” : Demand input
“10” : AF periodic inspection display
“11” : AF error display
“12” : Building multi energy save control
Permitted
*3
Heating
Valid
Valid
Test run start
Cooling
Valid
*3
Valid
Valid
Valid
Prohibited
*3
Cooling
Invalid
Invalid
Normal
Heating
Invalid
*3
Invalid
Invalid
Invalid
“0” : Operation output
“1” : Error output
“2” : Compressor ON output
“3” : Fan ON output
“4 - 9” : Spare
By changing the allocation of external input function (P07-10) on the 7-segment, functions of external input terminal
may be selected. Inputting signals to external input terminals enable the following functions.
External output function of CnZ1 can be changed
by changing P06 on 7-segment indicator.
Demand
control
Function
assignment 1
Function
assignment 9
None (Normal)
1-step
2-step
3-step
Shorted
Open
Open
Shorted
Shorted
Shorted
Open
Open
*3 Demand setting table
Setting value for external input function assignment
External input terminal shorted
External input terminal open


