-
219
-
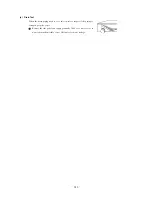
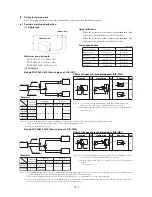
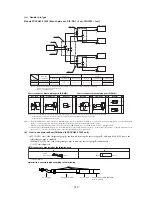
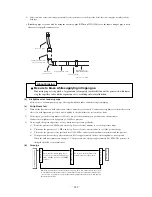
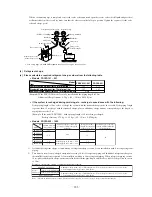
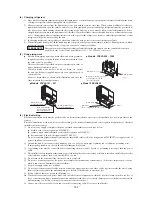
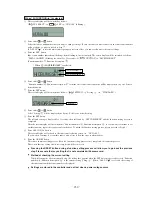
Do not hold the valve cap area with a spanner.
Please use a torque wrench. If a torque wrench is not
available, fasten the flare nut manually first and then
tighten it further, using the left table as a guide.
(c) Points for attention in installing refrigerant piping
1) Use pipes made of the following material
Material: Phosphorus deoxidized copper seamless pipes (C1220T, JIS
H3300)
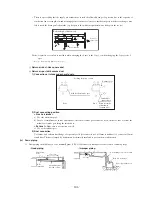
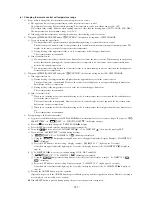
2) Please dress the refrigerant piping (both gas and liquid pipes) with a heat
insulating material for prevention of dew condensation. Improper heat
insulation incapable of preventing dew condensation can cause the leaking
or dripping of water and a resultant soaking of household effects.
3) Use only a good heat insulating material (120°C or higher) for heat insula-
tion. A poor heat insulating material offers only poor heat insulation and
can cause cable deterioration.
a) The gas pipes can cause dew condensation during a cooling opera-
tion, which may become drain water causing a water-leak accident,
or a risk of burns during a heating operation, if touched accidentally,
with its surface reaching a high temperature because of discharged
gas fl owing inside. So, do not fail to dress it with a heat insulating
material to prevent such mishap.
b) Dress the fl are joints of the indoor units with a heat insulating material
(pipe covers) (for both gas and liquid pipes).
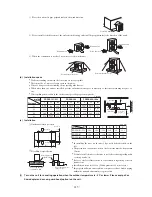
c) Dress both gas and liquid pipes with a heat insulating material. In
doing so, leave no gaps between the pipe and the heat insulating
material and wrap them, together with the connecting cable, with a
dressing tape.
d) If the unit is used in a place where dew point in the ambient atmo-
sphere is 28ºC or higher, and the relative humidity is 80% or higher,
dress 20 mm or more of insulation.
4) When you need to bend a pipe, bend it to the largest possible radius
(R100-R150) permitted. Do not bend a pipe repeatedly in an effort to
shape it appropriately.
5) In laying pipes, take care to avoid debris, chips or water
from entering the piping system.
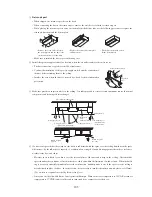
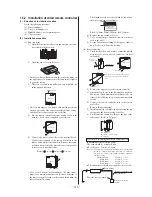
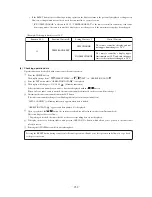
6) A unit and a refrigerant pipe are to be fl are connected.
Flare a pipe after you have attached a fl are nut to the pipe.
The dimensions of fl aring for R410A are different from
those for the conventional R407C refrigerant. Although
we recommend the use of fl are tools developed specifi cally
for R410A, conventional fl are tools can also be used, if the
measurement of protrusion B is adjusted with a protrusion
control copper pipe gauge.
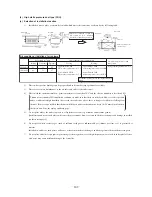
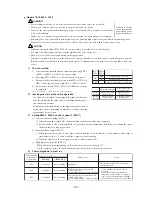
7) Tighten
a
fl are joint securely with double spanners. Observe
the following tightening torque values for fl are nuts:
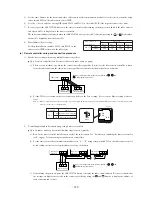
8) A branching pipe set (option part supplied separately) and
refrigerant piping should be connected by brazing.
9) In brazing pipes, keep nitrogen gas fl owing inside the pipes
so that an oxide fi lm may not form on the inner surfaces of
the pipes.
Exterior tape
Gas piping
Liquid piping
Wires for connecting
indoor and outdoor
units
Insulation
A
B
9.1
13.2
16.6
19.7
ø6.35
ø9.52
ø12.7
ø15.88
0
-0.4
A
Copper
pipe outer
diameter
Flared pipe end: A (mm)
0~0.5
φ
6.35
φ
9.52
φ
12.7
φ
15.88
Copper
pipe outer
diameter
Copper pipe protrusion for flaring: B (mm)
0.7~1.3
With an R410A tool
In the case of a rigid (clutch) type
With a conventional tool
Operation valve
size (mm)
φ
6.35 (1/4")
φ
9.52 (3/8")
φ
12.7 (1/2")
φ
15.88 (5/8")
Tightening
torque (N·m)
14~18
34~42
49~61
68~82
Tightening
angle (˚ )
45~60
30~45
30~45
15~20
Recommended length
of a tool handle (mm)
150
200
250
300
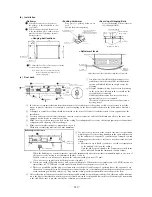
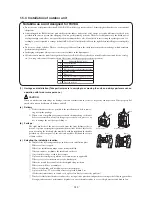
10) Tighten a fl are joint securely with a double spanner.
a) Do not apply force beyond proper fastening torque in tightening the fl are nut.
b) Fix both liquid and gas service valves at the valve main bodies as illustrated on the lower, and then fasten them,
applying appropriate fastening torque.

