'19 • PAC-DB-333
Outdoor unit
<Table
of
pipe
size
restrictions>
●
Please
consult
with
our
distributor
in
the
area,
if
you
need
to
recover
refrigerant
and
charge
it
again.
●
Any
combinations
of
pipe
sizes
not
listed
in
the
table
are
not
usable.
Wires for connecting indoor and outdoor units
Exterior tape
Gas piping
Insulation
Liquid piping
Band (accesso
ry)
Pipe cover (accesso
ry)
Additional
charge
volume
(kg)
=
{Main
pipe
length
(m)
–
Length
covered
without
additional
charge
shown
in
the
table
(m)}
×
Additional
charge
volume
per
meter
of
pipe
shown
in
the
table
(kg/m)
Formula to calculate the volume of additional refrigerant required
4. ELECTRICAL WIRING WORK
For details of electrical cabling, refer to the indoor unit installation manual.
Formula
to
calculate
additional
charge
volume
※
If
you
obtain
a
negative
figure
as
a
result
of
calculation,
no
additional
refrigerant
needs
to
be
charged.
Example)
When FDT is
installed
in
a
10m
long
existing
pipe
system
(liquid ø9.52,
gas ø12.7),
the
quantity
of
refrigerant
to
charge
additionally
should
be
(10m-6m)
x
0.06kg/m
=
0.24
kg.
7)
Additional
refrigerant
charge
Additional charge volume (kg) = { Main length (m) – Facto
ry charged volume} x 0.020 (kg/m)
*When
an
additional
charge
volume
calculation
result
is
negative,
it
is
not
necessa
ry
to
charge
refrigerant
additionall
y.
8) Heating and condensation prevention
(1) Dress refrigerant pipes (both gas and liquid pipes) for heat insulation and prevention of dew condensation.
·
Improper
heat
insulation/anti-dew
dressing
can
result
in
a
water
leak
or
dripping
causing
damage
to
household
effects,
etc.
(2) Use a heat insulating material that can withstand 120
℃
or a higher temperature. Poor heat insulating capacity can cause heat insulation problems or cable
deterioration. ·
All
gas
pipes
must
be
securely
heat
insulated
in
order
to
prevent
damage
from
dripping
water
that
comes
from
the
condensation
formed
on
them
during
a
cooling
operation
or
personal
inju
ry
from
burns
because
their
su
rface
can
reach
quite
a
high
temperature
due
to
discharged
gas
flowing
inside
during
a
heating
operation.
·
Wrap
indoor
units’
flare
joints
with
heat
insulating
parts
(pipe
cover)
for
heat
insulation
(both
gas
and
liquid
pipes).
·
Give
heat
insulation
to
both
gas
and
liquid
side
pipes.
Bundle
a
heat
insulating
material
and
a
pipe
tightly
together
so
that
no
gaps
may
be
left
between
them
and
wrap
them
together
with
a
connecting
cable
by
a
dressing
tape.
·
Both
gas
and
liquid
pipes
need
to
be
dressed
with
20
mm
or
thicker
heat
insulation
materials
above
the
ceiling
where
relative
humidity
exceeds
70%.
CAUTION
Power cable, indoo
r-outdoor connecting wires
Always
use
an
earth
leakage
ci
rcuit
breaker
designed
for
inverter
ci
rcuits
to
prevent a faulty operation.
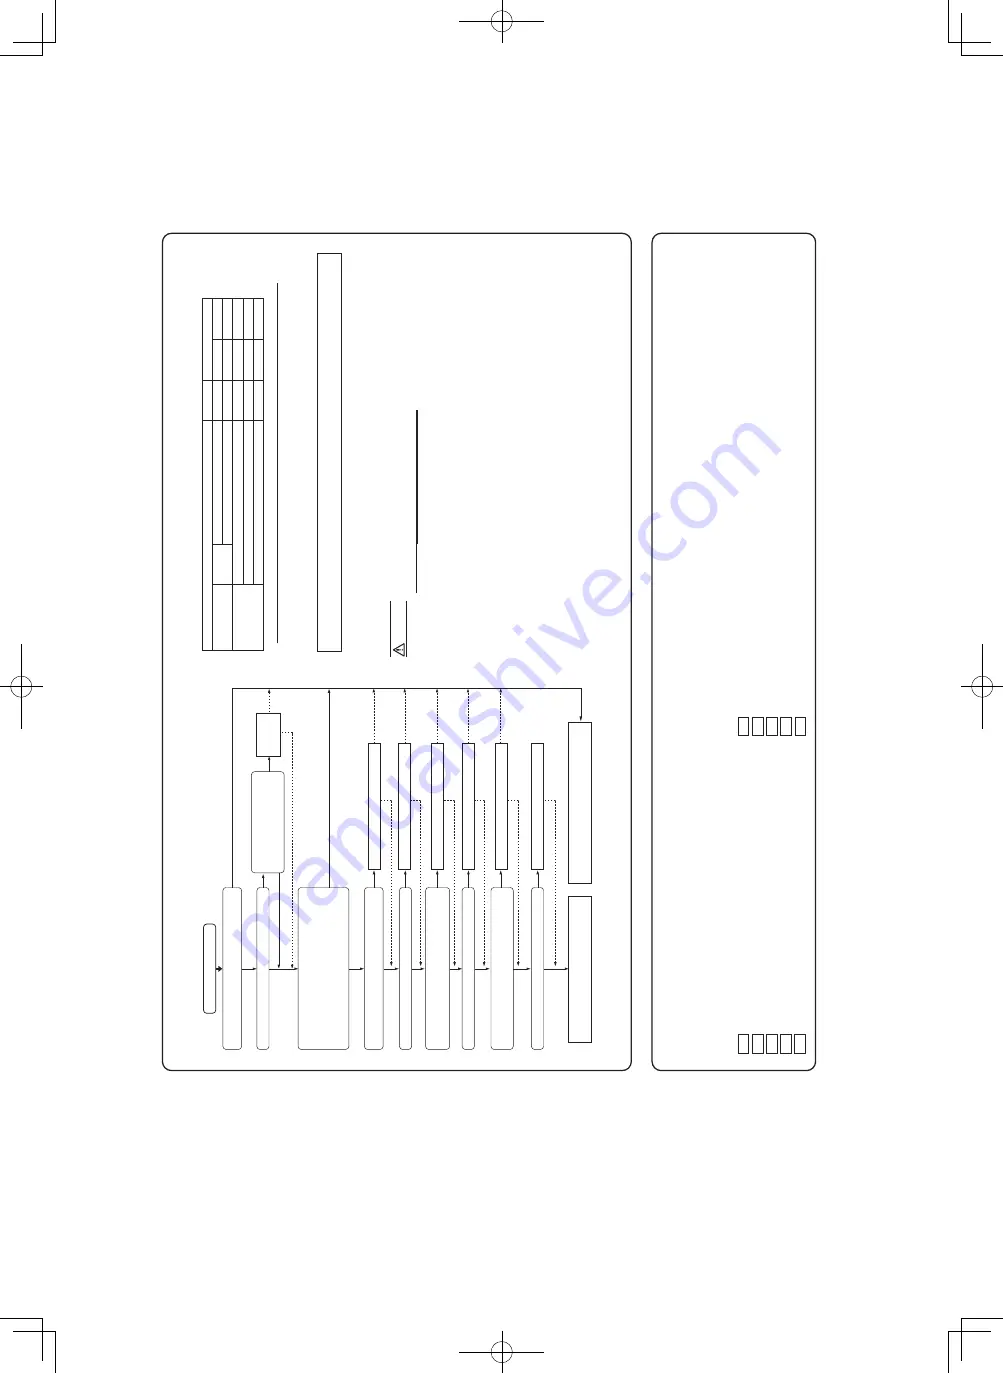
NO
Are the existing units our products?
NO
NO
NO
Is the existing pipe system to reuse free of corrosion, flaws or dents?
Repair the damaged parts.
Remove those branches.
Repair the damaged parts.
Check the pipe system for air tightness on the site.
Repair the damaged parts.
NO
NO
NO
NO
No loose pipe supports
NO
YES
ST
AR
T
The existing pipe system is reusable.
The existing pipe system is not reusable. Install a new pipe system.
YES
YES
YES
YES
YES
Are an outdoor unit and an indoor unit connected to the existing pipe system to reuse?
Is the unit to install in the existing pipe system a twin-triple-double-twin model?
Is the existing pipe system to reuse free of gas leaks? (Check whether refrigerant charge was required frequently for the system before)
Are heat insulation materials of the existing pipe system to reuse free of peel-offs or deterioration? (Heat insulation is necessa
ry for both gas and liquid pipes)
Change the branching pipe to a specified type.
Does the existing pipe system to reuse satisfy all of the following? (1) The pipe length is 30m or less. (2) The pipe size conforms to the table of pipe size restrictions. (3) The elevation difference between the indoor and outdoor units
conforms to the following restrictions.
Where the outdoor unit is above: 15m or less Where the outdoor unit is below: 15m or less
Which of the following refrigeration oils does the existing unit use? Suniso, MS, Barrel Freeze, HAB, Freol, ether oil, ester oil
Please make an inqui
ry for
reusabilit
y.
※
Check with the flow chart developed for a case where an existing pipe system is reused for a twin-triple-double-twin model published as a technical data sheet.
Change
Change is impossible.
Can Use
Can‘t Use
Repair
is impossible.
Air tightness is impossible.
Remove is impossible
Repair
is impossible.
Repair
Repair
Repair
Some loose pipe supports
Air tightness is OK
Remove
5. UTILIZ
ATION OF EXISTING PIPING
Check whether an existing pipe system is reusable or not by using the following flow chart.
W
ARNING
<Where
the
existing
unit
can
be
run
for
a
cooling
operation.>
Car
ry
out
the
following
steps
with
the
excising
unit
(in
the
order
of
(1),
(2),
(3)
and
(4))
(1)
Run
the
unit
for
30
minutes
for
a
cooling
operation.
(2)
Stop
the
indoor
fan
and
run
the
unit
for
3
minutes
for
a
cooling
operation
(returning
liquid)
(3)
Close
the
liquid
side
operation
valve
of
the
outdoor
unit
and
pump
down
(refrigerant
recove
ry)
(4)
Blow
with
nitrogen
gas.
※
If
discolored
refrigeration
oil
or
any
foreign
matters
is
discharged
by
the
blo
w
,
wash
the
pipe
system
or
install
a
new
pipe
system.
●
For
the
flare
nut,
do
not
use
the
old
one,
but
use
the
one
supplied
with
the
outdoor
unit.
Process
a
flare
to
the
dimensions
specified
for
R32.
<Where
the
existing
unit
cannot
be
run
for
a
cooling
operation.>
W
ash
the
pipe
system
or
install
a
new
pipe
system.
●
If
you
choose
to
wash
the
pipe
system,
please
contact
our
distributor
in
the
area.
●
In cabling, fasten cables securely with cable clamps so that no external fo
rce may work on terminal connections.
●
Grounding terminals are provided in the control box.
●
Always pe
rform grounding system installation work with the power cord unplugged.
●
Connect a pair bearing a common terminal number with an indoo
r-outdoor connecting wire.
Aren’t there any loose pipe supports?
Are there any branch pipes with no indoor unit connected?
Electrical installation work must be pe
rformed by an electrical installation se
rvice provider qualified by a power provider of the count
ry
.
Elec
trical
in
st
allat
io
n
w
or
k
m
us
t b
e ex
ec
ute
d
ac
co
rd
in
g
to
th
e
te
ch
nic
al
s
ta
nd
ar
ds
a
nd
o
th
er
re
gu
la
tio
ns
a
pp
lic
ab
le
to
elec
tri
ca
l i
ns
talla
tio
ns
in
th
e
co
un
try
.
●
Do not use any supply cord lighter than one specified in parentheses for each type belo
w
.
·
braided cord (code designation 60245 IEC 51),
·
ordina
ry tough rubber sheathed cord (code designation 60245 IEC 53)
·
flat twin tinsel cord (code designation 60227 IEC 41); Use polychloroprene sheathed flexible cord (code designation 60245 IEC57) for supply cords of parts of appliances for outdoor u
se.
●
Ground the unit. Do not connect the grounding wire to a gas pipe, water pipe, lightning rod or telephone grounding wire
.
If imprope
ry grounded, an electric shock or malfunction may result.
●
A grounding wire must be connected before connecting the power cable. Provide a grounding wire longer than the power cable.
●
The
installation
of
an
impulse
withstanding
type
earth
leakage
breaker
is
necessa
ry
. A
failure
to
install
an
earth
leakage
breaker
can
result
in
an
acccident such as an electric shock or a fire.
●
Do not turn on the power until the electrical work is completeted .
●
Do
not
use
a
condensive
capacitor
for
power
factor
improvement
under
any
ci
rcumstances.
(It
dose
not
improve
power
facto
r,
while
it
can
cause
an abnormal overheat accident)
●
For power supply cables, use conduits.
●
Do
not
lay
electronic
control
cables
(remote
control
and
signaling
wires)
and
other
cables
together
outside
the
unit.
Laying
them
together
can
result
in the malfunctioning or a failure of the unit due to electric noises.
●
Fasten cables so that may not touch the piping, etc.
●
When
cables
are
connected,
make
sure
that
all
electrical
components
within
the
electrical
component
box
are
free
of
loose
connector
coupling
or
terminal
connection
and
then
attach
the
cover
securel
y.
(Improper
cover
attachment
can
result
in
malfunctioning
or
a
failure
of
the
unit,
if
water
penetrates into the box.)
●
Always use a three-core cable for an indoo
r-outdoor connecting cable. Never use a shield cable.
L
Outdoor unit
Switchgear or Ci
rcuit breaker
N
1
2/N
3
1
2/N
X
Y
X
Y
3
Indoor unit
Remote control
Earth leakage breaker
(Harmonic resistant type)
Inte
rconnecting and
grounding wires
(minimum)
2.5
mm
2
30A
20A
1.5mm×4
20A,30mA, 0.1sec or less
Switchgear or
Ci
rcuit Breaker
Switch breaker
Over current protector
rated capacity
Earth leakage breaker
●
The
specifications
shown
in
the
above
table
are
for
units
without
heaters.
For
units
with
heaters,
refer
to
the installation instructions or the construction instructions of the indoor unit.
●
Switchgear
or
Ci
rcuit
breaker
capacity
which
is
calculated
from
MAX.
over
current
should
be
chosen
along
the
regulations in each count
ry
.
●
Th
e
ca
bl
e
sp
ec
ifi
ca
tio
ns
a
re
b
as
ed
o
n
th
e
as
su
m
pt
io
n
th
at
a
m
et
al
o
r pla
st
ic
c
on
du
it
is
u
se
d
w
ith
n
o
m
or
e
th
an
th
re
e
cabl
es
c
on
ta
in
ed
in
a
c
on
du
it
an
d
a
vo
lta
ge
d
ro
p
is
2
%
.
Fo
r
an
in
st
al
la
tio
n
fall
in
g
ou
tsi
de
o
f t
he
se
co
nd
iti
on
s,
plea
se
fo
llo
w
th
e
in
te
rn
al
c
abl
in
g
re
gu
la
tio
ns
. A
da
pt
it
to
th
e
re
gu
la
tio
n
in
e
ffec
t i
n
ea
ch
c
ou
nt
ry
.
Power souce
(minimum)
Phase
Single-phase
Take
care
so
that
installed
pipes
may
not
touch
components
within
a
unit.
If
touching
with
an
internal
component
,
it
will
generate
abnormal
sounds
and/or
vibrations.
4) On-site piping work
IMPO
RT
ANT
How to remove the side cover
●
Car
ry
out
the
on
site
piping
work
with
the
service
valve
fully
closed.
●
Give
sufficient
protection
to
a
pipe
end
(compressed
and
blazed,
or
with
an
adhesive
tape)
so
that
water
or
foreign
matters
may
not
enter
the
piping.
●
Bend
a
pipe
to
a
radius
as
large
as
practical.(R100-R150)
Do
not
bend
a
pipe
repeatedly
to
correct
its
form.
●
●
Flare
connection
is
used
between
the
unit
and
refrigerant
pipe.
Flare
a
pipe
after
engaging
a
The pipe should be anchored every 1.5m or less to isolate the vibration.
flare
nu
t ont
o
it.
Flare
d
im
en
si
on
s
fo
r R
32 a
re
d
iff
er
en
t f
rom
th
ose
fo
r c
on
ve
nt
io
na
l R2
2
an
d
R407C
.
Although
we
recommend
the
use
of
flaring
tools
designed
specifically
for
R32,
conventional
flaring
tools
can
also
be
used
by
adjusting
the
measurement
of
protrusion
B
with
a
protrusion
control
gauge.
Please
remove
the
screw
of
a
side
cover
and
remove
to
the
front.
A
B
Flared
pipe
end
:
A
(mm)
ø6.35
ø15.88
Copper
pipe
outer
diameter
0
ー
0
.
4
A
9
.
1
19.7
Copper
pipe
protrusion
for
flaring
:
B
(mm)
ø6.35
ø15.88
Copper
pipe
outer
diameter
In
the
case
of
a
rigid
(clutch)
type
With
an
R32
tool
With
a
conventional
tool
0-
0.5
1.0-
1.5
CAUTION
Do
not
apply
force
beyond
proper
fastening
torque
in
tightening
the
flare
nut.
Fix both liquid and gas operation valves at the valve main bodies as illustrated on the right, and then fasten them, applying appropriate fastening torque.
T
ø6.35
ø9.52
14-
18
34-
42
ø12.7
ø15.88
49-
61
68-
82
Service valve size (mm)
5) Air tightness test
①
Although
outdoor
and
indoor
units
themselves
have
been
tested
for
air
tightness
at
the
facto
ry
,
check
the
connecting
pipes
after
the
installation
work
for
air
tightness
from
the
service valve
’s check joint equipped on the outdoor unit side. While conducting a test, keep the service valve shut all the time.
a)
Raise
the
pressure
to
0.5
MPa,
and
then
stop.
Leave
it
for
five
minutes
to
see
if
the
pressure
drops.
b)
Then
raise
the
pressure
to
1.5
MPa,
and
stop.
Leave
it
for
five
more
minutes
to
see
if
the
pressure
drops.
c)
Then
raise
the
pressure
to
the
specified
level
(4.15
MPa),
and
record
the
ambient
temperature
and
the
pressure.
d)
If
no
pressure
drop
is
obse
rved
with
an
installation
pressurized
to
the
specified
level
and
left
for
about
one
da
y,
it
is
acceptable.
When
the
ambient
T
emperature
fall
1
℃
, the
pressure
also
fall
approximately
0.01
MPa.
The
pressure,
if
changed,
should
be
compensated
fo
r.
e)
If
a
pressure
drop
is
obse
rved
in
checking
e)
and
a)
–
d),
a
leak
exists
somewhere.
Find
a
leak
by
applying
bubble
test
liquid
to
welded
parts
and
flare
joints
and
repair
it.
After
repai
r,
conduct
an
ai
r-tightness
test
again.
②
In
conducting
an
ai
r-tightness
test,
use
nitrogen
gas
and
pressurize
the
system
with
nitrogen
gas
from
the
gas
side.
Do
not
use
a
medium
other
than
nitrogen
gas
under
any
ci
rcumstances.
Gas side service valve
Check joint
Pressurize
Close
Outdoor unit
Indoor unit
<
W
ork flow
>
6) Evacuation
Airtighteness test completed
Fill refrigerant
Vacuum gauge check
Vacuuming
completed
Vacuuming begins
Run
the
vacuum
pump
for
at
least
one
hour
after
the
vacuum
gauge
shows
-101kPa
or
lowe
r.
(-755mmHg
or
lower)
Confirm
that
the
vacuum
gauge
indicator
does
not
rise
even
if
the system is left for one hour or more.
When
the
system
has
remaining
moisture
inside
or
a
leaky
point,
the
vacuum
gauge
indicator
will
rise.
Check
the
system
for
a
leaky
point
and
then
draw
air
to
create
a
vacuum
again.
INS
TALL
ATION
TEST
CHECK
POINTS
After
installation
Check
the
following
points
again
after
completion
of
the
installation,
and
before
turning
on
the
powe
r.
Conduct
a
test
run
again
and
ensure
that
the
unit
operates
properl
y.
Explain
to
the
customer
how
to
use
the
unit
and
how
to
take
care
of
the
unit
following
the
instruction
manual.
(1)
Calculate
a
required
refrigerant
charge
volume
from
the
following
table.
Power
cables
and
connecting
wires
are
securely
fixed
to
the
terminal
block.
The
power
supply
voltage
is
correct
as
the
rating.
The
drain
hose
is
fixed
securel
y.
Operation
valve
is
fully
open.
No
gas
leaks
from
the
joints
of
the
operation
valve and joint.
The
pipe
joints
for
indoor
and
outdoor
pipes
have
been
insulated.
The
reverse
flow
check
cap
is
attached.
The
cover
of
the
pipe
cover
(A)
faces
downward
to
prevent
rain
from
entering.
Gaps
are
properly
sealed
between
the
pipe
covers
(A)
(B)
and
the
wall
su
rface
/
pipes.
The screw of the side cover is tightened securely.
●
This
unit
contains
facto
ry
charged
refrigerant
covering
15m
of
refrigerant
piping
and
additional
refrigerant
charge
on
the
installation
site
is
not
required
for an
installation
with
up
to
15m
refrigerant
piping.
W
he
n
re
fri
ge
ra
nt
p
ip
in
g
exc
ee
ds
1
5m
, a
dd
iti
on
al
ly
c
ha
rg
e
an
a
m
ou
nt
ca
lc
ul
at
ed
f
ro
m
t
he
p
ip
e
le
ng
th
a
nd
t
he
a
bo
ve
t
ab
le
fo
r
th
e
po
rti
on
in
exce
ss
o
f
15
m.
●
If
an
ex
is
tin
g
pi
pe
sy
st
em
is
u
se
d,
a
r
eq
ui
re
d
re
fr
ig
er
an
t
ch
ar
ge
vo
lu
m
e
wi
ll
va
ry
d
ep
en
di
ng
o
n
th
e
liq
ui
d
pi
pe
si
ze
.
Fo
r
fu
rt
he
r
in
fo
rm
at
io
n,
p
lea
se
s
ee “5.
UTILIZ
ATION
OF
EXISTING
PIPING.”
NOTE
Put down the refrigerant volume calculated from the pipe length onto the caution label attached on the back side of the service panel.
(2)
Charging refrigerant
●
Since R32 refrigerant must be charged in the liquid phase, you should charge it, keeping the container cylinder upside down or using a refrigerant cylinder equipped with a siphon tube.
●
When you find it difficult to charge a required amount, fully open the outdoor unit valves on both liquid and gas sides and charge refrigerant from the gas (suction) side service port, while running the unit in the cooling mode. In doing so, care must be taken so that refrigerant may be discharged from the cylinder in the liquid phase all the time. When the cylinder valve is throttled down or a dedicated conversion tool to change liquid-phase refrigerant into mist is used to protect the compressor, however, adjust charge conditions so that refrigerant will gasify upon entering the unit.
●
In charging refrigerant, always charge a calculated volume by using a scale to measure the charge volume.
●
When refrigerant is charged with the unit being run, complete a charge operation within 30 minutes. Running the unit with an insufficient quantity of refrigerant for a long time can cause a compressor failure.
Pay
attention
to
the
following
points
in
addition
to
the
above
for
the
R32
and
compatible machines.
○
To prevent a different oil from entering, assign dedicated tools, etc. to each refrigerant
type.
Under
no
ci
rcumstances
must
a
gauge
manifold
and
a
charge
hose
in
particular be
shared
with
other
refrigerant
types
(R22,
R407C,
etc.).
○
Use a counterflow prevention adapter to prevent vacuum pump oil from entering the
refrigerant
system.
(three-way valve)
Charge hose (Designed specifically for R32)
Compound pressure gauge
Pressure gauge
Gauge Manifold (Designed specifically for R32)
Handle Hi.
Vacuum pump
Vacuum pump adapter (Anti-reverse flow type) (Designed specifically for R32)
Charge hose (Designed specifically for R32)
Check joint
-101kPa
(-755mmHg)
H
an
dl
e
Lo
Service
Valve
Service
Valve
(two-way valve)
Service
Valve
Cap
Service
Valve
Cap
tightening torque (N·m)
Operation valve cap
tightening torque (N·m)
Check joint blind nut
ø6.35 (1/4")
ø15.88 (5/8")
20-
30
10-
12
30-
40
Service valve size
(mm)
Securely tighten the service valve cap and the check joint blind nut after adjustment.
PSC012D137
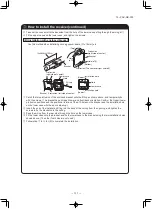
Side cover
Flare nut
The screw of the side cover is tightened securely.
◎:
Standard
pipe
size
○:
Usable
△:
Restricted
to
shorter
pipe
length
limits
Cable
clamp
Power supply terminal block
○
It holds cables in place and protect the terminal connection from external fo
rce.
○
This clamp is for the cable in the outside diameter 9~15mm. Please adjust it when not suitable.
○
It holds cables in place and protect the terminal connection from external fo
rce.
○
Please be sure to car
ry out D-type (type III)
grounding work.
Grounding terminal
Cable clamp
●
When
condensed
water
needs
to
be
led
to
a
drain,
etc.,
install
the
unit
on
a flat base or concrete blocks.
(prepared on site)
Th
en
,
plea
se
sec
ur
e
spa
ce
f
or
t
he
drai
n
el
bo
w
a
nd
th
e
dr
ai
n
ho
se
.
●
Execute drain piping by using a drain elbow and drain grommets supplied separately as accessories, where water drained from the outdoor unit is a problem.
●
W
ater may drip where there is a larger amount of drain
wate
r. Seal around the drain elbow and drain grommets
with putty or adequate caulking material.
●
Condensed water may flow out from vicinity of service valve or connected pipes.
Where
you
are
likely
to
have
several
days
of
sub-zero
temperatures
in
a
ro
w
, do
not
use
a
drain
elbow
and
dr
ai
n
gr
ommet
s.
(T
he
re
i
s
a
ris
k
of
d
ra
in
w
at
er
freezing inside and blocking the drain.)
●
●
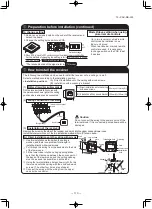
Regarding the change in the size of liquid pipe; Use the reducer at indoor unit side. Reducer set is available in the outdoor unit as accessory.
Indoor unit
Gas side joint (ø15.88)
Reducer set (
,
) is included in the outdoor unit as accessory
Reducer [L=115mm](ø9.52-ø6.35)
Liquid side joint (ø9.52)
[Usage of reducer set]
3. DRAIN PIPING WORK
FDT, FDE
FDU, FDUM, SRK
1.7
0.020
15
Indoor unit
Additional charge volume (kg) per meter of
refrigerant piping (liquid pipe ø6.35
)
Refrigerant volume charged for
shipment at the factory (kg)
Installation
’s pipe length (m) covered
without additional refrigerant charge
D
o
no
t
pu
t
a
gr
om
m
et
on this hole. This
is
a
supplementa
ry
dr
ai
n
ho
le
t
o
disc
ha
rg
e
drain
wate
r,
when
a
large
quantity of it is gathered.
CAUTION
Clearance
Drain elbow
Grommet
Grommet
Drain hose
(
To be procured on the installer's part
)
Pipe
size
Indoor unit
Liquid pipe
ø6.35
Gas pipe
ø15.88
Usability
◎
Maximum one-way pipe length
Length covered without additional charge
30
15
Additional charge volume per meter of pipe
0.025kg/m
ø9.52
ø12.7
△
12
6
ø9.52
ø15.88
△
12
6
0.06kg/m
FDT, FDE
FDU, FDUM, SRK
ø6.35 pipe
ø15.88 pipe
CAUTION
In
case
of
faulty
wiring
connection,
the
indoor
unit
stops,
and
then
the
run
lamp
turns
on
and
the
timer
lamp
blinks.
Use
cables
for
inte
rconnection
wiring
to
avoid
loosening
of
the
wires.
CENELEC
code
for
cables
Required
field
cables.
H05RNR4G1.5
(Example)
or
245IEC57
H 05 R N R 4or5 G
1.5
Harmonized
cable
type
300/500
volts
Natural-and/or
synth.
rubber
wire
insulation
Polychloroprene
rubber
conductors
insulation
Stranded
core
Number
of
conductors
One
conductor
of
the
cable
is
the
earth
conductor
(yellow/green) Section
of
copper
wire
(mm
2
)
Specific
ation
250V 20A
Part No.
SSA564A136A
Main fuse specific
ation
●
For an installation measuring 15m or shorter in pipe length, please charge the refrigerant volume charged for shipment at the facto
ry
, when you recharge refrigerant after se
rvicing etc.
Do
n
ot
h
ol
d
th
e
val
ve
c
ap
a
re
a
w
ith
a
s
pa
nn
er
.
Use a torque wrench.
Outdoor unit
<Table
of
pipe
size
restrictions>
●
Please
consult
with
our
distributor
in
the
area,
if
you
need
to
recover
refrigerant
and
charge
it
again.
●
Any
combinations
of
pipe
sizes
not
listed
in
the
table
are
not
usable.
Wires for connecting indoor and outdoor units
Exterior tape
Gas piping
Insulation
Liquid piping
Band (accesso
ry)
Pipe cover (accesso
ry)
Additional
charge
volume
(kg)
=
{Main
pipe
length
(m)
–
Length
covered
without
additional
charge
shown
in
the
table
(m)}
×
Additional
charge
volume
per
meter
of
pipe
shown
in
the
table
(kg/m)
Formula to calculate the volume of additional refrigerant required
4. ELECTRICAL WIRING WORK
For details of electrical cabling, refer to the indoor unit installation manual.
Formula
to
calculate
additional
charge
volume
※
If
you
obtain
a
negative
figure
as
a
result
of
calculation,
no
additional
refrigerant
needs
to
be
charged.
Example)
When FDT is
installed
in
a
10m
long
existing
pipe
system
(liquid ø9.52,
gas ø12.7),
the
quantity
of
refrigerant
to
charge
additionally
should
be
(10m-6m)
x
0.06kg/m
=
0.24
kg.
7)
Additional
refrigerant
charge
Additional charge volume (kg) = { Main length (m) – Facto
ry charged volume} x 0.020 (kg/m)
*When
an
additional
charge
volume
calculation
result
is
negative,
it
is
not
necessa
ry
to
charge
refrigerant
additionall
y.
8) Heating and condensation prevention
(1) Dress refrigerant pipes (both gas and liquid pipes) for heat insulation and prevention of dew condensation.
·
Improper
heat
insulation/anti-dew
dressing
can
result
in
a
water
leak
or
dripping
causing
damage
to
household
effects,
etc.
(2) Use a heat insulating material that can withstand 120
℃
or a higher temperature. Poor heat insulating capacity can cause heat insulation problems or cable
deterioration. ·
All
gas
pipes
must
be
securely
heat
insulated
in
order
to
prevent
damage
from
dripping
water
that
comes
from
the
condensation
formed
on
them
during
a
cooling
operation
or
personal
inju
ry
from
burns
because
their
su
rface
can
reach
quite
a
high
temperature
due
to
discharged
gas
flowing
inside
during
a
heating
operation.
·
Wrap
indoor
units’
flare
joints
with
heat
insulating
parts
(pipe
cover)
for
heat
insulation
(both
gas
and
liquid
pipes).
·
Give
heat
insulation
to
both
gas
and
liquid
side
pipes.
Bundle
a
heat
insulating
material
and
a
pipe
tightly
together
so
that
no
gaps
may
be
left
between
them
and
wrap
them
together
with
a
connecting
cable
by
a
dressing
tape.
·
Both
gas
and
liquid
pipes
need
to
be
dressed
with
20
mm
or
thicker
heat
insulation
materials
above
the
ceiling
where
relative
humidity
exceeds
70%.
CAUTION
Power cable, indoo
r-outdoor connecting wires
Always
use
an
earth
leakage
ci
rcuit
breaker
designed
for
inverter
ci
rcuits
to
prevent a faulty operation.
NO
Are the existing units our products?
NO
NO
NO
Is the existing pipe system to reuse free of corrosion, flaws or dents?
Repair the damaged parts.
Remove those branches.
Repair the damaged parts.
Check the pipe system for air tightness on the site.
Repair the damaged parts.
NO
NO
NO
NO
No loose pipe supports
NO
YES
ST
AR
T
The existing pipe system is reusable.
The existing pipe system is not reusable. Install a new pipe system.
YES
YES
YES
YES
YES
Are an outdoor unit and an indoor unit connected to the existing pipe system to reuse?
Is the unit to install in the existing pipe system a twin-triple-double-twin model?
Is the existing pipe system to reuse free of gas leaks? (Check whether refrigerant charge was required frequently for the system before)
Are heat insulation materials of the existing pipe system to reuse free of peel-offs or deterioration? (Heat insulation is necessa
ry for both gas and liquid pipes)
Change the branching pipe to a specified type.
Does the existing pipe system to reuse satisfy all of the following? (1) The pipe length is 30m or less. (2) The pipe size conforms to the table of pipe size restrictions. (3) The elevation difference between the indoor and outdoor units
conforms to the following restrictions.
Where the outdoor unit is above: 15m or less Where the outdoor unit is below: 15m or less
Which of the following refrigeration oils does the existing unit use? Suniso, MS, Barrel Freeze, HAB, Freol, ether oil, ester oil
Please make an inqui
ry for
reusabilit
y.
※
Check with the flow chart developed for a case where an existing pipe system is reused for a twin-triple-double-twin model published as a technical data sheet.
Change
Change is impossible.
Can Use
Can‘t Use
Repair
is impossible.
Air tightness is impossible.
Remove is impossible
Repair
is impossible.
Repair
Repair
Repair
Some loose pipe supports
Air tightness is OK
Remove
5. UTILIZ
ATION OF EXISTING PIPING
Check whether an existing pipe system is reusable or not by using the following flow chart.
W
ARNING
<Where
the
existing
unit
can
be
run
for
a
cooling
operation.>
Car
ry
out
the
following
steps
with
the
excising
unit
(in
the
order
of
(1),
(2),
(3)
and
(4))
(1)
Run
the
unit
for
30
minutes
for
a
cooling
operation.
(2)
Stop
the
indoor
fan
and
run
the
unit
for
3
minutes
for
a
cooling
operation
(returning
liquid)
(3)
Close
the
liquid
side
operation
valve
of
the
outdoor
unit
and
pump
down
(refrigerant
recove
ry)
(4)
Blow
with
nitrogen
gas.
※
If
discolored
refrigeration
oil
or
any
foreign
matters
is
discharged
by
the
blo
w
,
wash
the
pipe
system
or
install
a
new
pipe
system.
●
For
the
flare
nut,
do
not
use
the
old
one,
but
use
the
one
supplied
with
the
outdoor
unit.
Process
a
flare
to
the
dimensions
specified
for
R32.
<Where
the
existing
unit
cannot
be
run
for
a
cooling
operation.>
W
ash
the
pipe
system
or
install
a
new
pipe
system.
●
If
you
choose
to
wash
the
pipe
system,
please
contact
our
distributor
in
the
area.
●
In cabling, fasten cables securely with cable clamps so that no external fo
rce may work on terminal connections.
●
Grounding terminals are provided in the control box.
●
Always pe
rform grounding system installation work with the power cord unplugged.
●
Connect a pair bearing a common terminal number with an indoo
r-outdoor connecting wire.
Aren’t there any loose pipe supports?
Are there any branch pipes with no indoor unit connected?
Electrical installation work must be pe
rformed by an electrical installation se
rvice provider qualified by a power provider of the count
ry
.
Elec
trical
in
st
allat
io
n
w
or
k
m
us
t b
e ex
ec
ute
d
ac
co
rd
in
g
to
th
e
te
ch
nic
al
s
ta
nd
ar
ds
a
nd
o
th
er
re
gu
la
tio
ns
a
pp
lic
ab
le
to
elec
tri
ca
l i
ns
talla
tio
ns
in
th
e
co
un
try
.
●
Do not use any supply cord lighter than one specified in parentheses for each type belo
w
.
·
braided cord (code designation 60245 IEC 51),
·
ordina
ry tough rubber sheathed cord (code designation 60245 IEC 53)
·
flat twin tinsel cord (code designation 60227 IEC 41); Use polychloroprene sheathed flexible cord (code designation 60245 IEC57) for supply cords of parts of appliances for outdoor u
se.
●
Ground the unit. Do not connect the grounding wire to a gas pipe, water pipe, lightning rod or telephone grounding wire
.
If imprope
ry grounded, an electric shock or malfunction may result.
●
A grounding wire must be connected before connecting the power cable. Provide a grounding wire longer than the power cable.
●
The
installation
of
an
impulse
withstanding
type
earth
leakage
breaker
is
necessa
ry
. A
failure
to
install
an
earth
leakage
breaker
can
result
in
an
acccident such as an electric shock or a fire.
●
Do not turn on the power until the electrical work is completeted .
●
Do
not
use
a
condensive
capacitor
for
power
factor
improvement
under
any
ci
rcumstances.
(It
dose
not
improve
power
facto
r,
while
it
can
cause
an abnormal overheat accident)
●
For power source cables, use conduits.
●
Do
not
lay
electronic
control
cables
(remote
control
and
signaling
wires)
and
other
cables
together
outside
the
unit.
Laying
them
together
can
result
in the malfunctioning or a failure of the unit due to electric noises.
●
Fasten cables so that may not touch the piping, etc.
●
When
cables
are
connected,
make
sure
that
all
electrical
components
within
the
electrical
component
box
are
free
of
loose
connector
coupling
or
terminal
connection
and
then
attach
the
cover
securel
y.
(Improper
cover
attachment
can
result
in
malfunctioning
or
a
failure
of
the
unit,
if
water
penetrates into the box.)
●
Always use a three-core cable for an indoo
r-outdoor connecting cable. Never use a shield cable.
L
Outdoor unit
Switchgear or ci
rcuit breaker
N
1
2/N
3
1
2/N
X
Y
X
Y
3
Indoor unit
Remote control
Earth leakage breaker
(Harmonic resistant type)
Inte
rconnecting and
grounding wires
(minimum)
2.5
mm
2
30A
20A
1.5mm×4
20A,30mA, 0.1sec or less
Switchgear or
ci
rcuit breaker
Switch breaker
Over current protector
rated capacity
Earth leakage breaker
●
The
specifications
shown
in
the
above
table
are
for
units
without
heaters.
For
units
with
heaters,
refer
to
the installation instructions or the construction instructions of the indoor unit.
●
Switchgear
or
ci
rcuit
breaker
capacity
which
is
calculated
from
MAX.
over
current
should
be
chosen
along
the
regulations in each count
ry
.
●
Th
e
ca
bl
e
sp
ec
ifi
ca
tio
ns
a
re
b
as
ed
o
n
th
e
as
su
m
pt
io
n
th
at
a
m
et
al
o
r pla
st
ic
c
on
du
it
is
u
se
d
w
ith
n
o
m
or
e
th
an
th
re
e
cabl
es
c
on
ta
in
ed
in
a
c
on
du
it
an
d
a
vo
lta
ge
d
ro
p
is
2
%
.
Fo
r
an
in
st
al
la
tio
n
fall
in
g
ou
tsi
de
o
f t
he
se
co
nd
iti
on
s,
plea
se
fo
llo
w
th
e
in
te
rn
al
c
abl
in
g
re
gu
la
tio
ns
. A
da
pt
it
to
th
e
re
gu
la
tio
n
in
e
ffec
t i
n
ea
ch
c
ou
nt
ry
.
Power souce
(minimum)
Phase
Single-phase
Take
care
so
that
installed
pipes
may
not
touch
components
within
a
unit.
If
touching
with
an
internal
component
,
it
will
generate
abnormal
sounds
and/or
vibrations.
4) On-site piping work
IMPO
RT
ANT
How to remove the side cover
●
Car
ry
out
the
on
site
piping
work
with
the
operation
valve
fully
closed.
●
Give
sufficient
protection
to
a
pipe
end
(compressed
and
blazed,
or
with
an
adhesive
tape)
so
that
water
or
foreign
matters
may
not
enter
the
piping.
●
Bend
a
pipe
to
a
radius
as
large
as
practical.(R100~R150)
Do
not
bend
a
pipe
repeatedly
to
correct
its
form.
●
●
Flare
connection
is
used
between
the
unit
and
refrigerant
pipe.
Flare
a
pipe
after
engaging
a
The pipe should be anchored every 1.5m or less to isolate the vibration.
flare
nu
t ont
o
it.
Flare
d
im
en
si
on
s
fo
r R
32 a
re
d
iff
er
en
t f
rom
th
ose
fo
r c
on
ve
nt
io
na
l R2
2
an
d
R407C
.
Although
we
recommend
the
use
of
flaring
tools
designed
specifically
for
R32,
conventional
flaring
tools
can
also
be
used
by
adjusting
the
measurement
of
protrusion
B
with
a
protrusion
control
gauge.
Please
remove
the
screw
of
a
side
cover
and
remove
to
the
front.
A
B
Flared
pipe
end
:
A
(mm)
ø6.35
ø15.88
Copper
pipe
outer
diameter
0
ー
0
.
4
A
9
.
1
19.7
Copper
pipe
protrusion
for
flaring
:
B
(mm)
ø6.35
ø15.88
Copper
pipe
outer
diameter
In
the
case
of
a
rigid
(clutch)
type
With
an
R32
tool
With
a
conventional
tool
0
~
0.5
1.0
~
1.5
CAUTION
Do
not
apply
force
beyond
proper
fastening
torque
in
tightening
the
flare
nut.
Fix both liquid and gas operation valves at the valve main bodies as illustrated on the right, and then fasten them, applying appropriate fastening torque.
T
ø6.35
ø9.52
14
~
18
34
~
42
ø12.7
ø15.88
49
~
61
68
~
82
Operation valve size (mm)
5) Air tightness test
①
Although
outdoor
and
indoor
units
themselves
have
been
tested
for
air
tightness
at
the
facto
ry
,
check
the
connecting
pipes
after
the
installation
work
for
air
tightness
from
the
operation valve
’s check joint equipped on the outdoor unit side. While conducting a test, keep the operation valve shut all the time.
a)
Raise
the
pressure
to
0.5
MPa,
and
then
stop.
Leave
it
for
five
minutes
to
see
if
the
pressure
drops.
b)
Then
raise
the
pressure
to
1.5
MPa,
and
stop.
Leave
it
for
five
more
minutes
to
see
if
the
pressure
drops.
c)
Then
raise
the
pressure
to
the
specified
level
(4.15
MPa),
and
record
the
ambient
temperature
and
the
pressure.
d)
If
no
pressure
drop
is
obse
rved
with
an
installation
pressurized
to
the
specified
level
and
left
for
about
one
da
y,
it
is
acceptable.
When
the
ambient
T
emperature
fall
1
℃
, the
pressure
also
fall
approximately
0.01
MPa.
The
pressure,
if
changed,
should
be
compensated
fo
r.
e)
If
a
pressure
drop
is
obse
rved
in
checking
e)
and
a)
–
d),
a
leak
exists
somewhere.
Find
a
leak
by
applying
bubble
test
liquid
to
welded
parts
and
flare
joints
and
repair
it.
After
repai
r,
conduct
an
ai
r-tightness
test
again.
②
In
conducting
an
ai
r-tightness
test,
use
nitrogen
gas
and
pressurize
the
system
with
nitrogen
gas
from
the
gas
side.
Do
not
use
a
medium
other
than
nitrogen
gas
under
any
ci
rcumstances.
Gas side operation valve
Check joint
Pressurize
Close
Outdoor unit
Indoor unit
<
W
ork flow
>
6) Evacuation
Airtighteness test completed
Fill refrigerant
Vacuum gauge check
Vacuuming
completed
Vacuuming begins
Run
the
vacuum
pump
for
at
least
one
hour
after
the
vacuum
gauge
shows
-101kPa
or
lowe
r.
(-755mmHg
or
lower)
Confirm
that
the
vacuum
gauge
indicator
does
not
rise
even
if
the system is left for one hour or more.
When
the
system
has
remaining
moisture
inside
or
a
leaky
point,
the
vacuum
gauge
indicator
will
rise.
Check
the
system
for
a
leaky
point
and
then
draw
air
to
create
a
vacuum
again.
INS
TALL
ATION
TEST
CHECK
POINTS
After
installation
Check
the
following
points
again
after
completion
of
the
installation,
and
before
turning
on
the
powe
r.
Conduct
a
test
run
again
and
ensure
that
the
unit
operates
properl
y.
Explain
to
the
customer
how
to
use
the
unit
and
how
to
take
care
of
the
unit
following
the
instruction
manual.
(1)
Calculate
a
required
refrigerant
charge
volume
from
the
following
table.
Power
cables
and
connecting
wires
are
securely
fixed
to
the
terminal
block.
The
power
source
voltage
is
correct
as
the
rating.
The
drain
hose
is
fixed
securel
y.
Service
valve
is
fully
open.
No
gas
leaks
from
the
joints
of
the
service
valve and joint.
The
pipe
joints
for
indoor
and
outdoor
pipes
have
been
insulated.
The
reverse
flow
check
cap
is
attached.
The
cover
of
the
pipe
cover
(A)
faces
downward
to
prevent
rain
from
entering.
Gaps
are
properly
sealed
between
the
pipe
covers
(A)
(B)
and
the
wall
su
rface
/
pipes.
The screw of the side cover is tightened securely.
●
This
unit
contains
facto
ry
charged
refrigerant
covering
15m
of
refrigerant
piping
and
additional
refrigerant
charge
on
the
installation
site
is
not
required
for an
installation
with
up
to
15m
refrigerant
piping.
W
he
n
re
fri
ge
ra
nt
p
ip
in
g
exc
ee
ds
1
5m
, a
dd
iti
on
al
ly
c
ha
rg
e
an
a
m
ou
nt
ca
lc
ul
at
ed
f
ro
m
t
he
p
ip
e
le
ng
th
a
nd
t
he
a
bo
ve
t
ab
le
fo
r
th
e
po
rti
on
in
exce
ss
o
f
15
m.
●
If
an
ex
is
tin
g
pi
pe
sy
st
em
is
u
se
d,
a
r
eq
ui
re
d
re
fr
ig
er
an
t
ch
ar
ge
vo
lu
m
e
wi
ll
va
ry
d
ep
en
di
ng
o
n
th
e
liq
ui
d
pi
pe
si
ze
.
Fo
r
fu
rt
he
r
in
fo
rm
at
io
n,
p
lea
se
s
ee “5.
UTILIZ
ATION
OF
EXISTING
PIPING.”
NOTE
Put down the refrigerant volume calculated from the pipe length onto the caution label attached on the back side of the service panel.
(2)
Charging refrigerant
●
Since R32 refrigerant must be charged in the liquid phase, you should charge it, keeping the container cylinder upside down or using a refrigerant cylinder equipped with a siphon tube.
●
When you find it difficult to charge a required amount, fully open the outdoor unit valves on both liquid and gas sides and charge refrigerant from the gas (suction) side service port, while running the unit in the cooling mode. In doing so, care must be taken so that refrigerant may be discharged from the cylinder in the liquid phase all the time. When the cylinder valve is throttled down or a dedicated conversion tool to change liquid-phase refrigerant into mist is used to protect the compressor, however, adjust charge conditions so that refrigerant will gasify upon entering the unit.
●
In charging refrigerant, always charge a calculated volume by using a scale to measure the charge volume.
●
When refrigerant is charged with the unit being run, complete a charge operation within 30 minutes. Running the unit with an insufficient quantity of refrigerant for a long time can cause a compressor failure.
Pay
attention
to
the
following
points
in
addition
to
the
above
for
the
R32
and
compatible machines.
○
To prevent a different oil from entering, assign dedicated tools, etc. to each refrigerant
type.
Under
no
ci
rcumstances
must
a
gauge
manifold
and
a
charge
hose
in
particular be
shared
with
other
refrigerant
types
(R22,
R407C,
etc.).
○
Use a counterflow prevention adapter to prevent vacuum pump oil from entering the
refrigerant
system.
(three-way valve)
Charge hose (Designed specifically for R32)
Compound pressure gauge
Pressure gauge
Gauge Manifold (Designed specifically for R32)
Handle Hi.
Vacuum pump
Vacuum pump adapter (Anti-reverse flow type) (Designed specifically for R32)
Charge hose (Designed specifically for R32)
Check joint
-101kPa
(-755mmHg)
H
an
dl
e
Lo
Operation
Valve
Operation
Valve
(two-way valve)
Operation
Valve
Cap
Operation
Valve
Cap
tightening torque (N·m)
Operation valve cap
tightening torque (N·m)
Check joint blind nut
ø6.35 (1/4")
ø15.88 (5/8")
20
~
30
10
~
12
30
~
40
Operation valve size
(mm)
Securely tighten the operation valve cap and the check joint blind nut after adjustment.
PSC012D137
Side cover
Flare nut
The screw of the side cover is tightened securely.
◎:
Standard
pipe
size
○:
Usable
△:
Restricted
to
shorter
pipe
length
limits
Cable
clamp
Power source terminal block
○
It holds cables in place and protect the terminal connection from external fo
rce.
○
This clamp is for the cable in the outside diameter 9-15mm. Please adjust it when not suitable.
○
It holds cables in place and protect the terminal connection from external fo
rce.
○
Please be sure to car
ry out D-type (type III)
grounding work.
Grounding terminal
Cable clamp
●
When
condensed
water
needs
to
be
led
to
a
drain,
etc.,
install
the
unit
on
a flat base or concrete blocks.
(prepared on site)
Th
en
,
plea
se
sec
ur
e
spa
ce
f
or
t
he
drai
n
el
bo
w
a
nd
th
e
dr
ai
n
ho
se
.
●
Execute drain piping by using a drain elbow and drain grommets supplied separately as accessories, where water drained from the outdoor unit is a problem.
●
W
ater may drip where there is a larger amount of drain
wate
r. Seal around the drain elbow and drain grommets
with putty or adequate caulking material.
●
Condensed water may flow out from vicinity of operation valve or connected pipes.
Where
you
are
likely
to
have
several
days
of
sub-zero
temperatures
in
a
ro
w
, do
not
use
a
drain
elbow
and
dr
ai
n
gr
omm
et
s.
(T
he
re
i
s
a
ris
k
of
d
ra
in
w
at
er
freezing inside and blocking the drain.)
●
●
Regarding the change in the size of liquid pipe; Use the reducer at indoor unit side. Reducer set is available in the outdoor unit as accessory.
Indoor unit
Gas side joint (ø15.88)
Reducer set (
,
) is included in the outdoor unit as accessory
Reducer [L=115mm](ø9.52-ø6.35)
Liquid side joint (ø9.52)
[Usage of reducer set]
3. DRAIN PIPING WORK
FDT, FDE
FDU, FDUM, SRK
1.7
0.020
15
Indoor unit
Additional charge volume (kg) per meter of
refrigerant piping (liquid pipe ø6.35
)
Refrigerant volume charged for
shipment at the factory (kg)
Installation
’s pipe length (m) covered
without additional refrigerant charge
D
o
no
t
pu
t
a
gr
om
m
et
on this hole. This
is
a
supplementa
ry
dr
ai
n
ho
le
t
o
disc
ha
rg
e
drain
wate
r,
when
a
large
quantity of it is gathered.
CAUTION
Clearance
Drain elbow
Grommet
Grommet
Drain hose
(
To be procured on the installer's part
)
Pipe
size
Indoor unit
Liquid pipe
ø6.35
Gas pipe
ø15.88
Usability
◎
Maximum one-way pipe length
Length covered without additional charge
30
15
Additional charge volume per meter of pipe
0.025kg/m
ø9.52
ø12.7
△
12
6
ø9.52
ø15.88
△
12
6
0.06kg/m
FDT, FDE
FDU, FDUM, SRK
ø6.35 pipe
ø15.88 pipe
CAUTION
In
case
of
faulty
wiring
connection,
the
indoor
unit
stops,
and
then
the
run
lamp
turns
on
and
the
timer
lamp
blinks.
Use
cables
for
inte
rconnection
wiring
to
avoid
loosening
of
the
wires.
CENELEC
code
for
cables
Required
field
cables.
H05RNR4G1.5
(Example)
or
245IEC57
H 05 R N R 4or5 G
1.5
Harmonized
cable
type
300/500
volts
Natural-and/or
synth.
rubber
wire
insulation
Polychloroprene
rubber
conductors
insulation
Stranded
core
Number
of
conductors
One
conductor
of
the
cable
is
the
earth
conductor
(yellow/green) Section
of
copper
wire
(mm
2
)
Specific
ation
250V 20A
Part No.
SSA564A136A
Main fuse specific
ation
●
For an installation measuring 15m or shorter in pipe length, please charge the refrigerant volume charged for shipment at the facto
ry
, when you recharge refrigerant after se
rvicing etc.
Do
n
ot
h
ol
d
th
e
val
ve
c
ap
a
re
a
w
ith
a
s
pa
nn
er
.
Use a torque wrench.
- 96 -

