background image

'19 • PAC-DB-333

PJF000Z589

H

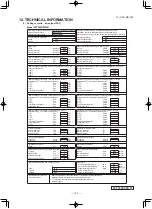
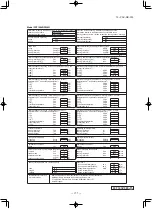
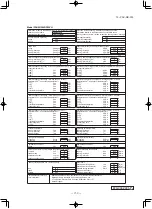
Information to identify the model(s) to which the information relates to: If function includes heating: Indicate the heating season the

Indoor unit model name

FDT100VH

information relates to. Indicated values should relate to one

Outdoor unit model name

FDC90VNP-W

heating season at a time. Include at least the heating season 'Average'.

Function(indicate if present)

Average(mandatory)

Yes

cooling

Yes

Warmer(if designated)

No

heating

Yes

Colder(if designated)

No

Item

symbol

value

unit

Item

symbol

value

class

Design load

Seasonal efficiency and energy efficiency class

cooling

Pdesignc

9.00

kW

cooling

SEER

7.10

A++

heating / Average

Pdesignh

6.00

kW

heating / Average

SCOP/A

4.56

A+

heating / Warmer

Pdesignh

-

kW

heating / Warmer

SCOP/W

-

-

heating / Colder

Pdesignh

-

kW

heating / Colder

SCOP/C

-

-

unit

Declared capacity at outdoor temperature Tdesignh

Back up heating capacity at outdoor temperature Tdesignh

heating / Average (-10 )

Pdh

6.00

kW

heating / Average (-10 )

elbu

0

kW

heating / Warmer (2 )

Pdh

-

kW

heating / Warmer (2 )

elbu

-

kW

heating / Colder (-22 )

Pdh

-

kW

heating / Colder (-22 )

elbu

-

kW

Declared capacity for cooling, at indoor temperature 27(19)  and

Declared energy efficiency ratio, at indoor temperature 27(19)  and

outdoor temperature Tj

outdoor temperature Tj

Tj=35

Pdc

9.00

kW

Tj=35

EERd

3.63

-

Tj=30

Pdc

6.60

kW

Tj=30

EERd

5.49

-

Tj=25

Pdc

4.25

kW

Tj=25

EERd

7.71

-

Tj=20

Pdc

2.40

kW

Tj=20

EERd

14.72

-

Declared capacity for heating / Average season, at indoor

Declared coefficient of performance / Average season, at indoor

temperature 20  and outdoor temperature Tj

temperature 20  and outdoor temperature Tj

Tj=-7

Pdh

5.31

kW

Tj=-7

COPd

3.32

-

Tj=2

Pdh

3.23

kW

Tj=2

COPd

4.32

-

Tj=7

Pdh

2.08

kW

Tj=7

COPd

5.79

-

Tj=12

Pdh

1.75

kW

Tj=12

COPd

7.09

-

Tj=bivalent temperature

Pdh

6.00

kW

Tj=bivalent temperature

COPd

3.05

-

Tj=operating limit

Pdh

5.35

kW

Tj=operating limit

COPd

2.74

-

Declared capacity for heating / Warmer season, at indoor

Declared coefficient of performance / Warmer season, at indoor

temperature 20  and outdoor temperature Tj

temperature 20  and outdoor temperature Tj

Tj=2

Pdh

-

kW

Tj=2

COPd

-

-

Tj=7

Pdh

-

kW

Tj=7

COPd

-

-

Tj=12

Pdh

-

kW

Tj=12

COPd

-

-

Tj=bivalent temperature

Pdh

-

kW

Tj=bivalent temperature

COPd

-

-

Tj=operating limit

Pdh

-

kW

Tj=operating limit

COPd

-

-

Declared capacity for heating / Colder season, at indoor

Declared coefficient of performance / Colder season, at indoor

temperature 20  and outdoor temperature Tj

temperature 20  and outdoor temperature Tj

Tj=-7

Pdh

-

kW

Tj=-7

COPd

-

-

Tj=2

Pdh

-

kW

Tj=2

COPd

-

-

Tj=7

Pdh

-

kW

Tj=7

COPd

-

-

Tj=12

Pdh

-

kW

Tj=12

COPd

-

-

Tj=bivalent temperature

Pdh

-

kW

Tj=bivalent temperature

COPd

-

-

Tj=operating limit

Pdh

-

kW

Tj=operating limit

COPd

-

-

Tj=-15

Pdh

-

kW

Tj=-15

COPd

-

-

Bivalent temperature

Operating limit temperature

heating / Average

Tbiv

-10

heating / Average

Tol

-15

heating / Warmer

Tbiv

-

heating / Warmer

Tol

-

heating / Colder

Tbiv

-

heating / Colder

Tol

-

Cycling interval capacity

Cycling interval efficiency

for cooling

Pcycc

-

kW

for cooling

EERcyc

-

-

for heating

Pcych

-

kW

for heating

COPcyc

-

-

Degradation coefficient

Degradation coefficient

cooling

Cdc

0.25

-

heating

Cdh

0.25

-

Electric power input in power modes other than 'active mode'

Annual electricity consumption

off mode

Poff

7

W

cooling

Qce

444

kWh/a

standby mode 

Psb

7

W

heating / Average

Qhe

1842

kWh/a

thermostat-off mode 

Pto(cooling)

20

W

heating / Warmer

Qhe

-

kWh/a

Pto(heating)

26

W

heating / colder

Qhe

-

kWh/a

crankcase heater mode

Pck

0

W

Capacity control(indicate one of three options)

Other items

Sound power level(indoor)

Lwa

62

dB(A)

Sound power level(outdoor)

Lwa

67

dB(A)

fixed

No

Global warming potential

GWP

675

kgCO

2

eq.

staged

No

Rated air flow(indoor)

-

2,220

m

3

/h

variable

Yes

Rated air flow(outdoor)

-

3,540

m

3

/h

Contact details for obtaining

Name and address of the manufacturer or of its authorised representative.

more information

Mitsubishi Heavy Industries Air-Conditioning Europe, Ltd.

5 The Square, Stockley Park, Uxbridge, Middlesex, UB11 1ET,

United Kingdom

12. TECHNICAL INFORMATION

(1)   Ceiling cassette - 4 way type (FDT)

Model FDT90VNPWVH

- 154 -

Summary of Contents for FDE100VNPWVH

Page 1: ...ED AIR CONDITIONERS DATA BOOK CEILINING CASSETTE 4 WAY TYPE FDT90VNPWVH 100VNPWVH DUCT CONNECTED LOW MIDDLE STATIC PRESSURE TYPE FDUM90VNPWVH 100VNPWVH WALL MOUNTED TYPE SRK100VNPWZR DUCT CONNECTED HIGH STATIC PRESSURE TYPE FDU90VNPWVH 100VNPWVH CEILING SUSPENDED TYPE FDE90VNPWVH 100VNPWVH ...

Page 2: ... 147 148 149 150 151 12 7 9 32 1 0 7 0 2 34 26 7 9 21 3 3 3 3 33 12 21 12 17 18 CONTENTS 3 1 SPECIFICATIONS 525 3 2 EXTERIOR DIMENSIONS 537 1 Indoor units 537 2 Outdoor units 537 3 4 NOISE LEVEL 3 7 PIPING SYSTEM 3 6 TEMPERATURE AND VELOCITY DISTRIBUTION 3 3 ELECTRICAL WIRING 540 3 8 RANGE OF USAGE LIMITATIONS 1 Indoor units 540 2 Outdoor units 540 3 Remote control Option parts 539 3 9 SELECTION C...

Page 3: ...eiling cassette 4 way type FDT 2 Duct connected Low Middle static pressure type FDUM 7 1 Duct connected High static pressure type FDU 6 3 Remote control Option parts 3 ELECTRICAL WIRING 4 NOISE LEVEL 3 5 CHARACTERISTICS OF FAN 6 TEMPERATURE AND VELOCITY DISTRIBUTION 8 7 PIPING SYSTEM 30 8 RANGE OF USAGE LIMITATIONS 32 1 Indoor units 2 Outdoor units 2 1 Indoor units 3 2 Outdoor units 5 9 2 Correcti...

Page 4: ...er sleeve for fan motor compressor Electric heater W Operation control Remote control Option Wired RC EX3A RC E5 RCH E3 Wireless RCN T 5AW E2 Room temperature control Thermostat by electronics Operation display Safety equipments Compressor overheat protection Overcurrent protection Frost protection Serial signal error protection Indoor fan motor error protection Heating overload protection High pr...

Page 5: ...ber sleeve for fan motor Rubber sleeve for fan motor compressor Electric heater W Operation control Remote control Option Wired RC EX3A RC E5 RCH E3 Wireless RCN T 5AW E2 Room temperature control Thermostat by electronics Operation display Safety equipments Compressor overheat protection Overcurrent protection Frost protection Serial signal error protection Indoor fan motor error protection Heatin...

Page 6: ...y Safety equipments Compressor overheat protection Overcurrent protection Frost protection Serial signal error protection Indoor fan motor error protection Heating overload protection High pressure control Cooling overload protection Installation data Refrigerant piping size O D Liquid line mm I U φ9 52 3 8 Pipe φ6 35 1 4 x0 8 O U φ6 35 1 4 Gas line φ15 88 5 8 Pipe φ15 88 5 8 x1 0 φ15 88 5 8 Conne...

Page 7: ...lectronics Operation display Safety equipments Compressor overheat protection Overcurrent protection Frost protection Serial signal error protection Indoor fan motor error protection Heating overload protection High pressure control Cooling overload protection Installation data Refrigerant piping size O D Liquid line mm I U φ9 52 3 8 Pipe φ6 35 1 4 x0 8 O U φ6 35 1 4 Gas line φ15 88 5 8 Pipe φ15 8...

Page 8: ...electronics Operation display Safety equipments Compressor overheat protection Overcurrent protection Frost protection Serial signal error protection Indoor fan motor error protection Heating overload protection High pressure control Cooling overload protection Installation data Refrigerant piping size O D Liquid line mm I U φ9 52 3 8 Pipe φ6 35 1 4 x0 8 O U φ6 35 1 4 Gas line φ15 88 5 8 Pipe φ15 ...

Page 9: ...perature control Thermostat by electronics Operation display Safety equipments Compressor overheat protection Overcurrent protection Frost protection Serial signal error protection Indoor fan motor error protection Heating overload protection High pressure control Cooling overload protection Installation data Refrigerant piping size O D Liquid line mm I U φ9 52 3 8 Pipe φ6 35 1 4 x0 8 O U φ6 35 1 ...

Page 10: ... for fan motor Rubber sleeve for fan motor compressor Electric heater W Operation control Remote control Option Wired RC EX3A RC E5 RCH E3 Wireless RCN E E3 Room temperature control Thermostat by electronics Operation display Safety equipments Compressor overheat protection Overcurrent protection Frost protection Serial signal error protection Indoor fan motor error protection Heating overload pro...

Page 11: ...tor Rubber sleeve for fan motor compressor Electric heater W Operation control Remote control Option Wired RC EX3A RC E5 RCH E3 Wireless RCN E E3 Room temperature control Thermostat by electronics Operation display Safety equipments Compressor overheat protection Overcurrent protection Frost protection Serial signal error protection Indoor fan motor error protection Heating overload protection Hig...

Page 12: ...tion absorber Rubber sleeve for fan motor Rubber sleeve for fan motor compressor Electric heater W Operation control Remote control Option Wired RC EX3A RC E5 RCH E3 Interface kit SC BIKN2 E Room temperature control Thermostat by electronics Operation display RUN Green TIMER Yellow HI POWER Green 3D AUTO Orange Safety equipments Compressor overheat protection Overcurrent protection Frost protectio...

Page 13: ... 35 215ー245 850 or less 140 100 100 60 140 140 6 φ4 140 100 130 240 140 6 φ4 200 76 112 137 129 50 38 99 40 65 5 φ4 167 44 13 H1 2 G H1 2 H1 2 B A F C H1 H2 H1 2 D G Unit mm A Gas piping φ15 88 5 8 Flare B Liquid piping φ9 52 3 8 Flare C Drain piping VP25 O D 32 D Hole for wiring F Suspension bolts M10 or M8 G Space for installation and service Obstacle H1 2 G H1 2 H1 2 Drain hose piece B A F C Ma...

Page 14: ... more Case 2 From bottom of unit Notes a There must not be obstacle to draw out 2 fan units For fan units maintenance refer to page 54 b Install refrigerant pipes drain pipe and wiring so as not to cross marked area c The case that pipes are installed to upper bottom of fan unit keep space of 60mm or more to upper bottom of unit C1 Drain piping VP25 O D 32 VP20 Unit mm 4 φ4 Suspension bolts pitch ...

Page 15: ...he model name label ࠉࠉis attached on the lid ࠉࠉ of the control box Notes a There must not be obstacle to draw out 2 fan units For fan units maintenance refer to page 60 b Install refrigerant pipes drain pipe and wiring so as not to cross marked area c The case that pipes are installed to upper bottom of fan unit keep space of 60mm or more to upper bottom of unit C1 Drain piping VP25 O D 32 VP20 Un...

Page 16: ... 19 PAC DB 333 d Ceiling suspended type FDE Model FDE100VH PFA004Z086 15 C 1 C 2 C 1 C 2 C 2 C 1 A E G F A B B D ...

Page 17: ...ce when viewing from the front 768 157 48 240 6 7 322 4 214 5 214 5 883 157 10 3 262 19 64 55 47 53 77 47 1197 339 150 50 Space for service Space for service Space for service 15 100 780 715 759 55 Installation board Outlet for downward piping Refer to the top view Terminal block 60 240 43 470 363 5 363 5 568 5 568 5 11 60 Unit mm Notes 1 The model name label is attached on the underside of the in...

Page 18: ...hat the blower outlet faces perpendicularly to the dominant wind direction 4 Leave 1m or more space above the unit 5 A wall in front of the blower outlet must not exceed the unit s height 6 The model name label is attached on the lower right corner Minimum installation space D C E Symbol Content A Service valve connection gas side φ15 88 5 8 Flare B Service valve connection liquid side φ6 35 1 4 F...

Page 19: ...remote control Where the average room temperature cannot be detected Place near the equipment to generate heat Place affected by outside air in opening closing the door Place exposed to direct sunlight or wind from air conditioner Where the difference between wall and room temperature is large 4 When you are using the automatic grille up and down panel in the IU you may not be able to confirm the ...

Page 20: ...cores Under 300m Under 400m Under 600m Upper part Lower part Lower case Sheath Upper cace Board Wiring Upper Lower X Y Sheath Upper cace Board Wiring Upper Lower Y X Tighten the screws after cutting off the thin part of screw mounting part Embedded mounting The peeling off length of sheath The peeling off length of sheath In case of pulling out from upper left In case of pulling out from upper lef...

Page 21: ... 19 PAC DB 333 b Wireless remote control RCN E2 Option parts Except SRK series 60 24 167 3 Remote control Unit mm 60 24 167 SRK series only 20 Unit mm Unit mm ...

Page 22: ...5 1 2 3 4 5 1 2 3 4 5 6 7 8 9 10 11 12 13 14 15 16 17 18 19 20 BK BK BK BK BK BK BK BK BK BL RD BR OR WH YE GN RD 12 12 12 3 Power source line Signal line 1 2 3 CNW3 WH 1 3 WH BL 2 0A 3 15A WH YE GN PIS WHWHWHWHWHWHWHWHWHWHBL BL BL BL BL BL BL BL BL BL RD RD RD RD RD RD RD RD RD RD SW2 1 BK BK BK BK BK RD WH E1 Indoor unit PCB 1 2 Option Remote operation input volt free contact The line between in...

Page 23: ... FMi1 2 FS Float switch Indication lamp Red Inspection Indication lamp Green Normal operation LED 3 LED 2 Connector CNB Z Model capacity setting SW6 Operation check drain pump motor test run SW7 1 SW5 Temperature sensor Remote control Temperature sensor Heat exchanger Temperature sensor Return air Thc Thi R1 2 3 TB2 Terminal block Signal line mark TB1 Terminal block Power source mark Remote contro...

Page 24: ...Power source line Signal line indoor unit and outdoor unit M 1 4 5 6 7 F4 2A CNM2 BK RD BL or BK BR or WH WH or BL OR or YE BL 3 1 WH CNW3 WH 1 2 WH RD YE GN 3 5 CNW0 WH 1 3 TB1 F1 5A YE GN M 1 4 5 6 7 RD F3 2A CNM1 WH BL or BK BR or WH WH or BL OR or YE L CNWR WH 1 3 1 2 CNTA BL Remote operation input volt free contact 12 Prepare on site XR5 Remote operation input volt free contact Thi R1 2 3 FMi...

Page 25: ...4 15 16 17 18 19 20 CNJ WH BL PK BR OR RD 12 1 PIS CNG BL CNV2 BK 2 4 3 1 3 Option WH BK RD WH RD BK WH RD BK WH RD BK CNL1 WH CNL2 WH Prepare on site CNZ CNC For HA WH RD SW2 SW6 SW5 SW7 LED 2 LED 3 SW8 1 5 Section 1 1 shows electric circuit of motion sensor Option Notes 1 indicates wiring on site 2 See the wiring diagram of outdoor unit about the line between indoor unit and outdoor unit 3 Use t...

Page 26: ...CIRCUIT PRINTED SM 1 LM 1 CNX M M M 5 5 LM 2 RD WH RD WH BK BL Y Y G BK CNG CNE DISPLAY WIRELESS RECEIVER CNF BACK UP SW 2 8 Th2 1 Th2 2 Th1 Th3 CNY Y G CNM 5 Color Marks Blue Black BK Red BL RD White WH Yellow Green Y G Yellow Y Color Mark Heat exchanger temperature sensor Humidity sensor Fan motor Room temperature sensor Flap motor Th1 Th2 1 2 Th3 Diode stack DS Fuse F Connector CNE FMi Terminal...

Page 27: ...mm x 4 90 100 3 1 2 N 1 Phase 220 230 240V 50Hz 1 5 Color RD Mark Orange OR Yellow Green YG Black BK Brown BR Yellow YE White WH Red Description Item Connector CN20S Electric expansion valve coil EEV Fan motor FMo Reactor L Terminal block TB1 2 Compressor motor CM Solenoid coil for 4 way valve 20S Heat exchanger temperature sensor outdoor unit TH1 Outdoor air temperature sensor TH2 TH3 Discharge p...

Page 28: ...odel FDT50VH 63 125 250 500 1000 2000 4000 8000 30 40 50 60 70 80 30 40 50 60 70 80 Cooling Heating Mid Octave Band Frequency Hz Mid Octave Band Frequency Hz Mid Octave Band Frequency Hz Sound power level dB Sound power level dB Model FDT60VH 63 125 250 500 1000 2000 4000 8000 20 10 30 40 50 60 20 10 30 40 50 60 N30 N40 N20 N50 N60 Mid Octave Band Frequency Hz Sound pressure level dB Standard 2 10...

Page 29: ...Hi 37 dB A at Me 32 dB A at Lo 63 125 250 500 1000 2000 4000 8000 20 10 30 40 50 60 20 10 30 40 50 60 N30 N40 N20 N50 N60 Sound pressure level dB Standard 2 10 5 Pa Mid Octave Band Frequency Hz Model FDE100VH Noise level 48 dB A at P Hi 43 dB A at Hi 38 dB A at Me 34 dB A at Lo 63 125 250 500 1000 2000 4000 8000 20 10 30 40 50 60 20 10 30 40 50 60 N30 N40 N20 N50 N60 Sound pressure level dB Standa...

Page 30: ...ng Heating Mid Octave Band Frequency Hz Sound pressure level dB standard 2 10 5 Pa 63 125 250 500 1000 2000 4000 8000 20 10 30 40 50 60 20 10 30 40 50 60 N30 N40 N20 N50 N60 Cooling Heating Mid Octave Band Frequency Hz Sound pressure level dB standard 2 10 5 Pa Heating noise level Hi 46 dB A Heating noise level Hi 46 dB A Heating noise level Hi 48 dB A Cooling noise level Hi 48 dB A Model SRK100ZR...

Page 31: ... 35 36 36 40 45 Air flow m3 min External static pressure Pa 0 20 40 60 80 100 120 140 160 180 200 220 10 15 20 25 30 35 40 45 Air flow m3 min External static pressure Pa Range of approvable air flow In case actual E S P correspond setting of E S P 0 20 40 60 80 100 120 140 160 180 200 220 32 33 34 35 36 38 39 40 37 Air flow m3 min External static pressure Pa SW8 4 OFF Range of use limitation Setti...

Page 32: ...a Setting 10Pa 100Pa Max 90Pa 80Pa 70Pa 60Pa 50Pa 40Pa 30Pa 20Pa 10Pa Min Lo Me Setting 40Pa Setting 10Pa Characteristic FAN 2 Characteristic FAN 1 Model FDUM100VH Air flow m3 min External static p 0 10 20 30 40 50 10 14 18 22 26 0 10 20 30 40 50 21 22 23 24 25 26 27 External static pr Air flow m3 min 20Pa 10Pa Min 0 10 20 30 40 50 60 70 80 90 100 16 20 24 28 32 36 40 44 Air flow m3 min External s...

Page 33: ... and obstacles 1 Ceiling cassette 4 way type FDT Model FDT100VH Cooling Air flow P Hi Louver position Temperature distribution 24 21 18 15 24 21 18 15 5m 4m 3m 2m 1m 0m 5m 4m 3m 2m 1m 0m 5m 4m 3m 2m 1m 0m 1m 2m 3m 4m 5m 20 Velocity distribution 0 3 0 6 0 3 0 6 5m 4m 3m 2m 1m 0m 5m 4m 3m 2m 1m 0m 5m 4m 3m 2m 1m 0m 1m 2m 3m 4m 5m m sec Heating Air flow P Hi Louver position Temperature distribution 2...

Page 34: ... Velocity distribution Velocity distribution 4m 3m 2m 1m 0m 8m 7m 5m 6m 0m 1m 2m 3m 3m 2m 1m 0m 15 18 21 24 m sec m sec 4m 3m 2m 1m 0m 8m 7m 5m 6m 0m 1m 2m 3m 3m 2m 1m 0m 2 0 1 5 1 0 0 5 35 32 29 26 23 4m 3m 2m 1m 0m 8m 7m 5m 6m 0m 1m 2m 3m 3m 2m 1m 0m 2 0 1 5 1 0 0 5 4m 3m 2m 1m 0m 8m 7m 5m 6m 0m 1m 2m 3m 3m 2m 1m 0m 5 45 Louver position Louver position ...

Page 35: ...y 7 PIPING SYSTEM Preset point of the protective devices Parts name Mark Equipped unit FDT FDU FDUM FDE series Temperature sensor for protection overloading in heating Thi R1 or Thi R2 Indoor unit OFF 63 ON 56 Temperature sensor for frost prevention OFF 1 0 ON 10 Temperature sensor for protection high pressure in cooling TH1 Outdoor unit OFF 63 ON 50 Temperature sensor for detecting discharge pipe...

Page 36: ... sensor Preset point of the protective devices Parts name Mark Equipped unit SRK series Temperature sensor for protection overloading in heating Th21 or Th22 Indoor unit OFF 51 5 58 ON 48 5 Temperature sensor for frost prevention OFF 2 5 ON 8 Temperature sensor for protection high pressure in cooling TH1 Outdoor unit OFF 63 ON 50 Temperature sensor for detecting discharge pipe temperature TH3 OFF ...

Page 37: ...iquid pipes need to be coverd with 20mm or thicker heat insulation materials at the place where humidity exceeds 70 8 RANGE OF USAGE LIMITATIONS Operating temperature range See next page When used below 5 C install a snow hood prepared on site Recommendable area to install Considering to get sufficient heating capacity the area where the averaged lowest ambient air temperature in day time during w...

Page 38: ... cooling operation may not be established for any given time 32 Usage range in heating 19 PAC DB 311D 5 10 15 20 25 30 20 15 10 5 0 5 10 15 20 25 20 10 0 10 20 30 40 50 10 12 14 16 18 20 22 24 26 Operating temperature range Cooling Heating Decline in cooling and heating capacity or operation stop may occur when the outdoor unit is installed in places where natural wind can increase or decrease its...

Page 39: ... 19 PAC DB 333 Limitation on unit and piping installation PJF000Z317 PCA001Z871 FDC90 100VNP W PCA001Z871 38 ...

Page 40: ... 26 DB 27 DB 28 DB 31 DB 33 DB 12 WB 14 WB 16 WB 18 WB 19 WB 20 WB 22 WB 24 WB 16 18 20 22 24 14 5 15 5 46 5 40 5 33 5 26 5 18 11 13 5 14 5 68 5 61 5 54 5 47 5 39 13 11 5 12 6 10 6 03 5 96 5 88 5 81 15 9 5 10 6 52 6 45 6 38 6 30 6 22 17 7 5 8 6 95 6 87 6 79 6 71 6 63 19 5 5 6 7 39 7 32 7 25 7 16 7 07 21 3 0 4 7 84 7 77 7 70 7 61 7 51 23 1 0 2 8 29 8 22 8 15 8 05 7 95 25 1 0 0 8 74 8 67 8 60 8 50 8...

Page 41: ... 64 6 57 6 49 6 41 6 33 21 3 0 4 7 05 6 97 6 89 6 80 6 72 23 1 0 2 7 45 7 37 7 29 7 20 7 10 25 1 0 0 7 86 7 77 7 68 7 59 7 49 27 2 0 1 8 06 7 97 7 88 7 78 7 68 29 3 0 2 8 26 8 18 8 11 8 01 7 91 31 5 0 4 8 64 8 60 8 55 8 46 8 37 33 7 0 6 9 03 9 02 9 00 8 91 8 82 35 9 0 8 9 50 9 46 9 41 9 37 9 32 37 11 5 10 9 97 9 90 9 82 9 82 9 82 39 13 5 12 10 39 10 38 10 36 10 35 10 35 41 15 5 14 10 82 10 86 10 8...

Page 42: ...2 5 94 19 5 5 6 6 64 6 57 6 49 6 41 6 33 21 3 0 4 7 05 6 97 6 89 6 80 6 72 23 1 0 2 7 45 7 37 7 29 7 20 7 10 25 1 0 0 7 86 7 77 7 68 7 59 7 49 27 2 0 1 8 06 7 97 7 88 7 78 7 68 29 3 0 2 8 26 8 18 8 11 8 01 7 91 31 5 0 4 8 64 8 60 8 55 8 46 8 37 33 7 0 6 9 03 9 02 9 00 8 91 8 82 35 9 0 8 9 50 9 46 9 41 9 37 9 32 37 11 5 10 9 97 9 90 9 82 9 82 9 82 39 13 5 12 10 39 10 38 10 36 10 35 10 35 41 15 5 14...

Page 43: ...80 6 72 23 1 0 2 7 45 7 37 7 29 7 20 7 10 25 1 0 0 7 86 7 77 7 68 7 59 7 49 27 2 0 1 8 06 7 97 7 88 7 78 7 68 29 3 0 2 8 26 8 18 8 11 8 01 7 91 31 5 0 4 8 64 8 60 8 55 8 46 8 37 33 7 0 6 9 03 9 02 9 00 8 91 8 82 35 9 0 8 9 50 9 46 9 41 9 37 9 32 37 11 5 10 9 97 9 90 9 82 9 82 9 82 39 13 5 12 10 39 10 38 10 36 10 35 10 35 41 15 5 14 10 82 10 86 10 89 10 88 10 87 43 16 5 16 11 24 11 34 11 43 11 41 1...

Page 44: ...10 56 7 63 10 88 7 58 11 52 7 94 12 16 7 79 7 5 8 8 93 8 89 8 85 8 80 8 75 23 9 65 7 19 10 28 7 70 10 59 7 65 10 91 7 59 11 56 7 95 12 21 7 81 5 5 6 9 05 9 00 8 97 8 91 8 86 25 8 93 7 28 9 64 7 19 10 31 7 71 10 62 7 66 10 95 7 61 11 61 7 97 12 27 7 83 3 0 4 9 17 9 12 9 07 9 03 8 97 27 8 86 7 25 9 64 7 19 10 34 7 72 10 65 7 67 10 96 7 61 11 57 7 95 1 0 2 9 29 9 23 9 19 9 13 9 07 29 8 80 7 22 9 50 7...

Page 45: ...rature DB 20 10 0 10 20 30 40 50 Indoor air temperature DB 15 Capacity compensation coeffcient 0 0 5 1 0 1 5 5 10 20 25 30 35 Indoor air temperature 24 WB Indoor air temperature 19 WB Indoor air temperature 12 WB Indoor air temperature 15 WB Indoor air temperature 17 WB Outdoor air temperature 10 WB Outdoor air temperature 15 WB Outdoor air temperature 18 WB Outdoor air temperature 1 WB Outdoor ai...

Page 46: ...rature 1 WB Outdoor air temperature 15 WB Outdoor air temperature 10 WB 45 II Model FDC100VNP W Cooling Heating Capacity compensation coeffcient 0 0 5 1 0 1 5 Outdoor air temperature DB 20 10 0 10 20 30 40 50 Indoor air temperature DB 15 Capacity compensation coeffcient 0 0 5 1 0 1 5 5 10 20 25 30 35 Indoor air temperature 24 WB Indoor air temperature 19 WB Indoor air temperature 12 WB Indoor air ...

Page 47: ...the cooling and heating capacity Net cooling capacity 9 0 1 00 0 97 0 99 8 6 kW Example The net cooling capacity of the model FDT90VNPWVH with the air flow P Hi the piping length of 15m the outdoor unit located 5m lower than the indoor unit indoor wet bulb temperature at 19 0 and outdoor dry bulb temperature 35 is Net cooling total capacity of FDT90VNPWVH Outdoor temp 35 DB Indoor temp 19 WB shown...

Page 48: ...aker is not installed it can cause electric shocks Use the circuit breaker of correct capacity Circuit breaker should be the one that disconnect all poles under over current Using the incorrect one could cause the system failure and fire Do not use any materials other than a fuse of correct capacity where a fuse should be used Connecting the circuit by wire or copper wire could cause unit failure ...

Page 49: ...ause condensation and leakage of water It is possible to set the air flow direction port by port independently Refer to the user s manual for details Preparation before installation Ceiling opening Suspension bolts pitch Pipe position Installation of indoor unit Work procedure 1 Set the suspension bolt length to about 50 mm from the ceiling 2 Temporarily locate the lower nuts of the suspension bol...

Page 50: ...drain After checking the pipe must be perf If the pipe lid has The position for drain 850mm above the ce tion to avoid obstacles tal drain pipe is too backflow of water w stopped and it may c the drain pan on the overflow keep the ho of the pipe within th below Drain test Drain pump operation Drain up 1 Remove the flare nut and blind flanges on the pipe of the indoor unit Makesuretoloosentheflaren...

Page 51: ...n them to the terminal block 5 Fix the wiring using clamps 6 Install the wiring cover and the lid of the control box Main fuse specification Specification T3 15A L250V Part No SSA564A149AF Panel installation Install the panel on the indoor unit after electrical wiring work Refer to the attached manual for panel installation for details How to check the dirt of drain pan and cleanimg the inlet of t...

Page 52: ...otor cable 2 3 Pass the anti draft motor ca 4 Fix the control box lid of the Hook of the contr Hook of the contro Pass through hole of The wiring work varies depend The connection positions of th For the Standard pan 1 Loosen 2 screws on the 2 Pass the flap motor wiri 3 Fix the control box lid o Accessories holding position Removal Stopper Coner lid Pull up around this part as shown in the picture...

Page 53: ...el type For the Standard panel 1 Loosen 2 screws on the control box lid of the indoor unit and remove the lid by sliding it 2 Pass the flap motor wiring 20 wire through the hook of the control box and connect to CnJ1 20P white 3 Fix the control box lid of the indoor unit and tighten 2 screws Closing direction Position for hanging hinges A a Pin Screw Installing the inlet grille Panel setting Flap ...

Page 54: ...TION CAUTION This model is high static blow type air conditionin Before insta Install correctly acc Confirm the followi Unit type Power Accessory item Case 2 Case 1 In h Note a Inspectio hole 450x45 Space for installation For refrigera Pipe cover big Pipe cov small 1 1 For heat insulation of gas pipe For heat insu of liquid tube For hanging Flat washer M10 8 For unit hanging PJG012D022 Perform ear...

Page 55: ...urce specification Pipes Wires Small parts Accessory items Accessory item Single type Multi type FDU F A B Size of inspection hole 45 56 1100 71 71 90 650 1300 100 140 112 160 1100 1720 725 For natural drainage Drain pipe connection VP20 PVC pipe Drain pipe connection PVC pipe Drain hose VP25 510 635 468 405 467 187 145 95 29 471 413 203 174 104 29 467 Refrigerant liquid pipe Refrigerant gas pipe ...

Page 56: ... specific blowout duct in a location where the air will circulate to the entire room Conduct the installation of the specific blowout hole and the connection of the duct before attaching them to the ceiling Insulate the area where the duct is secured by a band for dew condensation prevention Make sure provide an inspection hole on the ceiling It is indispensable to service electric equipment motor...

Page 57: ...cause over pressure and resultant it may result in bursting etc Store the copper pipes indoors and seal the both end of them until they are brazed in order to avoid any dust dirt or water getting into pipe Otherwise it will cause degradation of refrigeration oil and compressor breakdown etc Use special tools for R32 or R410A refrigerant 1 Remove the flare nut and blind flanges on the pipe of the i...

Page 58: ...hould not be used when actual E S P cannot be confirmed because the risk above becomes higher If 20 is selected for the setting No on the remote control the setting No shows No 19 You can not set E S P by wireless remote control How to set E S P by wired remote control Push marked button E S P button Select indoor unit No by using button Select setting No by using button and set E S P by button Se...

Page 59: ...unit located at the far side Screw iv Take out the fan unit in the arrow direction b Replacement procedure of the fan unit Model FDU100VH c Replacement procedure of the fan unit Notes 1 The unit is a heavy item It must be supported securely and handled with care not to drop when it is necessary to replace 2 For the maintenance space refer to page 54 i Remove the control box and the side panel and ...

Page 60: ...anger breakage of plastic parts etc And inflammable gas could cause fire Secure a space for installation inspection and maintenance specified in the manual Insufficient space can result in accident such as personal injury due to falling from the installation place Do not use the indoor unit at the place where water splashes such as laundry Indoor unit is not waterproof It could cause electric shoc...

Page 61: ...out fan motor marked area b Install refrigerant pipe drain pipe and wiring so as not to cross marked area If suspension bolt becomes longer do reinforcement of earthquake resistant For grid ceiling When the suspension bolt length is over 500mm or the gap between the ceiling and roof is over 700mm apply earthquake resistant brace to the bolt In case the unit is hanged directly from the slab and is ...

Page 62: ...nt 4 Refrigerant is cha As for the additio manual attached Caution Refrigerating mach is because even if force on the thread by the stress corro Refrigerating mach Be sure to use new pipes for the refrigerant pipes Use the flare nut attached to the product Regarding whether existing pipes can be reused or not and the washing method refer to the instruction manual of the outdoor unit catalogue or t...

Page 63: ...rease in turn the axial component force so that it could crack the flare by the stress corrosion Refrigerating machine oil may be applied to the internal surface of flare only Descending slope greater than 1 100 As wide as possible about100mm Supporting metal Descending slope greater than 1 100 Please confirm that the pipe doesn t bend Air vent No bump No trap Not touching the water Trapped air wi...

Page 64: ...either method of MANUAL SETTING or AUTO MATIC SETTING by remote control Indoor unit will control fan speed to keep rated air flow volume at each fan speed setting Lo Uhi 1 MANUAL SETTING You can set required E S P by wired remote control that calculated with the set air flow rate and pressure loss of the duct connected Select No 1 10 10Pa 100Pa from following table according to calculation result ...

Page 65: ...les 2 places from the fan unit located at the far side iv Take out the fan unit in the arrow direction Screw 2 Take out the fan unit in the arrow direction Side panel Screw Control box Side panel Screw 2 Take out the fan unit in the arrow direction Side panel Screw Control box Side panel Screw Control box 2 Take out the fan unit located at the near side in the arrow Side panel Screw direction Scre...

Page 66: ...ral ind other more than CAUTION Perform earth wiring surely Do not connect the earth wiring to the gas pipe water pipe lightning rod and telephone earth wiring Improper earth could cause unit failure electric shock and fire due to a short circuit Earth leakage breaker must be installed If the earth leakage breaker is not installed it can cause fire and electric shocks Use the circuit breaker of co...

Page 67: ...on the left and right sides CAUTION Do not give the reversed slope which may cause water leaks WARNING CAUTION Completely seal the hole in the wall with putty If not sealed properly dust insects small animals and highly humid air may enter the room from outside which could result in fire or other hazards Completely seal the hole in the wall with putty If not sealed properly furniture and other fix...

Page 68: ...wisting of the copper pipe When fastening the flare nut align the refrigeration pipe with the center of flare nut screw the nut for 3 4 times by hand and then tighten it by spanner with the specified torque mentioned in the table above 3 Cover the flare connection part of the indoor unit with attached insulation material after a gas leakage inspection and tighten both ends with attached straps Mak...

Page 69: ... control box Screw Screw Screw Screw Bracket The control content of indoor units can be switched in following way is the default setting Check if Expected trouble Check Falling vibration noise Inspection for leakage is done Insulation work is properly done Water leakage Water is drained properly Water leakage Power source voltage is same as mentioned in the model name plate PCB burnt out not worki...

Page 70: ...onal flare tool Pipe cutter Designed specifically for R32 or R410A RLD012A018 indd 1 RLD012A018 A 2 SELEC After getting cust 1 Indoor uni Where there is distributed A solid place wh A place where t can be secured Where it is easy A place where u A place where i A place separat ages and sound A place where t Avoid installing A place where t Install the indoo 180 cm 2 Remote co A place where t A pla...

Page 71: ...parts 5 ø65 Indoor side Outdoor side a Sleeve Top Thickness of the wall 1 5cm Cut Indoor side Outdoor side Installed state Turn to tighten b Sealing plate a Sleeve c Inclination plate d Putty d Putty Outdoor side Indoor side 1 Drill a hole with hole core drill 5 ELECTRICAL WIRING WORK Before installation make sure that the power source complies with the air conditioner s power speci fication Carry...

Page 72: ...er diameter B Rigid clutch type R32 or R410A Conventional 5 3 6 ø 1 9 5 3 6 ø 0 0 5 1 0 1 5 2 5 9 ø 2 3 1 2 5 9 ø 7 2 1 ø 6 6 1 7 2 1 ø 8 8 5 1 ø 7 9 1 8 8 5 1 ø 2 2 Connecting pipes 1 Connect pipes on both liquid and gas sides 2 Tighten nuts to specified torque shown in the table below Do not turn Liquid side Gas side Operation valve size mm Tightening torque N m ø6 35 1 4 14 18 ø9 52 3 8 34 42 ø...

Page 73: ...se two air conditioners are installed in the same room apply this setting so that one unit can be operated with only one remote control For the environmental protection be sure to pump down when relocating or disposing of the unit Pump down is the method of recovering refrigerant from the indoor unit to the outdoor unit before the connect ing pipes are removed from the unit When pump down is carri...

Page 74: ...le shows reference values in case of four outlet If you shut some outlets they are different Fan speed setting can be changed by using a wired remote control b FDE series Model Effective range FDE100VH 9 0m Conditions 1 Height of unit 2 4 3 0 m above floor level 2 Fan speed Hi 3 Location Free space without obstacles 4 The effective range means the horizontal distance for wind to reach the floor 5 ...

Page 75: ...g in the re outside of the case wire connecting se 100 200m Under 300m Under 400m Under 600m Switch No SW2 SW5 1 SW5 2 SW6 1 4 SW7 1 Control Content Indoor unit address 0 Fh Master Slave Switching plural Slave unit Setting Model capacity setting ON Operation check Drain motor test run OFF Normal operation The control content of indoor units can be switched in following way is the default setting N...

Page 76: ...XR5 Common Output 1 Output 2 Output 3 Output 4 Remote ON OFF switch or timer contactor AC100V DC12V DC24V Input 1 XR6 AC100V 200V DC12V DC24V Input 2 Note 1 0 3 mm2 2 m Note 1 0 3 mm2 2 m Note 1 To be no longer than 2 m 0 75mm2 0 2 m Butt connecting contactor Red Black Yellow Blue Brown Orange Remote ON OFF monitor kit Applicable range 0 75 1 25 mm2 XR5 XR6 White Black Yellow Blue Brown Orange Ora...

Page 77: ...r in winter The judgment to switch the operation mode Cooring Heating is done by the both factors of the set temp and outdoor air temp The set temp and fan speed can be set A 7 External Ventilation When the ventilator is combined On Off operation of the external ventilator can be done It is necessary to set from Menu Service setting R C function settings Ventilation setting If the Independent is s...

Page 78: ...temp setting Enable or Disable of Auto temp setting can be selected B Auto fan speed Enable or Disable of Auto fan speed can be selected B 3 IU settings Fan speed setting The fan speed for indoor units can be set B Filter sign The setting of filter sign display timer can be done from following patterns B Service password External input 1 The connect of control by external input 1 can be changed B ...

Page 79: ...ng the unit Repairing inspecting the unit with the power circuit breaker turned ON could cause electric shocks or injury Please read this manual carefully before starting installation work to install the unit properly Every one of the followings is important information to be observed strictly WARNING Failure to follow these instructions properly may result in serious consequences such as death se...

Page 80: ... shocks Do not wash the unit with water Use the specified cables for wiring and connect them securely with care to protect electronic parts from external forces etc y t t u p h t i w e l b a c l o r t n o c e t o m e r r o f e l o h t e l n i e h t l a e S break down If dew or water enters the unit it may cause screen display anomalies When installing the unit at a hospital telecommunication facili...

Page 81: ...ote control gets wet e h t f o r o s n e s e r u t a r e p m e t e h t g n i s u d e t c e t e d e b t o n y a m e r u t a r e p m e t m o o r e t a r u c c A 3 remote control Where the average room temperature cannot be detected Place near the equipment to generate heat Place affected by outside air in opening closing the door Place exposed to direct sunlight or wind from air conditioner Where th...

Page 82: ... Quick reference When the cable length is longer than 100 m the max size for wires used in the R C case is 0 5 mm2 Connect them to wires of larger size near the outside of R C When wires are connected take measures to prevent water etc from entering inside 200 m 0 5 mm2 x 2 cores 300m 0 75 mm2 x 2 cores 400m 1 25 mm2 x 2 cores 600m 2 0 mm2 x 2 cores For the installation method embedding wiring or ...

Page 83: ...d from front 37 23 23 固定穴 18 3 83 5 120 19 120 37 23 23 19 120 Fixing holes 83 5 120 18 3 PCB side Viewed from rear 8 50 200 壁 電線管 ロ ッ クナッ ト スイ ッ チ ボ ッ クス パテで シール する こ と リ モコ ン配線 下ケース配線穴 ブッ シング センサー USB 端子 Wall Conduit Sensor USB port Terminal block Locknut Bushing Switch box Seal with putty R C cable se at 2 places on the switch box Switch box for 1 pcs Switch box for 2 pcs 配線取出口 下 上 下ケース 下 上 下ケー...

Page 84: ...ugh the remote control case Take care not to pinch the sheath T If the wire is connected using an electric driver it may cause failure or deformation In case of exposing wiring When the wiring is taken out from the upper center or upper left of R C Cut out the thin wall sections on the cases for the size of wire screws In case of the upper center pass the wiring behind the bottom case Hatched sect...

Page 85: ...ata Error display Error history Display erase anomaly data Reset periodical check Saving IU settings Special settings Erase IU address CPU reset Restore of default setting Touch panel calibration Indoor unit capacity display Indoor unit R C Main R C Sub R C cable No polarity Advice Connection to personal computer It can be set from a personal computer via the USB port mini B Connect after removing...

Page 86: ...r knife and grind burrs with a file etc Install the lower case to the flat wall with attached two wooden screws Connect the remote control cord to t terminal block Connect the terminal of remote cont with the terminal of indoor unit X Y X and Y are no polarity Wiring route is as shown in the right depending on the pulling out directio The wiring inside the remote control The sheath should be peele...

Page 87: ...crews Connect the remote control cord to the terminal block Connect the terminal of remote control X Y with the terminal of indoor unit X Y X and Y are no polarity Wiring route is as shown in the right diagram depending on the pulling out direction The wiring inside the remote control case should be within 0 3mm2 recommended to 0 5mm2 The sheath should be peeled off inside the remote control case ...

Page 88: ...ication changes to FUNCTION SET 2 Press button once and change to the TEMP RANGE indication 3 Press SET button and enter the temperature range setting mode 4 Select UPPER LIMIT or LOWER LIMIT by using button 5 Press SET button to fix 6 When UPPER LIMIT is selected valid during heating Press SET button to fix Indication example UPPER 26 C Displayed for two seconds After the fixed upper limit value ...

Page 89: ...o be reset producing 1 0 C increase in return air temperature of indoor unit To be reset producing 1 0 C increase in return air temperature of indoor unit To be reset producing 1 5 C increase in return air temperature of indoor unit To be reset producing 2 0 C increase in return air temperature of indoor unit When heating thermostat is OFF fan speed is low speed When heating thermostat is OFF fan ...

Page 90: ...Set as the same procedure if you want to set continuously and if to finish go to 7 Press ON OFF button Setting is finished Indication is changed to 02 FAN SPEED SET Go to Note If plural indoor units are connected to a remote control the indication is I U 000 blinking The lowest number of the indoor unit connected is indicated No and function are indicated by turns on the indoor unit function table...

Page 91: ...red to arrange dedic All indoor units must be models designed excl if connected into the system will impair prope INSTALLATION MANUAL FOR OUTDOOR UNIT 2 REFRIGERANT PIPIN 1 Restrictions on unit insta 1 HAULAGE AND INST CAUTION When a unit is hoisted wit center position If not pro 1 Delivery Deliver the unit as close as possible to t the packaging When you have to unpack the unit for a installation...

Page 92: ...s which can prevent inlet and outlet air of the unit Locations where short circuit of air can occur in case of multiple units installation Locations where strong air blows against the air outlet of outdoor unit Locations where something located above the unit could fall It can cause remarkable decrease in performance corrosion and damage of components malfunction and fire Use the prescribed pipes ...

Page 93: ...nly Drain elbow Heat pump type only Reducer set ø9 52 ø6 35 2 1 1 1 2 3 Check before installation work Q ty 2 REFRIGERANT PIPING WORK 1 Restrictions on unit installation and use Check the following points in light of the indoor unit specifications and the installation site Observe the following restrictions on unit installation and use Improper installation can result in a compressor failure or pe...

Page 94: ... the refrigerant pipes become extremely hot or extremely cold ing the operating condition and it can cause burn injury or frost injury t touch the suction or aluminum fin on the outdoor unit ay cause injury t put anything on the outdoor unit and operating unit ay cause damage the objects or injury due to falling to the object t use the unit for special purposes such as storing foods cooling ion in...

Page 95: ...efrigerant after servicing etc Do not hold the valve cap area with a spanner Use a torque wrench Wires for connecting indoor and outdoor units Exterior tape Gas piping Insulation Liquid piping Band accessory Pipe cover accessory Formula to calculate the volume of additional refrigerant required 7 Additional refrigerant charge Additional charge volume kg Main length m Factory charged volume x 0 020...

Page 96: ...ecifications shown in the above table are for units without heaters For units with heaters refer to the installation instructions or the construction instructions of the indoor unit Switchgear or Circuit breaker capacity which is calculated from MAX over current should be chosen along the regulations in each country The cable specifications are based on the assumption that a metal or plastic condu...

Page 97: ...arge volume per meter of pipe 0 025kg m ø9 52 ø12 7 12 6 ø9 52 ø15 88 12 6 0 06kg m FDT FDE FDU FDUM SRK Table of pipe size restrictions Please consult with our distributor in the area if you need to recover refrigerant and charge it again Any combinations of pipe sizes not listed in the table are not usable Wires for connecting indoor and outdoor units Exterior tape Gas piping Insulation Liquid p...

Page 98: ...nd maintenance to electrical components shall include initial safety checks and component inspection procedures If a fault exists that could compromise safety then no electrical supply shall be connected to the circuit until it is satisfactorily dealt with If the fault cannot be corrected immediately but it is necessary to continue operation an adequate temporary solution shall be used This shall ...

Page 99: ...an is completely familiar with the equipment and all its detail It is recommended good practice that all refrigerants are recovered safely Prior to the task being carried out an oil and refrigerant sample shall be taken in case analysis is required prior to re use of reclaimed refrigerant It is essential that electrical power is available before the task is commenced a Become familiar with the equ...

Page 100: ...3 2 4 0 4 8 5 7 6 7 7 8 9 0 10 2 11 5 12 9 14 4 Wall mounted type 1 6 2 1 2 9 3 8 4 8 6 0 7 2 8 6 10 1 11 7 13 4 15 3 17 2 19 3 21 5 Refrigerant charge amount kg 5 0 5 5 6 0 6 5 7 0 7 5 8 0 8 5 9 0 9 5 10 0 10 5 11 0 11 5 12 0 minimum installation area m2 Ceiling mounted type 16 19 23 27 31 36 41 46 52 58 64 70 77 84 92 Wall mounted type 24 29 34 40 47 54 61 69 77 86 95 105 115 126 137 0 20 40 60 ...

Page 101: ...ak down or malfunction Do not modify the unit Be sure to turn OFF the power circuit breaker before repairing inspecting the unit Repairing inspecting the unit with the power circuit breaker turned ON could cause electric shocks or injury Do not install the unit in appropriate environment or where gas could generate in accumulate or leak If the unit is used at places where air contains dense oil mi...

Page 102: ...t the wiring of the receiver through the opening Put the wiring on the notch on the control box so as not to be pinched by the control box and lid as shown below Connect the wiring to the terminal block provided in the control box No polarity Attach the receiver to the panel according to the panel installation manual 1 2 Installation of the receiver SW1 Prevents interference during plural setting ...

Page 103: ...i Attach the receiv Fix the wiring wi Reattach the co 1 3 Refrigerant pipes Drain pipe The receiver can be installed by replacing with a corner panel on the applicable decorative panel Installation of t SW2 R SW3 SW4 Master Slave setting when using plural remote controls Preparation before installation Attach the decorative panel onto the air conditioner according to the installation manual for th...

Page 104: ...iring to the terminal block provided in the control box No polarity Attach the receiver to the panel according to the panel installation manual Fix the wiring with the clamp so that the wiring do not contact the edge of control box s metal sheet Reattach the control box lid with 3 screws removed 1 3 4 2 Terminal block in the indoor unit control box Installation of the receiver SW2 slave setting ON...

Page 105: ...e battery compartment using nippers 3 Insert the batteries and attach the back lid Changing the remote control setting How to change the Auto Run setting The Auto Run mode is not available on the building air conditioning and gas heat pump series excluding the cooling heating free multi system When using the remote control to operate those models set the remote control to disable the Auto Run mode...

Page 106: ...ter sign display OFF 01 Filter sign display 180 hours 02 Filter sign display 600 hours 03 Filter sign display 1000 hours 04 Filter sign display Operation stop after 1000 hours have elapsed U P 00 Anti draft setting Disable 01 Anti draft setting Enable SILENT 00 Infrared sensor setting Motion sensor setting Disable 01 Infrared sensor setting Motion sensor setting Enable HI POWER 00 Infrared sensor ...

Page 107: ...receiver 300lux 2 Correlation betw and reachable a The drawing in between the re illuminance at control is ope condition of c the illuminance narrowed down 3 Installation tips Minimum distan of 300lux of illum Backup switch A Backup switch is when the operation control lost or con to operate as temp directly when oper 1 The air cond the condition point High fa position 2 The air cond the switch is...

Page 108: ...peration command with the wireless remote control unit while the backup switch on the receiver is depressed If the backup switch on the receiver is pressed during a test run it will end the test run If you cannot operate the unit properly during a test run please check wiring by consulting with inspection guides How to read the 2 digit display On the receiver of a wireless kit a two digit 7 segmen...

Page 109: ...ing or a wall Select a method according to the installation position Installation position A Direct installation onto the ceiling with wood screws Take out th Fit the upp Use this m 1 B Installat PJZ012D112 Master Slave setting when using plural remote controls Do It c 1 2 3 4 5 6 7 Switch A To change setting 1 Remove one screws located on the under of the receiver and detach the board 2 Change th...

Page 110: ...eceiver continued Take out the connector to the backside from the hole of the lower case putting through the wiring at Fit the upper case and the lower case and tighten the screws Use this method when installaing onto a gypsum board 7 to 18mm etc 1 2 B Installation with enclosed bracket 2D112 SW1 Prevents interference during plural setting ON Normal OFF Customized SW2 Receiver master slave setting...

Page 111: ...onnect the wiring to the power source of the terminal block If it is connected printed board will be damaged 1 3 Drill the receiver installation holes with the dimensions shown right at the ceiling position where wires can be connected A Direct installation onto the ceiling with wood screws 88mm H 101mm W B Installation with enclosed bracket 108mm H 108mm W 1 Drilling of the ceiling ceiling openin...

Page 112: ...rawing Insert the end of the installation fitting into the back of the ceiling from the opening and tighten the screws to fix the bracket onto the ceiling Pass the wiring from the rear side through the hole on the lower case Fit the lower case onto the bracket and fix the lower case to the bracket using the two installation holes shown above The other four holes are not used Follow step to for A to c...

Page 113: ...the indoor unit PCB from 000 to 127 so as not to duplicate Terminal block Receiver continued Receiv 5 Wood screw Cutting Holder for remote control Ensure the correct polarity when inserting Button Numb FAN SPEED MODE FILTER U P SILENT HI POWER Band enclosed Hole Lower case Cord clamp Wiring Fix with band Hole Upper case Lower case A p p r o x 1 0 0 m m o r m o r e C Exposed installation Use the fo...

Page 114: ... Standard ON TIMER 00 Cooling fan residual period running Disable 01 Fun speed setting Setting 1 01 Cooling fan residual period running 0 5 hours 02 Fun speed setting Setting 2 02 Cooling fan residual period running 2 hours MODE 00 Room heating temperature adjustment Disable 03 Cooling fan residual period running 6 hours 01 Room heating temperature adjustment 1 C OFF TIMER 00 Heating fan residual ...

Page 115: ...ed on ceiling 1 Standard reachable area of the signa Condition Illuminance at the receiver 300lux when no lighting is installed within 1m of the receiver in an ordinary office l Receiver Ceiling surface Ceiling surface Floor Floor Orientation of receiver Receivable area of the signal Receivable area of the signal Orientation of receiver 2 Correlation between illuminance at the receiver and reachabl...

Page 116: ...peration command with the wireless remote control unit while the backup switch on the receiver is depressed If the backup switch on the receiver is pressed during a test run it will end the test run If you cannot operate the unit properly during a test run please check wiring by consulting with inspection guides How to read the 6 digit display A 6 digit indicator 7 segment indicator is provided on...

Page 117: ... is not strong enough the unit may drop and cause injury Be sure to have the electrical wiring work done by qualified electrical installer and use exclusive circuit Power source with insufficient and improper work can cause electric shock and fire Shut OFF the main power source before starting electrical work Otherwise it could result in electric shocks break down or malfunction Do not modify the ...

Page 118: ... insect etc enters through the hole it could cause electric shocks fire or break down CAUTION Please make sure that you have all of the following accessories How to connect the wiring for control box Preparation before installation Setting on site PCB on the receiver has the following switches to set the function Default setting is shown with mark wo receiver 012D635 SW1 Prevents interference duri...

Page 119: ...ver or wired remote control can be installed in one indoor unit group When two receiver or wired remote control are used it is necessary to change switch on the PCB to set it as slave How to install the receiver Connect The receiver can be installed by replacing with a cover of the panel CAUTION When installing the receiver after unit has been fixed injury due to falling may result because of work...

Page 120: ...ion is unnecessary for indoor unit that have wiring is already connected from the signal terminal block to the receiver How to connect the wiring for control box o receiver remote can be in one nit group wo receiver remote are used it sary to switch on to set it as OFF Invalid er Slave ng when g plural e controls Wiring from receiver C L 3P Whire X White Y Black Attached wiring Signal terminal blo...

Page 121: ...e MODE button Note Once the batteries are removed the setting is reset to the factory default e v o b a d e b i r c s e d s p e t s e h t t a e p e r d e v o m e r e r a s e i r e t t a b e h t n e h W Indoor function settings 1 How to set indoor functions Press the ON OFF button to stop the unit Press the desired one of the buttons shown item 2 while holding down the FUNCTION SETTING switch Use t...

Page 122: ...Filter sign display Operation stop after 1000 hours have elapsed U P Up Down 00 Anti draft setting Disable 01 Anti draft setting Enable SILENT 00 Infrared sensor setting Motion sensor setting Disable 01 Infrared sensor setting Motion sensor setting Enable HI POWER 00 Infrared sensor control Motion sensor control Disable 01 Infrared sensor control Motion sensor control Power control only 02 Infrare...

Page 123: ...ol Up to two receivers can be installed in one indoor unit group Wireless rem Backup swi A backup switch section of the p When operation unit is not possi unit a unit failur means You sho If pressed w will cause t in the autom only in the Wind spee Louver ho If pressed Cooling test After safety Transmit a c on the receiv If the backup If you canno inspection g How to read A two digit indi An indic...

Page 124: ...n guides How to read the two digit display A two digit indicator 7 segment indicator is provided on the receiver section An indication will be displayed for one hour after power on An indication appears for 3 5 seconds when a Stop command is sent from the wireless remote control unit while the air conditioner is not running An indication appearing in 1 or 2 above will go off as soon as the unit st...

Page 125: ...case the cover needs to be detached protect the motion sensor with a packaging or bag In order to keep it away from water and dust 1 Places exposed to direct sunlight 2 Places near heat devices 3 High humidity places 4 Hot surface or cold surface enough to generate condensation 5 Places exposed to oil mist or steam directly 6 Places affected by the direct air flow of the Indoor unit 7 Places where...

Page 126: ... to the installation manual for the panel 2 Remove the inlet grille 3 Remove the corner lid A located on the panel 4 Loosen 2 screws for the control lid It is unnecessury to remove the screws 5 Slide the control lid and open and remove it Preparation before installation Hight of the ceiling 2 7 about 4 5 about 6 4 3 5 about 6 4 about 8 3 4 0 about 7 6 about 9 5 Detectable scope Detectable scope Re...

Page 127: ... through the opening of the panel Hang the wiring on the hook which is on the panel s inside Pass the wiring through the opening of the control box Connect the connecter to CNL 3P Black on PWB in the contorl box Tighten the bolts which fix the panel Install the motion sensor on the panel Fix the motion sensor by the screw Reinstall the control lid and tighten 2 screws 6 126 ...

Page 128: ...nstalled Set the function of the motion sensor by the wired or wireless remote control Refer to the manual instruction of each remote control for the setting procedure Note It is not possible to set by the following remote control models or older Wired RC EX1A RC E5 RCH E3 Wireless RCN E1R 127 ...

Page 129: ... as not to apply unexpected stress on the PCB Loose connection or hold will cause abnormal heat generation or fire Make sure the power source is turned off when electric wiring work Otherwise electric shock malfunction and improper running may occur WARNING CAUTION Attention Accessories Installing the motion sensor Please make sure that all components are in the package ø Please prepare a relay wi...

Page 130: ...the angle of about 100 degrees Height of the ceiling h m 2 7 3 5 4 0 Detectable area φ A m 4 5 6 4 7 6 Detectable area φ B m 6 4 8 3 9 5 The detectable area 0 8 h φA φB Ceiling plane Floor face Side of screws for fixing the case Installing the motion sensor There are the following 3 methods to install the motion sensor on the ceiling plane or wall surface hereinafter called ceiling plane Select th...

Page 131: ...hole Screws Installing hole Using a crimping terminal etc connect the same color to the relay wiring prepare on site and the wiring of motion sensor Relay wiring Wiring from the motion sensor Connect wirings with the same colors White Red Black White Sensor board Red Black Place the connecting part inside of the ceiling space Seal the wiring hole on the lower case with putty Taking care not to pin...

Page 132: ...o the relay wiring prepare on site and the wiring of motion sensor The same as of Option A Taking care not to pinch the wirings slip the upper case into the lower case and tighten the screws The same as of Option A Seal the cut part at Step with putty Option C Set up the switch box and relay wiring prepare on site in advance Seal the relay wiring inlet with putty Lower case Upper case Thinner part...

Page 133: ...site and the attached wiring 2 Remove the control box cover from the indoor unit Connect CnG connector 4P blue to the PCB Connect CnV2 connector 4P black to the PCB Relay wiring Connect wirings with the same colors White Red Black White Red Black Attached wiring to CnG connector 4P blue Connect the same color to the relay wiring prepare on site and the wiring of motion sensor The same as of Option...

Page 134: ...lled Set the function of the motion sensor by the wired or wireless remote control Refer to the manual instruction of each remote control for the setting procedure Note It is not possible to set by the following remote control models or older Wired RC EX1A RC E5 RCH E3 Wireless RCN E1R Setting the motion sensor Relay wiring prepare on site Connect wirings with the same colors White Red Black White...

Page 135: ... or bag In order to keep it away from water and dust Insert a too paintwork o Connect th connector correct dire CAUTION Do n Connect th and black Fix the wirin Connect Cn Connect Cn Install the m Place the c motion sen CAUTION Con In c pan This manual describes how to install the motion sensor kit Instruct the customer how to operate it correctly referring to the instruction manual For the install...

Page 136: ... activity area Use the separate motion sensor when using both wireless remote control and motion sensor together Motion sensor Height of the ceiling h m 2 7 3 5 4 0 Detectable area A m 2 9 3 9 4 5 Detectable area φ A m 4 5 6 4 7 6 Detectable area B m 3 9 4 8 5 4 Detectable area φ B m 6 4 8 3 9 5 φB Ceiling plane 0 8 h A φA Floor face B Wall surface The motion sen Set the function Refer to the ma N...

Page 137: ...ack to the PCB Connect the wiring 3P white Attached wiring to the indoor unit Clips Clip CnG connector 4P blue CnV2 connector 4P black Connector 3P white Clip Control box Attached wiring to the motion sensor kit Wiring from the motion sensor Install the motion sensor Place the connector under the panel and install it to the panel with careful attention to the direction of the motion sensor CAUTION...

Page 138: ...ocedure Note It is not possible to set by the following remote control models or older Wired RC EX1A RC E5 RCH E3 Wireless RCN E1R Connect the wiring 3P white Attached wiring to the indoor unit Clips Clip CnG connector 4P blue CnV2 connector 4P black Connector 3P white Clip Control box Attached wiring to the motion sensor kit Wiring from the motion sensor Install the motion sensor Place the connec...

Page 139: ...n the message display Menu Direction Heating 20 20 Tue F1 High power F2 Energy saving Timer Power control ON Set temp Menu Direction Cooling 16 32 Mon F1 High power F2 Energy saving Timer In auto off mode Set temp Control s Refer to the Cooling 16 14 Mon F1 High power Timer Now stopping Infrared sensor control Se Disab Disab Select the item Power control Auto off 1 Indoor funct 1 How to set i Pres...

Page 140: ...ared sensor control screen and contents of the current settings are displayed Enable disable power control Enable disable auto off After you set each item tap the Set button The display returns to the Energy saving setting menu screen Infrared sensor control Set Back Enable Disable Enable Disable Select the item Power control Auto off 3 1 2 Indoor function settings 1 How to set indoor functions Pr...

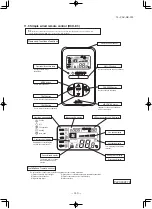
Page 141: ...ton Button to start stop the air conditioner FAN SPEED button Button to set the fan speed AIR CON No button Indicates the No of air conditioner which is connected MODE button Use to select the mode TEMP button Use to raise the setting temperature TEMP button Use to lower the setting temperature Operation mode display Indoor unit No display VRF series outdoor unit No display Central control display...

Page 142: ...tion 2 Maximum prolongation of remote control wiring is 600m If the prolongation is over 100m change to the size below But the wiring in the remote control case should be 0 3mm2 recommended to 0 5mm2 Change the wire size outside of the case according to wire connecting Waterproof treatment is necessary at the wire connecting section Be careful about contact failure Thin part The remote control wir...

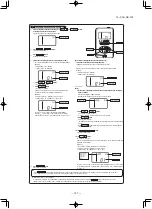
Page 143: ...ct failure 100 200m 0 5mm2 2 cores Under 300m 0 75mm2 2 cores Under 400m 1 25mm2 2 cores Under 600m 2 0mm2 2 cores SettheswitchSW1 1ofthe Note The remote control the Install the master rem The air conditioner op master slave setting 3 Master slave setting w Up to two remote control 4 The indication when po At the time of turning the becomes as shown below The number displayed on and this is not an...

Page 144: ...te control 5 Confirmation method for return air temperature Return air temperature can be confirmed by the remote control operation Press AIR CON No button for over 5 seconds 88 blinks on the temperature setting indicator 88 blinks for approximately 2 seconds while data is read Then the return air temperature is displayed Example return air temperature 27 C blinking Note For the return air tempera...

Page 145: ... control thermistor enabled offset temperature at 3 0 C 05 Ventilation setting 01 No ventilator connection 02 Ventilator links air conditioner In case of Single split series by connecting ventilation device to CNT of the indoor printed circuit board in case of VRF series by connecting it to CND of the indoor printed circuit board the operation of ventilation device is linked with the operation of ...

Page 146: ...unction number 07 lighting for 3 to 20 seconds Setting number 01 lighting for 3 to 20 seconds Then the screen goes back to the function number blinking indication if the setting is sequentially conducted continue with the same procedures If the setting is finished proceed to Stop air conditioner and simultaneously press AIR CON No and MODE buttons at the same time for over three seconds The functi...

Page 147: ...on or there is a danger of being entangled in the rotating parts and getting injured Clean the air filter regularly Be sure to entrust qualified serviceman to performance on the air filter Be sure to cut off the power and stop the unit before performing maintenance 1 Table of filter kit parts No and corresponding object models Small model Medium model Large model Single type 50 60 71 100 140 Multi...

Page 148: ...side 2 Install the rail on both inner sides of the duct with the screw 3 Install the air filter on the rails Installation procesure 4 Install the bracket on the rail with the screw PJZ012D076 When the unit is installed bottom side of the unit is located at the lower side Insulation Rail Screw Air filter Bracket Screw Insulation Duct Sticking standard position for insulation Insu Duct lation 3 Inst...

Page 149: ...ad these Safety precautions thoroughly before installation All the cautionary items mentioned below are important safety related items to be taken into consideration so be sure to observe them at all times Incorrect installation could lead to serious consequences such as death major injury or envirommental destruction Symbols used in these precautions After completed installation carry out trial o...

Page 150: ...cable length approximately 1 3m from the indoor unit Be sure not to extend the connection cable on site If the connection cable is extended malfunction may occur Fix the interface on the wall pillar or the like Cut out the punch outs for the connection cables running into the casing with cutter Recess the electrical box procured locally and connection cables in the wall Mount the lower casing of t...

Page 151: ...ssion prohibition mode switch OFF the DIP switch SW2 3 on the interface PCB Connection of Superlink E board Functions of CnT connector Switch ON the DIP switch SW2 2 Factory setting ON on the interface PCB Wiring connection between the interface and the Superlink E board Clamp the connection cables with cable clamps Regarding the connection of Superlink E board refer to the installation manual of ...

Page 152: ...control with reference to the attached installation manual of wired remote control B 0 3mm2 x 2 cores cable should be used for the wiring of wired remote control C Maximum length of wiring is 600m If the length of wiring exceeds 100m change the size of cable as mentioned below 100m 200m 0 5mm2 x 2 cores 300m or less 0 75mm2 x 2 cores 400m or less 1 25mm2 x 2 cores 600m or less 2 0mm2 x 2 cores How...

Page 153: ... 19 PAC DB 333 l l l l l l er central control SL4N AE BE to control l l A 11 6 Superlink E board SC ADNA E K K 152 ...

Page 154: ... 19 PAC DB 333 l l l l l l l l DIP 153 ...

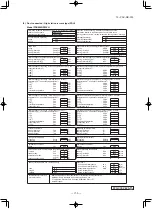
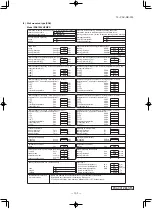
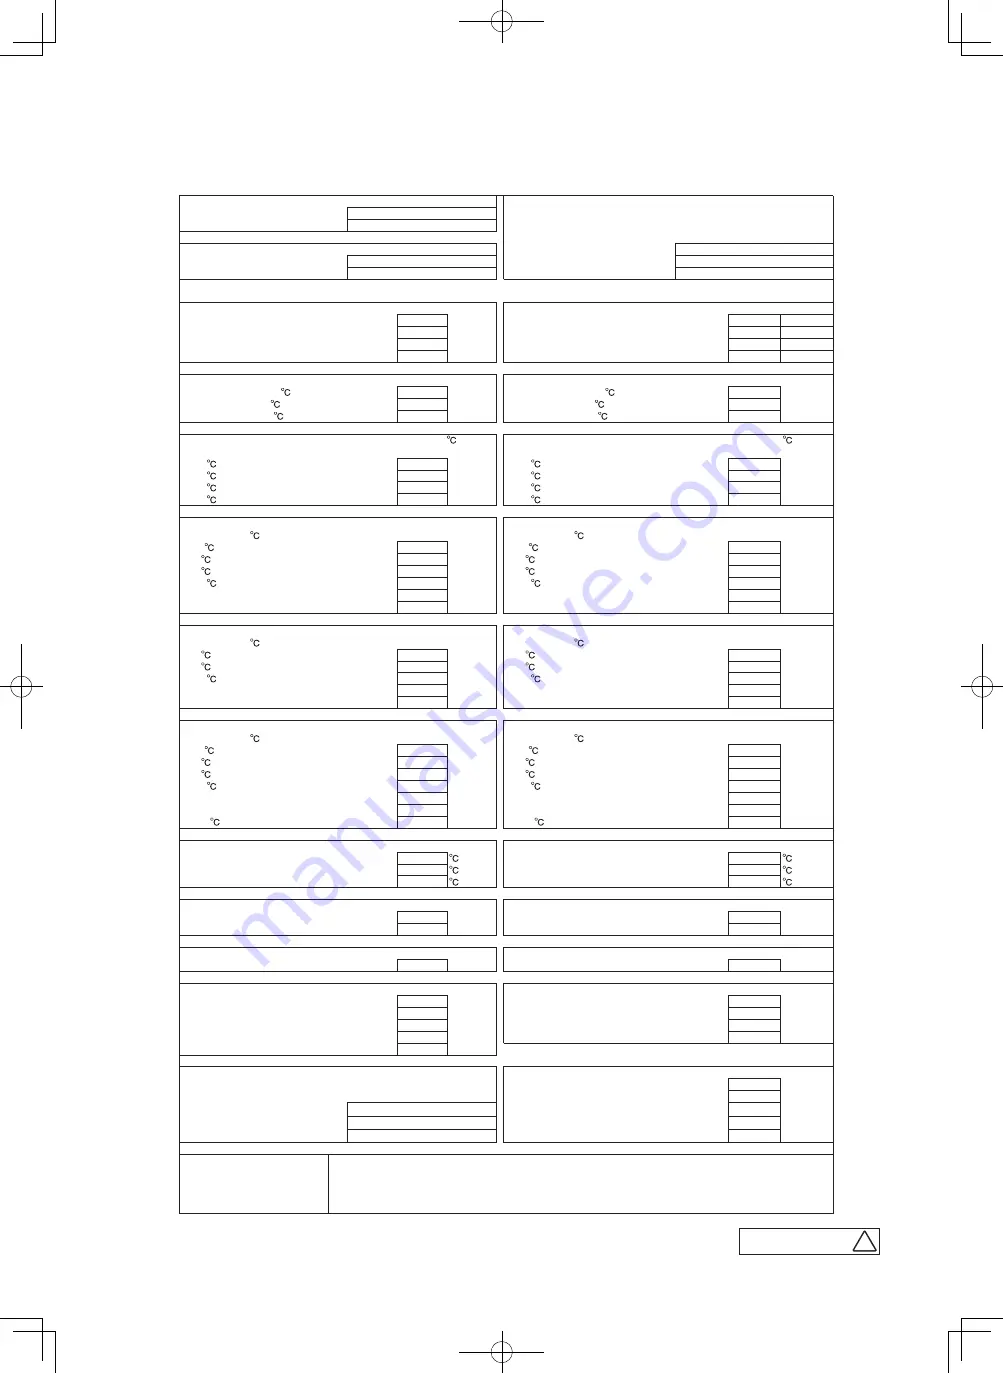
Page 155: ...mer season at indoor Declared coefficient of performance Warmer season at indoor temperature 20 and outdoor temperature Tj temperature 20 and outdoor temperature Tj Tj 2 Pdh kW Tj 2 COPd Tj 7 Pdh kW Tj 7 COPd Tj 12 Pdh kW Tj 12 COPd Tj bivalent temperature Pdh kW Tj bivalent temperature COPd Tj operating limit Pdh kW Tj operating limit COPd Declared capacity for heating Colder season at indoor Dec...

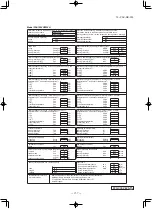
Page 156: ...lared capacity for heating Warmer season at indoor Declared coefficient of performance Warmer season at indoor temperature 20 and outdoor temperature Tj temperature 20 and outdoor temperature Tj Tj 2 Pdh kW Tj 2 COPd Tj 7 Pdh kW Tj 7 COPd Tj 12 Pdh kW Tj 12 COPd Tj bivalent temperature Pdh kW Tj bivalent temperature COPd Tj operating limit Pdh kW Tj operating limit COPd Declared capacity for heati...

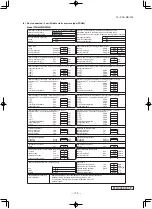
Page 157: ...ng Warmer season at indoor Declared coefficient of performance Warmer season at indoor temperature 20 and outdoor temperature Tj temperature 20 and outdoor temperature Tj Tj 2 Pdh kW Tj 2 COPd Tj 7 Pdh kW Tj 7 COPd Tj 12 Pdh kW Tj 12 COPd Tj bivalent temperature Pdh kW Tj bivalent temperature COPd Tj operating limit Pdh kW Tj operating limit COPd Declared capacity for heating Colder season at indo...

Page 158: ...lared capacity for heating Warmer season at indoor Declared coefficient of performance Warmer season at indoor temperature 20 and outdoor temperature Tj temperature 20 and outdoor temperature Tj Tj 2 Pdh kW Tj 2 COPd Tj 7 Pdh kW Tj 7 COPd Tj 12 Pdh kW Tj 12 COPd Tj bivalent temperature Pdh kW Tj bivalent temperature COPd Tj operating limit Pdh kW Tj operating limit COPd Declared capacity for heati...

Page 159: ...armer season at indoor Declared coefficient of performance Warmer season at indoor temperature 20 and outdoor temperature Tj temperature 20 and outdoor temperature Tj Tj 2 Pdh kW Tj 2 COPd Tj 7 Pdh kW Tj 7 COPd Tj 12 Pdh kW Tj 12 COPd Tj bivalent temperature Pdh kW Tj bivalent temperature COPd Tj operating limit Pdh kW Tj operating limit COPd Declared capacity for heating Colder season at indoor D...

Page 160: ...lared capacity for heating Warmer season at indoor Declared coefficient of performance Warmer season at indoor temperature 20 and outdoor temperature Tj temperature 20 and outdoor temperature Tj Tj 2 Pdh kW Tj 2 COPd Tj 7 Pdh kW Tj 7 COPd Tj 12 Pdh kW Tj 12 COPd Tj bivalent temperature Pdh kW Tj bivalent temperature COPd Tj operating limit Pdh kW Tj operating limit COPd Declared capacity for heati...

Page 161: ...for heating Warmer season at indoor Declared coefficient of performance Warmer season at indoor temperature 20 and outdoor temperature Tj temperature 20 and outdoor temperature Tj Tj 2 Pdh kW Tj 2 COPd Tj 7 Pdh kW Tj 7 COPd Tj 12 Pdh kW Tj 12 COPd Tj bivalent temperature Pdh kW Tj bivalent temperature COPd Tj operating limit Pdh kW Tj operating limit COPd Declared capacity for heating Colder seaso...

Page 162: ...lared capacity for heating Warmer season at indoor Declared coefficient of performance Warmer season at indoor temperature 20 and outdoor temperature Tj temperature 20 and outdoor temperature Tj Tj 2 Pdh kW Tj 2 COPd Tj 7 Pdh kW Tj 7 COPd Tj 12 Pdh kW Tj 12 COPd Tj bivalent temperature Pdh kW Tj bivalent temperature COPd Tj operating limit Pdh kW Tj operating limit COPd Declared capacity for heati...

Page 163: ...ty for heating Warmer season at indoor Declared coefficient of performance Warmer season at indoor temperature 20 and outdoor temperature Tj temperature 20 and outdoor temperature Tj Tj 2 Pdh kW Tj 2 COPd Tj 7 Pdh kW Tj 7 COPd Tj 12 Pdh kW Tj 12 COPd Tj bivalent temperature Pdh kW Tj bivalent temperature COPd Tj operating limit Pdh kW Tj operating limit COPd Declared capacity for heating Colder se...

Page 164: ...t we reserve the right to make changes in all specifications without notice INVERTER WALL MOUNTED TYPE RESIDENTIAL AIR CONDITIONERS Copyright MITSUBISHI HEAVY INDUSTRIES THERMAL SYSTEMS LTD Because of our policy of continuous improvement we reserve the right to make changes in all specifications without notice C MITSUBISHI HEAVY INDUSTRIES THERMAL SYSTEMS LTD 2 3 Marunouchi 3 chome Chiyoda ku Toky...

Reviews: