'10 • KX-SM-148
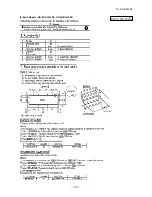
Indoor Unit
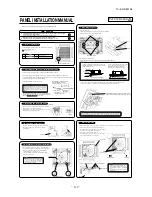
Ceiling surface
Level gauge
(inserted into the unit)
Ceiling opening
dimensions
20
+
4
0
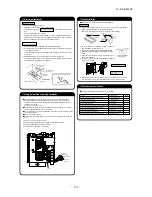
Keep the distance between 20~24mm.
Exceeding the range of distance
may cause failure etc.
①
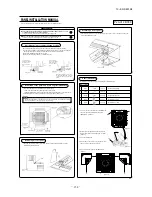
Before installation
③
Removing the air return grille
Accessories
Follow installation manual carefully, and install the panel properly.
Check the following items.
Accessories
Accessories holding position
Note: Accessories are laid in the position removing the corner panel.
1.
2.
④
Removing a corner panel
Corner panel
⑤
Orientation of the panel installation
Control box
Refrigerant pipes
Drain pipe
Caution
WARNING
Bolt
Strap
4 pieces
4 pieces
For panel installation
For avoiding the corner panel from falling
②
Checking the indoor unit installation position
for details.)
⑥
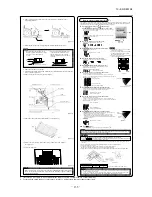
Attaching the panel
<Removal>
Stopper
Pull the corner panel toward the direction indicated by
the arrow and remove it. (Same way for all four
corner panels)
Take note that there is an orientation to install the panel.
Attach the panel with the orientation shown on the right.
CAUTION
PIPE SIDE
DRAIN
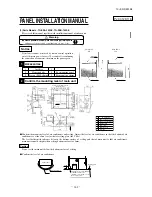
PANEL INSTALLATION MANUAL
Read this manual together with the indoor unit’s installation manual.
⑦
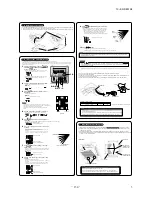
Electrical wiring
Unit’s hook
Panel’s fixing hanger
Hook
hanger
Screws of
Panel switch
control box cover
Refrigerant pipes
Drain pipe
Connector for louver motor (white) Clamps of unit main body
To Panel switch
CNV (red)
⑥
Attaching the panel
1. Temporary attaching
Lift up the hanger (2 places) on the panel for temporary support.
Hang the panel on the hook on the indoor unit.
2. Fix the panel on the indoor unit
Fasten the panel on the indoor unit with the four bolts supplied with the panel.
Caution
Improperly tightened hanging bolts can cause the
problems listed below, so make sure that you have
tightened them securely.
Air leakage
Air leakage along
the ceiling
Fouling
Dew condensation or dripping
Make sure no gap is left here.
Caution
Pipe Side
Drain
Horizontal 0°
43
Vertical airflow direction
Dimension L (mm)
Downwards 45°
26
It can be set between 26~43mm freely.
A
a
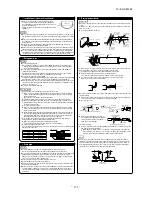
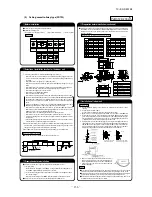
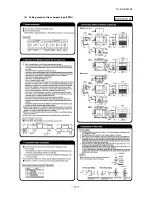
If it is necessary to fix the louver position manually, follow the procedure mentioned below.
1. Shut off the main power switch.
2.
3.
⑧
Attaching a corner panel
Louver motor
Louver
Louver motor
Connector
<Range of louver setting>
Caution
⑩
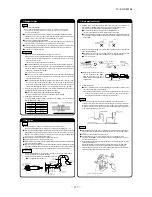
Attaching the air return grille
To attach the air return grille, follow the procedure described in in the reverse order.
1.
2.
③
Removing the air return grille
<Installation>
Closing direction
Position for hanging hinges
Caution
•
•
•
Attaching the
air return
grille from the hinge side.
Be careful in
air return
grille attaching, unstable attaching may cause grille falling.
Repair or replace the distorted, broken stopper at once, or the grille falling may occur.
PIPE SIDE
DRAIN
1
Stop the air conditioner and press
SET
button and
LOUVER button simultaneously
for three seconds or more.
“
”
“
”
“
”
“
”
2
Press
S
or
T
button.(selection of indoor unit)
[EXAMPLE]
“
”
⇔
“
”
⇔
“
”
⇔
“
”
3
Press
SET button. (determination of
indoor unit)
[EXAMPLE]
“
”
“
”
“
”
4
Press
S
or
T
button. (selection of louver No.)
[EXAMPLE]
“
”
⇔
“
”
⇔
“
”
⇔
“
”
5
Press
SET button. (Determination of
louver No.)
[EXAMPLE] If No.1 louver is selected,
“
”
current upper limit position
6
Press
S
or
T
S
T
button. (selection of upper limit
position)
“
” (the most horizotal)
⇔
“
”
⇔
“
”
⇔
“
”
⇔
“
”
⇔
“
” (the most downwards)
⇔
“
” (return to the default setting)
2•4•6•8
1
10
3•5•7•9
No. 4
No. 2
No. 1
No. 3
bl
ort
no
C
ox
Louver No.
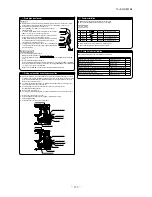
It is possible to change the movable range of the louver on the air outlet from the wired remote controller. Once the top and bottom position
is set, the louver will swing within the range between the top and the bottom when swing operation is chosen. It is also possible to apply
different setting to each louver.
NOTICE
•
(downwards)
(horizontal)
the position of the louver
7
Press
SET button (Fixing of the upper
limit position)
[EXAMPLE]
8
Press
or
button (Selection of lower limit
position)
9
Press
SET button (Fixing of the lower limit
position)
[Example]
(displayed for two seconds)
10
Press
button.
ATTENTION
Lower
position
Movable
range
Upper
position
When plural remote controllers are connected, louver setting operation cannot be set by slave remote controller.
Caution
Fasten the wiring to the terminal securely and hold the cable securely so as not to apply
unexpected stress on the terminal.
Loose connection or hold will cause abnormal heat generation or fire.
Make sure the power supply is turned off when electric wiring work.
Otherwise, electric shock, malfunction and improper running may occur.
Read this manual together with the air conditioner installation manual carefully.
Check if the opening size for the indoor unit is correct with the level gauge supplied in the indoor unit.
Check if the gap between the ceiling plane and the indoor unit is correct by inserting the level gauge into the air
outlet port of the indoor unit. (See below drawing)
Adjust the installation elevation if necessary.
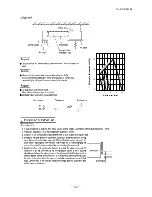
If there is a height difference beyond the design limit
between the installation level of the indoor unit and the
ceiling plane, the panel may be subject to excessive
stress during installation, it may cause distortion and
damage.
Align the “PIPE SIDE” mark (on the panel) with the
refrigerant pipes on the indoor unit.
Align the “DRAIN” mark (on the panel) with the drain
pipe on the indoor unit.
In case the orientation of the panel is
not correct, it will lead to air leakage
and also it is not possible to connect
the louver motor wiring.
If there is a gap remaining between the ceiling
and the decorative panel even after the
hanging bolts are tightened, adjust the
installation level of the indoor unit again.
It is possible to adjust the installation height of the indoor unit with the panel attached as long
as there is no influence on the drain pipe inclination and/or the indoor unit levelness.
To adjust finely, please turn a nut fastening the indoor unit
using a spanner or similar tool from the opening on the corner.
Make sure there is no stress given on the panel when adjusting the height of the indoor
unit to avoid unexpected distortion. It may cause the distortion of panel or failing to
close the air return grille.
1. To avoid unexpected falling of the corner panel, put the strap onto the corner panel’s pin with turning the strap up.
2. Then hang the strap of a corner panel onto the decorative panel’s pin.
3. First insert the part “a” of a corner panel into the part “A” of the decorative panel, and then engage four hooks.
Pin
Pin
For FDT type, in case the louver No to be set is uncertain, set any louver
temporarily. The louver will swing once when the setting is completed and it
is possible to confirm the louver No and the position.
After that, choose the correct louver No and set the top and bottom
position.
The louver No. to be set is confirmed and the display shows the upper limit of the movable range.
“position --” is to return to the factory setting. If you need to
change the setting to the default setting, use “position --”.
(displayed for two seconds)
(shows current setting)
⑨
How to set the airflow direction
•
After the setting is completed, the louver which was set moves
from the original position to the lower limit position, and goes
back to the original position again. (This operation is not
performed if the indoor unit and/or indoor unit fan is in operation.)
Upper limit position and lower limit position are fixed, and the set
positions are displayed for two seconds, then setting is completed.
If the upper limit position number and the lower limit position number are set to the same position, the louver is fixed at that
position auto swing does not funtion.
If you press
RESET button during settings, the display will return to previous display. If you press
button during settings, the mode will be ended and return to original display, and the settings that have not been
completed will become invalid.
Unplug the connector of the louver motor which you want to fix the position. Make sure to insulate unplugged
connectors electrically with a vinyl tape.
Adjust the louver position slowly by hand so as to be within the applicable range mentioned below table.
Any automatic control or operation from the remote controller will be disabled on the louver whose
position is fixed in the above way.
Do not set a louver beyond the specified range. Failure to observe this instruction may result in
dripping, dew condensation, the fouling of the ceiling and the malfunctioning of the unit.
Piping side
Drain hose side
•
•
•
•
•
•
•
•
•
•
•
•
•
•
•
•
•
•
•
•
•
PJF012D003A
A
The installation level of the indoor unit can be adjusted finely
from the opening provided on the corner, even after panel is attached.
(Refer to
Select the lower limit position of louver.
“position 1” is the most horizontal, and “position 6 ” is the most
downwards.
“position --” is to return to the factory setting. If you need to
change the setting to the default setting, use “position --”.
The upper limit position is fixed and the setting position is
displayed for two seconds. Then proceed to lower limit position
selection display.
Select the upper limit of louver movable range.
“position1” is the most horizontal, and “position 6” is the most
downward.
(the most horizontal)
(the most horizontal)
(return to the default setting)
Louver adjusting mode ends and returns to the original display.
Hang the hooks of the air return grille in the hole of the panel. (The hooks of the grille can be hanged in three side
of the panel as following.)
After the grille is hanged, close the grille while the stoppers on the grille (2 places) are kept pressed to “OPEN”
direction. When the grille comes to the original position, release the stoppers to hold the grille. Make sure to hear the
sound of “CLICK” in both stoppers.
Hold the stoppers on the air return grille (2 places) toward
OPEN direction, open the air return grille.
Remove the hooks of the air return grille from the decorative
panel while it is in the open position.
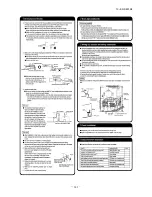
1. After removing three screws of control box, detach the cover of control box (the hatched part).
2. Connect the connector for louver motor (white 20P).
•
Hold the wiring by using the clamps of the indoor unit.
•
Hold the connector inside the control box.
3. Connect the connector for panel switch.
•
Hold the wiring by using the clamps of the indoor unit.
•
Connect CNV (red) inside the control box.
Control box
Panel switch
The grill may be
installed at one of
these three sides.
The grill cannot be
installed at this side.
Select the indoor unit of which the louver is set.
Select the louver No. to be set according to the right figure.
Selected indoor unit is fixed.
(displayed for two seconds)
The following is displayed if the number of the indoor units
connected to the remote controller is one. Go to step
4
.
The following is displayed if the number of the indoor units
connected to the remote controller are more than one
CAUTION
If the air return grill is opened, the
panel switch is turned off so that the
air-conditioner cannot be operated any
more.
To start the air conditioner, close the
air return grill.
•
•
-
130
-
*
• This function is not able to be set with wireless remote controls or simple remote control (RCH-H3).
• For setting the swing range of other louvers, return to 1 and proceed same procedure respectively.
Summary of Contents for KX6 series
Page 106: ... 104 10 KX SM 148 Models FDC335KXE6M FDCS335KXE6M PCB003Z185 ...
Page 108: ... 106 10 KX SM 148 2 Ceiling cassette 4 way Compact type FDTC Models All moddels A PJA003Z341 ...
Page 111: ... 109 10 KX SM 148 b Duct type Models All models PJC001Z281 ...
Page 112: ... 110 10 KX SM 148 5 Ceiling cassette 1 way type FDTS Model FDTS45KXE6D B PJC001Z195 ...
Page 113: ... 111 10 KX SM 148 Model FDTS71KXE6D B PJC001Z196 ...
Page 116: ... 114 10 KX SM 148 Models FDUM112KXE6D 140KXE6D C PJR002Z259 ...
Page 120: ... 118 10 KX SM 148 Model FDK71KXE6D PHA001Z030 ...
Page 122: ... 120 10 KX SM 148 Models FDE71KXE6D 112KXE6D 140KXE6D C PFA003Z827 ...
Page 123: ... 121 10 KX SM 148 12 Floor standing 2 way type FDFW Models All models A PGF000Z004 ...
Page 127: ... 125 10 KX SM 148 5 APPLICATION DATA 5 1 Installation of indoor unit PJF012D016 a ...
Page 128: ... 126 10 KX SM 148 PJF012D016 A 1 Ceiling cassette 4way type FDT ...
Page 129: ... 127 10 KX SM 148 ...
Page 130: ... 128 10 KX SM 148 ...
Page 141: ... 139 10 KX SM 148 4 Ceiling cassette 1way compact type FDTQ PJC012D121 ...
Page 142: ... 140 10 KX SM 148 ...
Page 143: ... 141 10 KX SM 148 ...
Page 146: ... 144 10 KX SM 148 2 Parts Models QR PNA 14W ER QR PNB 14W ER PJC012D102 h ...
Page 148: ... 146 10 KX SM 148 ...
Page 149: ... 147 10 KX SM 148 5 Ceiling cassette 1way type FDTS PJC012D016 ...
Page 150: ... 148 10 KX SM 148 ...
Page 151: ... 149 10 KX SM 148 ...
Page 152: ... 150 10 KX SM 148 6 Duct connected High static pressure type FDU PJD012D053 ...
Page 153: ... 151 10 KX SM 148 ...
Page 154: ... 152 10 KX SM 148 ...
Page 158: ... 156 10 KX SM 148 8 Duct connected thin Low static pressure type FDUT PJM012D032 B ...
Page 159: ... 157 10 KX SM 148 ...
Page 160: ... 158 10 KX SM 148 ...
Page 161: ... 159 10 KX SM 148 9 Duct connected Compact and Flexible type FDUH PJC012D207 a ...
Page 163: ... 161 10 KX SM 148 ...
Page 164: ... 162 10 KX SM 148 PHA012D039 10 Wall mounted type FDK ...
Page 165: ... 163 10 KX SM 148 ...
Page 166: ... 164 10 KX SM 148 ...
Page 170: ... 168 10 KX SM 148 PGF012D004 12 Floor standing 2 way type FDFW ...
Page 171: ... 169 10 KX SM 148 ...
Page 173: ... 171 10 KX SM 148 13 Outdoor air processing unit type FDU F PJD012D059 ...
Page 174: ... 172 10 KX SM 148 ...
Page 175: ... 173 10 KX SM 148 ...
Page 184: ... 10 KX SM 148 182 ...
Page 212: ... 210 10 KX SM 148 2 model type DIS model type HEAD ...
Page 213: ... 211 10 KX SM 148 2 2 ...
Page 214: ... 212 10 KX SM 148 2 2 2 2 2 ...


