ADJUSTMENT AND OPERATION
13-2
1. Adjusting engine
1.1 Inspecting and adjusting valve clearance
Inspect and adjust the valve clearance when the engine is
cold.
1.1.1
Inspecting valve clearance
(1)
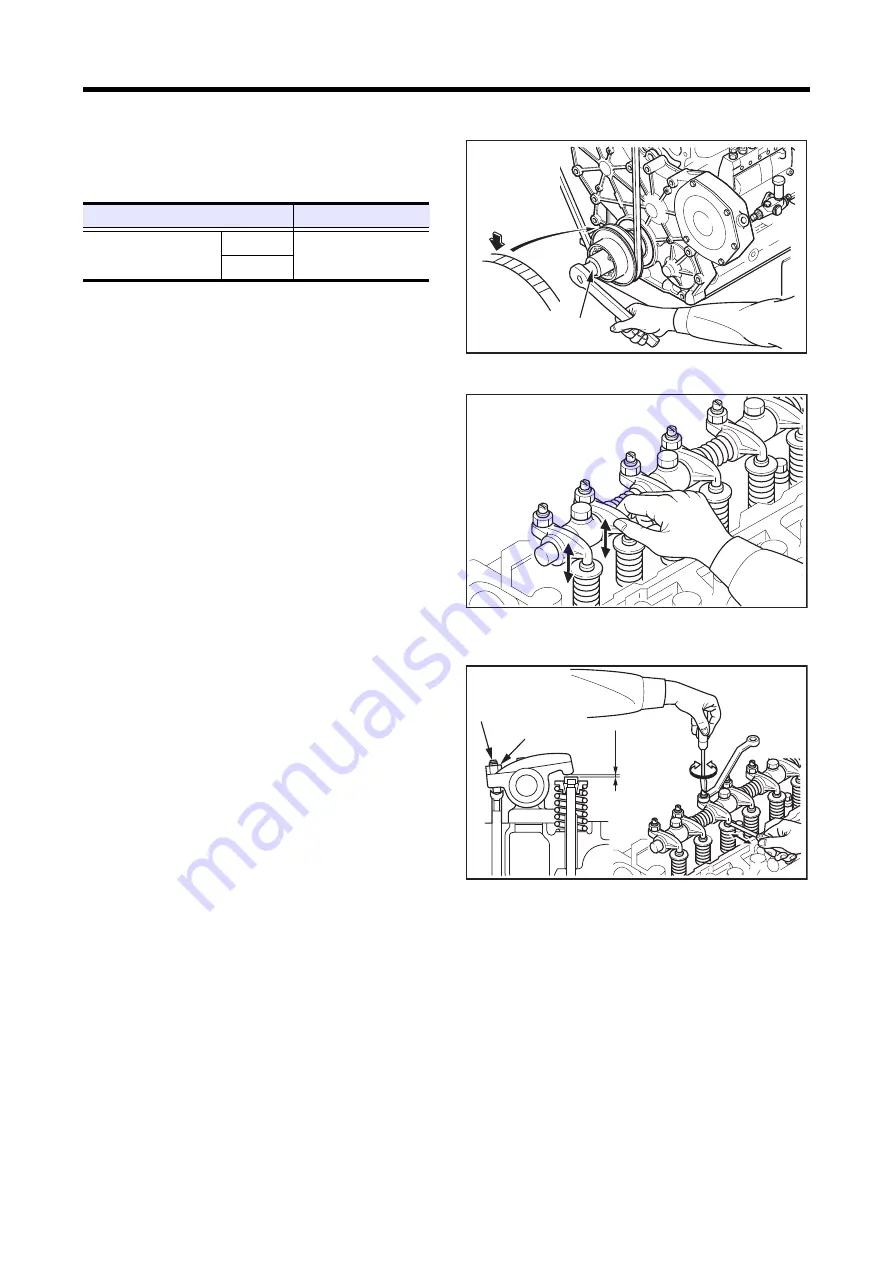
Inspect the valve clearance for all cylinders in the firing
order by turning the crankshaft to the specified degrees
in the normal direction (clockwise when viewed from
engine front side) to bring each piston to the top dead
center on the compression stroke.
Note: To turn the crankshaft, fit a socket and ratchet handle
on the crankshaft pulley nut.
(2)
When the No. 1 piston is at the top dead center on the
compression stroke, the "0" graduation mark on the
periphery of the crankshaft pulley is aligned with the
pointer on the timing gear case, and neither the inlet
valve nor the exhaust valve is not lifted off its seat by
the push rod.
(3)
Insert a thickness gauge between the rocker arm and
valve cap to inspect the clearance.
Turning engine
Determining top dead center of No.1 cylinder
compression stroke
1.1.2
Adjusting valve clearance
(1)
Insert the feeler gauge of the specified thickness
between the rocker arm and valve cap, then adjust the
clearance by turning the screw in either direction so that
the gauge is gripped softly between the rocker arm and
bridge cap.
(2)
After adjusting the clearance, tighten the lock nut
firmly, and inspect the clearance again.
Adjusting valve clearance
Item
Standard
Valve clearance
(when engine is cold)
Inlet
0.25 mm [0.0098 in.]
Exhaust
Turning socket
P/N:58309-73100
Firing order
(cylinder No.):
1-3-4-2
Turning angle:
180°
Adjusting screw
Lock nut
0.25 mm
[0.0098 in.]
20 ± 2 N·m
{2 ± 0.2 kgf·m}
[15 ± 1.4 lbf·ft]
Summary of Contents for S4S
Page 2: ......
Page 4: ......
Page 16: ......
Page 36: ......
Page 48: ......
Page 49: ...3 1 SERVICE TOOLS 1 Special tool 3 2 ...
Page 56: ......
Page 102: ......
Page 122: ......
Page 146: ......
Page 154: ...LUBRICATION SYSTEM 9 8 2 3 Reassembling oil pump Reassembling oil pump Flush Flush ...
Page 159: ...LUBRICATION SYSTEM 9 13 3 2 Installing oil cooler Installing oil cooler Replace Replace ...
Page 208: ...ELECTRICAL SYSTEM 12 30 3 2 Installing alternator 12V 50A Installing alternator 12V 50A ...
Page 220: ......


