-
12
-
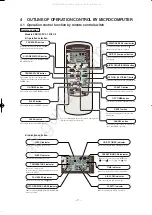
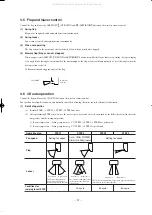
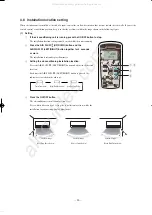
4.5 Flap and louver control
Control the flap and louver by AIRFLOW
(UP/DOWN) and
(LEFT/RIGHT) button on the wireless remote control.
(1)
Swing flap
Flap moves in upward and downward directions continuously.
(2)
Swing louver
Louver moves in left and right directions continuously.
(3)
When not operating
The flap returns to the position of air flow directly below, when operation has stopped.
(4) Memory flap (Flap or Louver stopped)
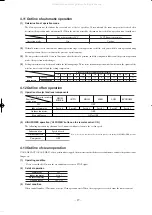
When you press the AIRFLOW (UP/DOWN or LEFT/RIGHT) button once while the flap or louver is operating, it stops swinging
at an angle. Since this angle is memorized in the microcomputer, the flap or louver will automatically be set at this angle when the
next operation is started.
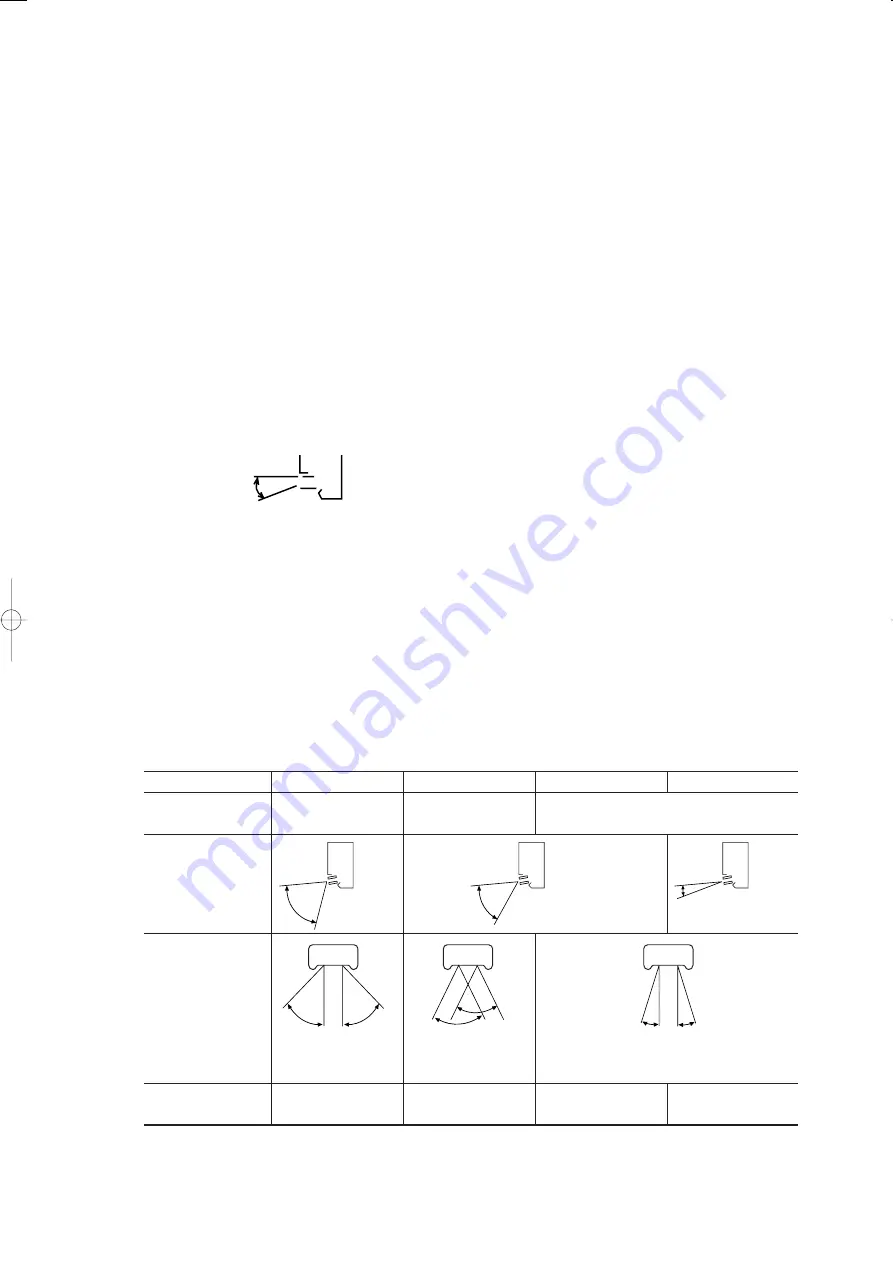
¡
Recommendable stopping angle of the flap
Horizontal
blowing
COOL•DRY
Operation step
Flap
Louver
Conditions for
jumping to next STEP
Fan speed
Setting fan speed
_
20 cycle
60 cycle
60 cycle
Auto : HIGH POWER
Other than Auto: Setting fan speed
Setting fan speed
STEP1
STEP2
STEP3
STEP4
Left louver
The left louver and right louver
operate in the same direction
left and right.
The left louver and right louver
operate in opposite directions to
each other on the left and right sides.
The left louver and right louver operate in opposite directions to
each other on the left and right sides.
Right louver
Left louver
Right louver
Left louver
Right louver
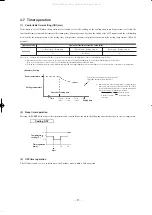
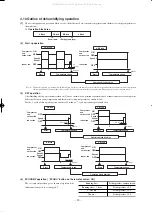
4.6 3D auto operation
Control the flap and louver by 3D AUTO button on the wireless remote control.
Fan speed and air flow direction are automatically controlled, allowing the entire room to efficiently conditioned.
(1)
Detail of operation
(a)
Perform STEP1
→
STEP2
→
STEP3
→
STEP4 one time.
(b)
After performing STEP4 in (a) above, the next steps to be carried out are determined by the difference between the room
temperature and the setting temperature.
1) Room temperature – Setting temperature > 5ºC: STEP2
→
STEP3
→
STEP4 are performed.
2) Room temperature – Setting temperature <
= 5ºC: STEP3
→
STEP4 are performed.
All manuals and user guides at all-guides.com

