-
-
'12•SRK-T-137
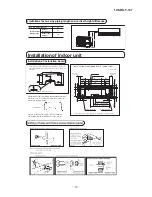
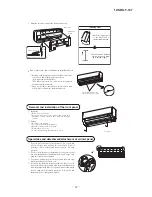
Preparation of indoor unit
Pipe
Drain hose
①
Mounting of connecting wires
ⓐ
Remove the lid.
ⓑ
Remove the wiring clamp.
ⓒ
Connect the connecting wire securely to the terminal block.
Use cable for interconnection wiring to avoid loosening of the
wires.
CENELEC code for cables Required field cables.
H05RNR3G1.5 (Example) or 245IEC57
H Harmonized cable type
05 300/500 volts
R Natural-and/or synth. rubber wire insulation
N Polychloroprene rubber conductors insulation
R Standed core
4or5 Number of conductors
G One conductor of the cables is the earth conductor (yel-
low/green)
1.5 Section of copper wire (mm
2
)
•
Connect the connection wire securely to the terminal block.
If the wire is not affixed completely, contact will be poor,
and it is dangerous as the terminal block may heat up and
catch fire.
•
Take care not to confuse the terminal numbers for indoor and
outdoor connections.
•
Affix the connection wire using the wiring clamp.
ⓓ
Fix the connecting wire by wiring clamp.
ⓔ
Attach the lid.
ⓕ
Close the air inlet panel.
For power supply, indoor outdoor
For power supply, indoor outdoor
1
Brown
2
Blue
②
Shaping the pipe
③
Taping of the exterior
•
Hold the bottom of the pipe and change its direc-
tion before stretching it and shaping it.
•
Tape only the portion that runs through the wall.
Always tape the crossover wires with the pipe.
④
Cautions when piping from the left and the rear center of the unit
[ Top View ]
•
Loosen and remove the
spring-type clamp.
•
Remove with your hand or
a pair of pliers.
•
Use a hexagonal wrench to
correctly insert the drain cap
which was removed in 2.
Caution: Be careful because
if the cap is not inserted
property, water leak may
occur.
•
Loosen the spring-type clamp
and securely insert the drain
hose.
Caution: Be careful because if
the drain hose is not inserted
properly, water leak may occur.
g
n
i
p
i
P
e
d
i
S
t
h
g
i
R
g
n
i
p
i
P
e
d
i
S
t
f
e
L
Right rear piping
Left rear piping
g
n
i
p
i
p
e
d
i
s
t
h
g
i
R
g
n
i
p
i
p
e
d
i
s
t
f
e
L
Left downward
Right
Rear
Downward Left rear
Left
Piping is possible in the rear,
left, left rear, left downward,
right or downward direction.
•
Do not place the power supply cords above the gutter, because the
air conditioner is structured in a way where condensation on the
back side is collected in to the drain pan before drainage.
•
Do not make traps in the drain hose line.
Declining slope
Inverted slipe
Trap
* Leave space to allow
removal of this screw
after installation.
[ Procedure for exchanging the drain hose ]
Wall
Gutter
Pipes storage area
Summary of Contents for SRK-13CMS-2
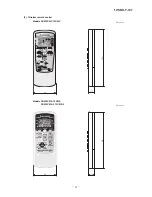
Page 46: ... 45 12 SRK T 137 3 Wireless remote control Unit mm 60 17 3 150 Unit mm 60 17 3 150 ...
Page 71: ... 70 12 SRK T 137 4 Troubleshooting procedure If the air conditioner runs NO YES 71 ...
Page 79: ... 78 12 SRK T 137 ...
Page 108: ... 107 12 SRK T 137 MEMO ...
Page 114: ... 113 12 SRK T 137 MEMO ...
Page 117: ... 116 12 SRK T 137 CRBE0290 6 11 9 10 13 14 3 15 12 2 4 8 7 5 1 7 7 PANEL FAN ASSY ...
Page 121: ... 120 12 SRK T 137 CRBE0290 6 11 9 10 13 14 3 15 12 2 4 8 7 5 1 7 7 PANEL FAN ASSY ...
Page 125: ... 124 12 SRK T 137 CRBE0290 6 11 9 10 13 14 3 15 12 2 4 8 7 5 1 7 7 PANEL FAN ASSY ...
Page 129: ... 128 12 SRK T 137 CRBE0290 6 11 9 10 13 14 3 15 12 2 4 8 7 5 1 7 7 PANEL FAN ASSY ...
Page 133: ... 132 12 SRK T 137 CRBE0290 6 11 9 10 13 14 3 15 12 2 4 8 7 5 1 7 7 PANEL FAN ASSY ...
Page 137: ... 136 12 SRK T 137 CRBE0290 6 11 9 10 13 14 3 15 12 2 4 8 7 5 1 7 7 PANEL FAN ASSY ...
Page 141: ... 140 12 SRK T 137 CRBE0221 12 16 17 1 2 3 5 6 7 8 9 10 13 16 14 15 4 11 PANEL FAN ASSY ...

