background image

-


-

'13•SRK-T-141

-

 1 

-

 '10 • SRK-T-099

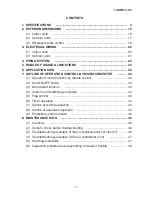
CONTENTS

    1.  SPECIFICATIONS

....................................................................................    4

(2)   Outdoor units

......................................................................................  17

(3)   Wireless remote control

......................................................................  19

........................................................................  15

(1)   Indoor units .........................................................................................  15

    2.  EXTERIOR DIMENSIONS

    3.  ELECTRICAL WIRING

.............................................................................  20

(1)   Indoor units .........................................................................................  20
(2)   Outdoor units

......................................................................................  21

.......................................................  24

    5.  RANGE OF USAGE & LIMITATIONS

    4.  PIPING SYSTEM

.....................................................................................  23

...............................................................................  26

    6.  APPLICATION DATA

    7.  OUTLINE OF OPERATION CONTROL BY MICROCOMPUTER

...........  40

(6)   Timer operation

.................................................................................  43

(5)   Flap control

.......................................................................................  43

......................................................  42

(4)   Custom cord switching procedure

........................................................................  42

(3)   Auto restart function

(2)   Unit ON/OFF button

..........................................................................  42

(1)   Operation control function by remote control

.....................................  40

(8)   Outline of automatic operation

..........................................................  44

(7)   Outline of cooling operation 

..............................................................  44

(9)   Protective control function

..................................................................  45

..............................................................................  46

....................  47

(4)   Troubleshooting procedure (If the air conditioner runs)

(3)   Troubleshooting procedure (If the air conditioner does not run at all)

.......  46

(1)   Cautions

............................................................................................  46

(2)   Items to check before troubleshooting ................................................  46

(5)   Self-diagnosis table

............................................................................  47

(6)   Inspection procedures corresponding to detail of trouble ...................  48

    8.  MAINTENANCE DATA

Summary of Contents for SRK05CM

Page 1: ...ECHNICAL MANUAL PARTS LIST WALL MOUNTED TYPE RESIDENTIAL AIR CONDITIONERS Split system air cooled cooling only type SRK05CM 05CM 3 SRK05CMP 3 SRK09CM 3 09CM 4 09CM 5 SRK09CMP 3 09CMP 4 SRK12CM 3 12CM 4 12CM 5 Manual No 13 SRK T 141 ...

Page 2: ... 13 SRK T 141 TECHNICAL MANUAL ...

Page 3: ...Flap control 43 42 4 Custom cord switching procedure 42 3 Auto restart function 2 Unit ON OFF button 42 1 Operation control function by remote control 40 8 Outline of automatic operation 44 7 Outline of cooling operation 44 9 Protective control function 45 46 47 4 Troubleshooting procedure If the air conditioner runs 3 Troubleshooting procedure If the air conditioner does not run at all 46 1 Cauti...

Page 4: ...served after shortcircuit wire breakage on sensor 49 How to read the model name Example SRK 05 C Series code Cooling only type Product capacity Model name SRK Wall mounted type SRC Outdoor unit MP 8 How to make sure of wireless remote control 50 ...

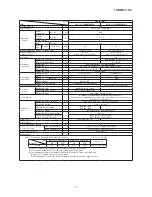
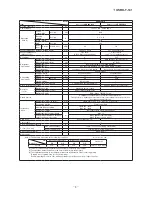
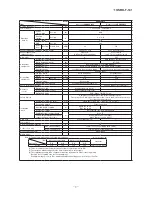
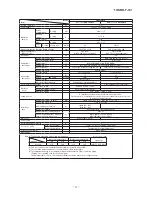
Page 5: ...Display RUN Green TIMER Yellow Safety devices Compressor overheat protection Overcurrent protection Frost protection Serial signal error protection Indoor fan motor error protection Cooling overload protection Installation data Refrigerant piping size O D mm Liquid line φ6 35 1 4 Gas line φ9 52 3 8 Connecting method Flare connecting Attached length of piping m Liquid line 0 46 Gas line 0 40 Insula...

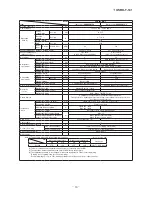
Page 6: ...tion Display RUN Green TIMER Yellow Safety devices Compressor overheat protection Overcurrent protection Frost protection Serial signal error protection Indoor fan motor error protection Cooling overload protection Installation data Refrigerant piping size O D mm Liquid line φ6 35 1 4 Gas line φ9 52 3 8 Connecting method Flare connecting Attached length of piping m Liquid line 0 46 Gas line 0 40 I...

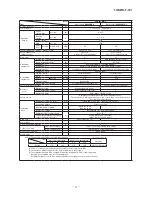
Page 7: ...Display RUN Green TIMER Yellow Safety devices Compressor overheat protection Overcurrent protection Frost protection Serial signal error protection Indoor fan motor error protection Cooling overload protection Installation data Refrigerant piping size O D mm Liquid line φ6 35 1 4 Gas line φ9 52 3 8 Connecting method Flare connecting Attached length of piping m Liquid line 0 46 Gas line 0 40 Insula...

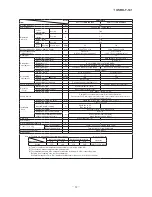
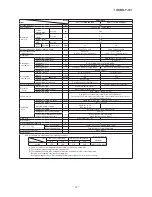
Page 8: ...isplay RUN Green TIMER Yellow Safety devices Compressor overheat protection Overcurrent protection Frost protection Serial signal error protection Indoor fan motor error protection Cooling overload protection Installation data Refrigerant piping size O D mm Liquid line φ6 35 1 4 Gas line φ9 52 3 8 Connecting method Flare connecting Attached length of piping m Liquid line 0 46 Gas line 0 40 Insulat...

Page 9: ...isplay RUN Green TIMER Yellow Safety devices Compressor overheat protection Overcurrent protection Frost protection Serial signal error protection Indoor fan motor error protection Cooling overload protection Installation data Refrigerant piping size O D mm Liquid line φ6 35 1 4 Gas line φ9 52 3 8 Connecting method Flare connecting Attached length of piping m Liquid line 0 46 Gas line 0 40 Insulat...

Page 10: ...isplay RUN Green TIMER Yellow Safety devices Compressor overheat protection Overcurrent protection Frost protection Serial signal error protection Indoor fan motor error protection Cooling overload protection Installation data Refrigerant piping size O D mm Liquid line φ6 35 1 4 Gas line φ9 52 3 8 Connecting method Flare connecting Attached length of piping m Liquid line 0 46 Gas line 0 40 Insulat...

Page 11: ...n Display RUN Green TIMER Yellow Safety devices Compressor overheat protection Overcurrent protection Frost protection Serial signal error protection Indoor fan motor error protection Cooling overload protection Installation data Refrigerant piping size O D mm Liquid line φ6 35 1 4 Gas line φ9 52 3 8 Connecting method Flare connecting Attached length of piping m Liquid line 0 46 Gas line 0 40 Insu...

Page 12: ...n Display RUN Green TIMER Yellow Safety devices Compressor overheat protection Overcurrent protection Frost protection Serial signal error protection Indoor fan motor error protection Cooling overload protection Installation data Refrigerant piping size O D mm Liquid line φ6 35 1 4 Gas line φ9 52 3 8 Connecting method Flare connecting Attached length of piping m Liquid line 0 46 Gas line 0 40 Insu...

Page 13: ...ration Display RUN Green TIMER Yellow Safety devices Compressor overheat protection Overcurrent protection Frost protection Serial signal error protection Indoor fan motor error protection Cooling overload protection Installation data Refrigerant piping size O D mm Liquid line φ6 35 1 4 Gas line φ12 7 1 2 Connecting method Flare connecting Attached length of piping m Liquid line 0 45 Gas line 0 41...

Page 14: ...ration Display RUN Green TIMER Yellow Safety devices Compressor overheat protection Overcurrent protection Frost protection Serial signal error protection Indoor fan motor error protection Cooling overload protection Installation data Refrigerant piping size O D mm Liquid line φ6 35 1 4 Gas line φ12 7 1 2 Connecting method Flare connecting Attached length of piping m Liquid line 0 45 Gas line 0 41...

Page 15: ...ration Display RUN Green TIMER Yellow Safety devices Compressor overheat protection Overcurrent protection Frost protection Serial signal error protection Indoor fan motor error protection Cooling overload protection Installation data Refrigerant piping size O D mm Liquid line φ6 35 1 4 Gas line φ12 7 1 2 Connecting method Flare connecting Attached length of piping m Liquid line 0 45 Gas line 0 41...

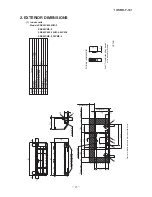
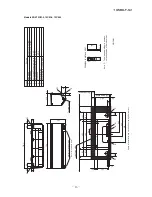
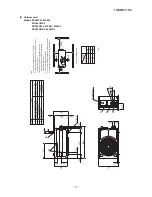
Page 16: ...ervice space 155 4 181 9 250 181 9 100 Service space 303 155 4 Unit 100 Service space 445 9 398 2 Installation plate Unit mm Wireless remote control Space for installation and service when viewing from the front Hole on wall for right rear piping Hole on wall for left rear piping Outlet for wiring Drain hose Liquid piping F E C D B Symbol φ65 VP16 φ6 35 1 4 Flare Content φ65 Outlet for piping on b...

Page 17: ...ng Drain hose Liquid piping F E C D B Symbol A φ65 VP16 φ6 35 1 4 Flare Content φ65 Outlet for piping on both side G φ12 7 1 2 Flare A B Note 1 The model name label is attached on the underside of the indoor unit 60 150 17 3 190 40 1 47 130 5 508 130 5 157 455 157 187 5 394 187 5 47 7 6 247 5 6 9 Service space 65 Service space 15 50 Service space 100 Service space 55 409 449 530 55 Installation pl...

Page 18: ...unit must be fixed with anchor bolts An anchor bolt must not protrude more than 15mm 3 Where the unit is subject to strong winds lay it in such a direction that the blower outlet faces perpendicularly to the dominant wind direction 4 Leave 1m or more space above the unit 5 A wall in front of the blower outlet must not exceed the unit height 6 The model name label is attached on the right side of th...

Page 19: ...nit must be fixed with anchor bolts An anchor bolt must not protrude more than 15mm 3 Where the unit is subject to strong winds lay it in such a direction that the blower outlet faces perpendicularly to the dominant wind direction 4 Leave 1m or more space above the unit 5 A wall in front of the blower outlet must not exceed the unit height 6 The model name label is attached on the right side of the...

Page 20: ... 19 13 SRK T 141 3 Wireless remote control Unit mm 60 17 3 150 Models All model Unit mm 60 17 3 150 ...

Page 21: ... 3 15A CONTROL BOX Back up Sw CNG CNM N 1 FM I T1 t t Th1 Th2 2 N L 1 Symbol Meaning of Marks Parts name Symbol Parts name Capacitor for CF I FM I FM ZNR FM I Fuse Fan motor Flap motor Varistor F Th2 T1 Room temp thermistor Heat exchanger thermistor Terminal block Th1 BK Color symbol BL Black Blue RD WH Red White BL WH BK Power source 220 230 240V 50Hz TO OUTDOOR UNIT U M FM ...

Page 22: ...OOR UNIT FMo BLACK ORANGE WHITE RED Cc ORANGE CFo ORANGE WHITE WHITE BLACK BLACK WHITE 1 2 T1 WHITE CM BLACK BLACK 51C 2 3 1 RED C S R T2 WHITE CAPACITOR L 1 2 N ORANGE Symbol Meaning of Marks Parts name Capacitor for CM Cc Capacitor for FMo CFo Compressor motor CM Fan motor FMo Motor protector for CM 51C Terminal block T1 T2 OUTDOOR UNIT ...

Page 23: ...or for CM Cc Capacitor for FMo CFo Compressor motor CM Fan motor FMo Terminal block T1 T2 Power source 220 240V 50Hz INDOOR UNIT BLACK ORANGE WHITE RED Cc ORANGE CFo ORANGE WHITE WHITE BLACK BLACK WHITE 1 2 T1 WHITE CM BLACK RED C S R T2 WHITE CAPACITOR L 1 2 N ORANGE OUTDOOR UNIT BLACK FMo ...

Page 24: ...ulator Service valve Gas Capillary tube ø9 52 Piping Gas Outdoor unit Indoor unit Room temp sensor Heat exchanger Flare connecting Heat exchanger sensor Piping Liquid ø6 35 Check joint Service valve Liquid Flare connecting Heat exchanger Compressor Capillary tube Accumulator Service valve Gas Capillary tube Piping Gas ø12 7 Models SRK05CM 05CM 3 SRK05CMP 3 SRK09CM 3 09CM 4 09CM 5 SRK09CMP 3 09CMP ...

Page 25: ...ay length Max 15m Max 5m Outdoor unit is higher Max 5m Outdoor unit is lower Min 3 minutes Max 10 times h Min 85 of rating Vertical height difference between outdoor unit and indoor unit Power source voltage Voltage at starting Frequency of ON OFF cycle ON and OFF interval Rating 10 14 16 18 20 22 15 20 25 30 35 40 0 6 0 7 0 8 0 9 1 0 1 1 1 2 1 3 43 24 ISO T1 Standard Condition Indoor air W B temp...

Page 26: ...refrigerant piping How to obtain the cooling capacity Model SRK05CM Piping length m Cooling 7 5 1 0 10 0 99 0 975 15 Models SRK05CM 3 SRK05CMP 3 SRK09CM 3 09CM 4 09CM 5 SRK09CMP 3 09CMP 4 SRK12CM 3 12CM 4 12CM 5 Piping length m Cooling 5 1 0 10 0 985 0 97 15 1500 SRK05CM SRK05CM 1463 ...

Page 27: ...improper connection or securing can result in heat generation or fire Take care that wiring does not rise upward and accurately install the lid service panel It s improper installation can also result heat generation or fire When setting up or moving the location of the air conditioner do not mix air etc or anything other than the designated refrigerant R22 within the refrigeration cycle Rupture and...

Page 28: ... the direct rays of the sun or the strong rays of the street lighting A place where it can be easily drained A place separated at least 1m away from the television or the radio To prevent interfence to images and sounds INDOOR UNIT Standard accessories Installation kit Accessories for indoor unit Q ty Installation board Attached to the rear of the indoor unit 1 Wireless remote control 1 Remote con...

Page 29: ...LATION SPACE INDOOR UNIT FRONT VIEW Unit mm Drilling of holes and fixture sleeve Option parts Drill a hole with Ø65 whole core drill Install the sleeve Adjusting sleeve length Note 1 Drill a hole with incline of 5 degree from indoor side to outdoor side Wall thickness 1 5 cm Cut off the sleeve collar that can be seen from beneath the unit Cut off the sleeve collar in case of drawing piping out to ...

Page 30: ...ping the pipe Taping of the exterior Hold the bottom of the pipe and change its direction before stretching it and shaping it Tape only the portion that runs through the wall Always tape the crossover wires with the pipe Cautions when piping from the left and the rear center of the unit Top View Remove the screw and pull the drain hose while twisting Remove it with hand or pliers Insert the drain ...

Page 31: ...it will be removed from the installation board Removal and installation of the front panel Set screws 1 Removing Remove the 2 set screws Move the lower part of the panel forward and push upwards to remove Remove the 3 latches in the upper section 2 Fitting Do remove the air lter Cover the body with the front panel Push the circled portion at the front Tighten the 2 set screws Fit the air lter Carr...

Page 32: ...or 15 minutes or more and check to see that the vacuum gauge reads 0 1 MPa 76 cmHg 4 After completing vacuum operation fully open service valve Both gas and liquid sides with hexagon headed wrench 5 Detach the charge hoses 6 Check for possible leakage of gas in the connection parts of both indoor and outdoor Remove the ared nuts on both liquid and gas sides Remove the ared nuts on both liquid and ...

Page 33: ...e piping so it will match the contours of the route that the piping to take Also fix the wiring and pipings to the wall with clamps Insulation Refrigerant piping Electrical wiring Covering tape Drain hose Tapping screw Uncover the remote control switch and mount the batteries R03 AAA Micro 2 pieces in the body regularly Fit the poles with the indication marks without fail Earth work shall be carrie...

Page 34: ...cted to the terminal connection part through properly securing it improper connection or securing can result in heat generation or fire Take care that wiring does not rise upward and accurately install the lid service panel It s improper installation can also result heat generation or fire When setting up or moving the location of the air conditioner do not mix air etc or anything other than the des...

Page 35: ...ed to the direct rays of the sun or the strong rays of the street lighting A place where it can be easily drained A place separated at least 1m away from the television or the radio To prevent interfence to images and sounds INDOOR UNIT Standard accessories Installation kit Accessories for indoor unit Q ty Installation board Attached to the rear of the indoor unit 1 Wireless remote control 1 Remot...

Page 36: ... drill Install the sleeve Adjusting sleeve length Note 1 Drill a hole with incline of 5 degree from indoor side to outdoor side Wall thickness 1 5 cm Cut off the sleeve collar that can be seen from beneath the unit Cut off the sleeve collar in case of drawing piping out to rear Indoor side Indoor side Indoor side View of sleeve when installed Outdoor side Outdoor side Outdoor side Inserting sleeve...

Page 37: ...ping of the exterior Hold the bottom of the pipe and change its direction before stretching it and shaping it Tape only the portion that runs through the wall Always tape the crossover wires with the pipe 4 Cautions when piping from the left and the rear center of the unit Top View Remove the screw and pull the drain hose while twisting Remove it with hand or pliers Insert the drain cap which was ...

Page 38: ...e removed from the installation board Removal and installation of the front panel Set screws Removing v Remove the 2 set screws v Move the lower part of the panel forward and push upwards to remove Remove the 3 latches in the upper section Fitting v Do remove the air filter v Cover the body with the front panel v Push the circled portion at the front v Tighten the 2 set screws v Fit the air filter C...

Page 39: ... gauge reads 0 1 MPa 76 cmHg 4 After completing vacuum operation fully open service valve Both gas and liquid sides with hexagon headed wrench 5 Detach the charge hoses 6 Check for possible leakage of gas in the connection parts of both indoor and outdoor Remove the ared nuts on both liquid and gas sides Remove the ared nuts on both liquid and gas sides Install the removed ared nuts to the pipes t...

Page 40: ...s Insulation Refrigerant piping Electrical wiring Covering tape Drain hose Tapping screw Uncover the wireless remote control and mount the batteries R03 AAA Micro 2 pieces in the body regularly Fit the poles with the indication marks without fail Earth work shall be carried out without fail in order to prevent electric shock and noise generation The connection of the earth cable to the following s...

Page 41: ...elects ON TIMER operation SLEEP button This button changes to SLEEP operation CLEAN switch This swich changes the CLEAN mode OPERATION MODE select button Each time the button pushed the indicator is switched over in turn ON OFF luminous button Press for starting operation press agian for stopping AIR FLOW UP DOWN button This button changes the air flow up down mode The above illustration shows all...

Page 42: ...t when remote control is not available This button can be used for turning on off the unit when remote control is not available Remote control signal receiver Unit ON OFF button Illuminates during operation Blinks at the CLEAN operation TIMER light yellow Remote control signal receiver 1 sec ON OFF CLEAN operation 3 sec Illuminates during operation Blinks at the CLEAN operation 1 sec ON OFF CLEAN ...

Page 43: ...n needs to be switched off 2 When power failure ocurrs the timer setting is cancelled Once power is re sumed reset the timer 3 If the jumper wire J201 AUTO RESTART is cut auto restart is disabled See the diagram at right 4 Custom cord switching procedure If two wireless remote control are installed in one room in order to prevent wrong operation due to mixed signals please modify the printed circu...

Page 44: ...perating COOL DRY FAN Remote control display Approx 15 Approx 25 Approx 35 Swing Flap stopped Approx 50 Approx 60 Angle of Flap from Horizontal In COOL DRY FAN operation Approx 15 Approx 60 b Sleep timer operation 6 Timer operation a Comfortable timer setting ON timer c OFF timer operation ...

Page 45: ...eration and if the result of check is not same as the previ ous operation mode changes the operation mode c When the unit is started again within 30 minutes after the stop of automatic operation or when the automatic operation is se lected during cooling or dehumidifying operation the unit is operated in the previous operation mode d Setting temperature can be adjusted within the following range T...

Page 46: ...rced operation When the compressor begins operating the thermal operation is not effective for 3 minutes so operation continues as is in the operation mode After 3 minutes has passed the thermal operation is effective However stopping the compressor via a stop signal or protection control has priority d Abnormality of outdoor unit After the compressor run 5 minutes and the indoor heat exchanger te...

Page 47: ...s service valve open 3 Troubleshooting procedure If the air conditioner does not run at all If the air conditioner does not run at all diagnose the trouble using the following troubleshooting procedure If the air condi tioner is running but breaks down proceed to troubleshooting step 4 Important When all the following conditions are met we say that the air conditioner will not run at all a The RUN...

Page 48: ... When a heat exchanger sensor wire disconnection is detected while operation is stopped If a temperature of 28ºC or lower is detected for 15 seconds it is judged that the wire is disconnected Not displayed during operation When a room temperature sensor wire disconnection is detected while operation is stopped If a temperature of 45ºC or lower is detected for 15 seconds it is judged that the wire ...

Page 49: ...acteristics Room temp indoor heat exchanger temp Temperature C Resistance kΩ 30 25 20 15 10 5 30 20 10 40 50 60 70 0 10 Indoor fan motor error Defective fan motor connector poor connection defective indoor PCB Is connector connection good YES NO Is the output of the indoor unit PCB normal Power supply reset Correct connector connection Is normal state restored Malfunction by temporary noise NO Rep...

Page 50: ... Replace capacitor for compressor Correct connection Check if there are any places where gas is leaking YES YES NO NO NO NO NO YES YES YES 7 Phenomenon observed after shortcircuit wire breakage on sensor a Indoor unit Phenomenon Sensor Shortcircuit Broken wire Cooling Release of continuous compressor operation command Cooling System can be operated normally Operation mode Continuous compressor ope...

Page 51: ...rates Operating the unit NO NO YES YES Remote control defects Abnormality is not found Replace the display of indoor unit Control problem on main unit Is the unit operable with remote control Defective remote control NO YES Normal Note 1 Check method of remote control a Press the reset switch of the remote control b If all LCD are displayed after one 1 display it is basically normal ...

Page 52: ...INDOOR UNIT SRK05CM SRK05CM 3 SRK05CMP 3 SRK09CM 3 SRK09CM 4 SRK09CM 5 SRK09CMP 3 SRK09CMP 4 SRK12CM 3 SRK12CM 4 SRK12CM 5 OUTDOOR UNIT SRC05CM SRC05CM 3 SRC05CMP 3 SRC09CM 3 SRC09CM 4 SRC09CM 5 SRC09CMP 3 SRC09CMP 4 SRC12CM 3 SRC12CM 4 SRC12CM 5 ...

Page 53: ... 52 13 SRK T 141 CRAE0268 5 18 4 7 20 4 8 8 9 9 22 12 11 15 19 16 21 3 10 13 6 22 2 1 14 17 PANEL FAN ASSY ...

Page 54: ... 1 1 2 2 8 RMA 129A 052 PLATE CONNECTING 2 9 RLC 436A 002 LOUVER 6 10 SSA 512T 096 MOTOR STEPPING 1 1 1 1 2 FOR FLAP 11 RMA 423A 001 HOSE DRAIN 1 12 SSA 326A 047 PLUG 1 13 RMA 504A 011 HARNESS ASSY 1 1 1 1 2 FOR FLAP MOTOR 14 RMA 111A 050 BASE ASSY 1 1 1 1 2 15 RLC 129A 001 CASE MOTOR U 1 1 1 1 2 16 RLC 129A 013A CASE MOTOR L 1 1 1 1 2 17 SSA 923C 114 BEARING PLANE 1 1 1 1 2 18 RMA 431G 050 IMPELL...

Page 55: ... 54 13 SRK T 141 CRAE0269 20 13 2 19 18 11 17 8 1 14 16 7 21 10 12 9 15 3 4 5 6 HEAT EXCH CONTROL ...

Page 56: ... 1 1 1 1 2 Z 12 SSA 564A 132 FUSE CURRENT 1 1 1 2 4 F 3 15A 13 RMA 503A 001 DISPLAY ASSY 1 1 1 2 3 14 RLC 505A 003 PWB ASSY DISPLAY 1 2 2 4 8 15 RMA 142A 052 LID CONTROL 1 16 RLC 129A 010 COVER BEND 1 17 RKJ 941F 001A SPRING LEAF 1 18 RKX 502A 001B CONTROL ASSY REMOTE 1 2 3 5 10 19 RKN 032A 002C HOLDER REMO CON 1 1 1 1 2 20 RMA 008A 013 PARTS STANDARD 1 FOR SRK05CM 20 RMA 008A 013D PARTS STANDARD ...

Page 57: ... 56 13 SRK T 141 CRAE0268 5 18 4 7 20 4 8 8 9 9 22 12 11 15 19 16 21 3 10 13 6 22 2 1 14 17 PANEL FAN ASSY ...

Page 58: ... RMA 129A 052 PLATE CONNECTING 2 9 RLC 436A 002 LOUVER 6 10 SSA 512T 096 MOTOR STEPPING 1 1 1 1 2 FOR FLAP 11 RMA 423A 001 HOSE DRAIN 1 12 SSA 326A 047 PLUG 1 13 RMA 504A 011 HARNESS ASSY 1 1 1 1 2 FOR FLAP MOTOR 14 RMA 111A 050 BASE ASSY 1 1 1 1 2 15 RLC 129A 001 CASE MOTOR U 1 1 1 1 2 16 RLC 129A 013A CASE MOTOR L 1 1 1 1 2 17 SSA 923C 114 BEARING PLANE 1 1 1 1 2 18 RMA 431G 050 IMPELLER 1 1 1 2...

Page 59: ... 58 13 SRK T 141 CRAE0270 20 13 2 19 18 11 17 8 1 16 7 21 10 12 9 15 3 4 5 6 14 HEAT EXCH CONTROL ...

Page 60: ...LOCK TERMINAL 1 1 1 2 2 T 10 12 RMA 505A 005C PWB ASSY 1 2 2 4 8 11 SSA 555B 058AD VARISTOR 1 1 1 1 2 Z 12 SSA 564A 132 FUSE CURRENT 1 1 1 2 4 F 3 15A 13 RMA 503A 001 DISPLAY ASSY 1 1 1 2 3 14 RLC 505A 003 PWB ASSY DISPLAY 1 2 2 4 8 15 RMA 142A 052 LID CONTROL 1 16 RLC 129A 010 COVER BEND 1 17 RKJ 941F 001A SPRING LEAF 1 18 RKX 502A 001B CONTROL ASSY REMOTE 1 2 3 5 10 19 RKN 032A 002C HOLDER REMO ...

Page 61: ... 60 13 SRK T 141 CRAE0268 5 18 4 7 20 4 8 8 9 9 22 12 11 15 19 16 21 3 10 13 6 22 2 1 14 17 PANEL FAN ASSY ...

Page 62: ...2 1 1 2 2 8 RMA 129A 052 PLATE CONNECTING 2 9 RLC 436A 002 LOUVER 6 10 SSA 512T 096 MOTOR STEPPING 1 1 1 1 2 FOR FLAP 11 RMA 423A 001 HOSE DRAIN 1 12 SSA 326A 047 PLUG 1 13 RMA 504A 011 HARNESS ASSY 1 1 1 1 2 FOR FLAP MOTOR 14 RMA 111A 050 BASE ASSY 1 1 1 1 2 15 RLC 129A 001 CASE MOTOR U 1 1 1 1 2 16 RLC 129A 013A CASE MOTOR L 1 1 1 1 2 17 SSA 923C 114 BEARING PLANE 1 1 1 1 2 18 RMA 431G 050 IMPEL...

Page 63: ... 62 13 SRK T 141 CRAE0271 22 15 4 21 20 13 19 10 1 3 2 18 9 23 12 14 11 17 5 6 7 8 16 HEAT EXCH CONTROL ...

Page 64: ... 1 2 4 F 3 15A 15 RMA 503A 001 DISPLAY ASSY 1 1 1 2 3 16 RLC 505A 003 PWB ASSY DISPLAY 1 2 2 4 8 17 RMA 142A 052 LID CONTROL 1 18 RLC 129A 010 COVER BEND 1 19 RKJ 941F 001A SPRING LEAF 1 20 RKX 502A 001B CONTROL ASSY REMOTE 1 2 3 5 10 21 RKN 032A 002C HOLDER REMO CON 1 1 1 1 2 22 RMA 008A 013D PARTS STANDARD 1 FOR SRK09CM 3 22 RMA 008A 013F PARTS STANDARD 1 FOR SRK09CM 4 22 RMA 008A 013G PARTS STA...

Page 65: ... 64 13 SRK T 141 CRAE0268 5 18 4 7 20 4 8 8 9 9 22 12 11 15 19 16 21 3 10 13 6 22 2 1 14 17 PANEL FAN ASSY ...

Page 66: ...8 RMA 129A 052 PLATE CONNECTING 2 9 RLC 436A 002 LOUVER 6 10 SSA 512T 096 MOTOR STEPPING 1 1 1 1 2 FOR FLAP 11 RMA 423A 001 HOSE DRAIN 1 12 SSA 326A 047 PLUG 1 13 RMA 504A 011 HARNESS ASSY 1 1 1 1 2 FOR FLAP MOTOR 14 RMA 111A 050 BASE ASSY 1 1 1 1 2 15 RLC 129A 001 CASE MOTOR U 1 1 1 1 2 16 RLC 129A 013A CASE MOTOR L 1 1 1 1 2 17 SSA 923C 114 BEARING PLANE 1 1 1 1 2 18 RMA 431G 050 IMPELLER 1 1 1 ...

Page 67: ... 66 13 SRK T 141 CRAE0270 20 13 2 19 18 11 17 8 1 16 7 21 10 12 9 15 3 4 5 6 14 HEAT EXCH CONTROL ...

Page 68: ... 2 Z 12 SSA 564A 132 FUSE CURRENT 1 1 1 2 4 F 3 15A 13 RMA 503A 001 DISPLAY ASSY 1 1 1 2 3 14 RLC 505A 003 PWB ASSY DISPLAY 1 2 2 4 8 15 RMA 142A 052 LID CONTROL 1 16 RLC 129A 010 COVER BEND 1 17 RKJ 941F 001A SPRING LEAF 1 18 RKX 502A 001B CONTROL ASSY REMOTE 1 2 3 5 10 19 RKN 032A 002C HOLDER REMO CON 1 1 1 1 2 20 RMA 008A 013D PARTS STANDARD 1 FOR SRK09CMP 3 20 RMA 008A 013F PARTS STANDARD 1 FO...

Page 69: ... 68 13 SRK T 141 CRAE0272 1 18 3 4 7 20 4 8 8 9 9 22 12 10 11 15 19 16 21 6 22 2 14 17 5 13 PANEL FAN ASSY ...

Page 70: ... 1 1 2 2 8 RLC 129A 009 PLATE CONNECTING 2 9 RLC 436A 002 LOUVER 10 10 SSA 512T 096 MOTOR STEPPING 1 1 1 1 2 FOR FLAP 11 SSA 423A 102 HOSE DRAIN 1 12 SSA 326A 047 PLUG 1 13 RMA 504A 011 HARNESS ASSY 1 1 1 1 2 FOR FLAP MOTOR 14 RLC 111A 001 BASE ASSY 1 1 1 1 2 15 RLC 129A 012 CASE ASSY U 1 1 1 1 2 16 RLC 129A 013 CASE ASSY L 1 1 1 1 2 17 SSA 923C 114 BEARING PLANE 1 1 1 1 2 18 SSA 431G 051 IMPELLER...

Page 71: ... 70 13 SRK T 141 CRAE0273 22 15 4 23 21 20 14 13 17 2 10 3 1 16 19 9 12 18 11 5 6 7 8 HEAT EXCH CONTROL ...

Page 72: ... 1 1 2 4 F 3 15A 15 RMA 503A 002 DISPLAY ASSY 1 1 1 2 3 16 RLC 505A 003 PWB ASSY DISPLAY 1 2 2 4 8 17 RKJ 941F 001A SPRING LEAF 1 18 RLC 142A 002 LID CONTROL 1 19 RLC 129A 010 COVER BEND 1 20 RKX 502A 001P CONTROL ASSY REMOTE 1 2 3 5 10 21 RKN 032A 002C HOLDER REMO CON 1 1 1 1 2 22 RMA 008A 014 PARTS STANDARD 1 FOR SRK12CM 3 22 RMA 008A 014A PARTS STANDARD 1 FOR SRK12CM 4 22 RMA 008A 014B PARTS ST...

Page 73: ... 72 13 SRK T 141 CRBE0358 7 4 12 6 1 14 15 7 6 5 8 3 6 9 6 13 11 10 2 PANEL FAN ASSY ...

Page 74: ...3 5 SSA 944B 036B HANDLE 1 6 SSA 913A 034F SCREW TAP 22 4 8 7 SSA 913A 034G SCREW TAP 6 4 12 8 SSA 913A 035 SCREW TAP 1 5 10 9 RMC 132A 050 COVER SERVICE 1 10 RMC 116A 050 BRACKET MOTOR 1 11 SSA 511B 074 MOTOR AC 1 2 2 4 8 12 RMC 141A 051 PLATE ASSY BAFFLE 1 13 SSA 431B 168 PROPELLER 1 1 1 2 4 14 SSA 914B 007AD NUT TH 1 15 RCW 111A 003A BASE ASSY 1 1 1 1 2 SRC05CM Note No Part No Part Name RE Q Re...

Page 75: ... 74 13 SRK T 141 CRBE0359 1 2 4 7 13 12 11 19 10 14 17 15 8 9 18 16 5 LIQ GAS 3 6 HEAT EXCH CONTROL ...

Page 76: ...PRESSOR ASSY 1 1 2 3 8 9 RMC 941C 050 CUSHION RUBBER 3 10 SSA 914C 013A NUT FLANGE 3 11 RMC 932C 002 GASKET COVER 1 12 RMC 947K 002 COVER TERMINAL 1 1 1 2 4 13 SSA 914C 016 NUT FLANGE 1 14 SSA 552A 842A CAPACITOR RUNNING 1 1 1 1 2 CFO 2 5µF 450VAC 15 SSA 552A 843 CAPACITOR RUNNING 1 1 1 1 2 CC 20µF 400VAC 16 RMC 533B 005 PROTECTOR MOTOR 1 1 1 1 2 17 SSA 561B 669 BLOCK TERMINAL 1 1 1 2 2 18 RMC 504...

Page 77: ... 76 13 SRK T 141 CRBE0358 7 4 12 6 1 14 15 7 6 5 8 3 6 9 6 13 11 10 2 PANEL FAN ASSY ...

Page 78: ... 5 SSA 944B 036B HANDLE 1 6 SSA 913A 034F SCREW TAP 24 4 8 7 SSA 913A 034G SCREW TAP 6 4 12 8 SSA 913A 035 SCREW TAP 1 5 10 9 RMC 132A 050 COVER SERVICE 1 10 RMC 116A 050A BRACKET MOTOR 1 11 SSA 511B 074 MOTOR AC 1 2 2 4 8 12 RMC 141A 051 PLATE ASSY BAFFLE 1 13 SSA 431B 168 PROPELLER 1 1 1 2 4 14 SSA 914B 007AD NUT TH 1 15 RCW 111A 003A BASE ASSY 1 1 1 1 2 SRC05CM 3 Note No Part No Part Name RE Q ...

Page 79: ... 78 13 SRK T 141 CRBE0360 2 1 3 5 8 14 13 12 20 11 15 18 16 9 10 19 17 6 LIQ GAS 4 7 HEAT EXCH CONTROL ...

Page 80: ...1 9 RMC 201A 055 COMPRESSOR ASSY 1 1 2 3 8 10 RMC 941C 050 CUSHION RUBBER 3 11 SSA 914C 013A NUT FLANGE 3 12 RMC 932C 002 GASKET COVER 1 13 RMC 947K 002 COVER TERMINAL 1 1 1 2 4 14 SSA 914C 016 NUT FLANGE 1 15 SSA 552A 842A CAPACITOR RUNNING 1 1 1 1 2 CFO 2 5µF 450VAC 16 SSA 552A 843 CAPACITOR RUNNING 1 1 1 1 2 CC 20µF 400VAC 17 RMC 533B 005 PROTECTOR MOTOR 1 1 1 1 2 18 SSA 561B 669 BLOCK TERMINAL...

Page 81: ... 80 13 SRK T 141 CRBE0361 7 4 12 6 1 14 15 7 6 5 8 3 6 9 6 13 11 10 2 PANEL FAN ASSY ...

Page 82: ... 5 SSA 944B 036B HANDLE 1 6 SSA 913A 034F SCREW TAP 22 4 8 7 SSA 913A 034G SCREW TAP 6 4 12 8 SSA 913A 035 SCREW TAP 1 5 10 9 RMC 132A 050 COVER SERVICE 1 10 RMC 116A 050 BRACKET MOTOR 1 11 SSA 511B 074 MOTOR AC 1 2 2 4 8 12 RMC 141A 051 PLATE ASSY BAFFLE 1 13 SSA 431B 168 PROPELLER 1 1 1 2 4 14 SSA 914B 007AD NUT TH 1 15 RCW 111A 003A BASE ASSY 1 1 1 1 2 SRC05CMP 3 Note No Part No Part Name RE Q ...

Page 83: ... 82 13 SRK T 141 CRBE0362 1 2 4 7 13 12 11 19 10 14 17 15 8 9 18 16 5 LIQ GAS 3 6 HEAT EXCH CONTROL ...

Page 84: ...ESSOR ASSY 1 1 2 3 8 9 RMC 941C 050 CUSHION RUBBER 3 10 SSA 914C 013A NUT FLANGE 3 11 RMC 932C 002 GASKET COVER 1 12 RMC 947K 002 COVER TERMINAL 1 1 1 2 4 13 SSA 914C 016 NUT FLANGE 1 14 SSA 552A 842A CAPACITOR RUNNING 1 1 1 1 2 CFO 2 5µF 450VAC 15 SSA 552A 843 CAPACITOR RUNNING 1 1 1 1 2 CC 20µF 400VAC 16 RMC 533B 005 PROTECTOR MOTOR 1 1 1 1 2 17 SSA 561B 669 BLOCK TERMINAL 1 1 1 2 2 18 RMC 504A ...

Page 85: ... 84 13 SRK T 141 CRBE0358 7 4 12 6 1 14 15 7 6 5 8 3 6 9 6 13 11 10 2 PANEL FAN ASSY ...

Page 86: ...2 3 5 SSA 944B 036B HANDLE 1 6 SSA 913A 034F SCREW TAP 24 4 8 7 SSA 913A 034G SCREW TAP 6 4 12 8 SSA 913A 035 SCREW TAP 1 5 10 9 RMC 132A 050 COVER SERVICE 1 10 RMC 116A 050A BRACKET MOTOR 1 11 SSA 511B 074 MOTOR AC 1 2 2 4 8 12 RMC 141A 051 PLATE ASSY BAFFLE 1 13 SSA 431B 168 PROPELLER 1 1 1 2 4 14 SSA 914B 007AD NUT TH 1 15 RCW 111A 003A BASE ASSY 1 1 1 1 2 SRC09CM 3 SRC09CM 4 SRC09CM 5 Note No ...

Page 87: ... 86 13 SRK T 141 CRBE0363 2 1 3 5 8 14 13 12 20 11 15 18 16 9 10 19 17 6 LIQ GAS 4 7 HEAT EXCH CONTROL ...

Page 88: ... 11 SSA 914C 013A NUT FLANGE 3 12 RSA 932C 005 GASKET COVER 1 13 RSA 947K 006 COVER TERMINAL 1 1 1 2 4 14 SSA 914C 016 NUT FLANGE 1 15 SSA 552A 842A CAPACITOR RUNNING 1 1 1 1 2 CFO 2 5µF 450VAC 16 SSA 552A 843F CAPACITOR RUNNING 1 1 1 1 2 CC 40µF 370VAC 17 RSA 533B 004A PROTECTOR MOTOR 1 1 1 1 2 18 SSA 561B 669 BLOCK TERMINAL 1 1 1 2 2 19 RMC 504A 010A WIRING ASSY 1 FOR COMP 20 RMC 011G 009 LABEL ...

Page 89: ... 88 13 SRK T 141 CRBE0358 7 4 12 6 1 14 15 7 6 5 8 3 6 9 6 13 11 10 2 PANEL FAN ASSY ...

Page 90: ...3 5 SSA 944B 036B HANDLE 1 6 SSA 913A 034F SCREW TAP 22 4 8 7 SSA 913A 034G SCREW TAP 6 4 12 8 SSA 913A 035 SCREW TAP 1 5 10 9 RMC 132A 050 COVER SERVICE 1 10 RMC 116A 050 BRACKET MOTOR 1 11 SSA 511B 074 MOTOR AC 1 2 2 4 8 12 RMC 141A 051 PLATE ASSY BAFFLE 1 13 SSA 431B 168 PROPELLER 1 1 1 2 4 14 SSA 914B 007AD NUT TH 1 15 RCW 111A 003A BASE ASSY 1 1 1 1 2 SRC09CMP 3 SRC09CMP 4 Note No Part No Par...

Page 91: ... 90 13 SRK T 141 CRBE0364 1 2 4 7 13 12 11 19 10 14 17 15 8 9 18 16 5 LIQ GAS 3 6 HEAT EXCH CONTROL ...

Page 92: ... 10 SSA 914C 013A NUT FLANGE 3 11 RSA 932C 005 GASKET COVER 1 12 RSA 947K 006 COVER TERMINAL 1 1 1 2 4 13 SSA 914C 016 NUT FLANGE 1 14 SSA 552A 842A CAPACITOR RUNNING 1 1 1 1 2 CFO 2 5µF 450VAC 15 SSA 552A 843F CAPACITOR RUNNING 1 1 1 1 2 CC 40µF 370VAC 16 RSA 533B 004A PROTECTOR MOTOR 1 1 1 1 2 17 SSA 561B 669 BLOCK TERMINAL 1 1 1 2 2 18 RMC 504A 010A WIRING ASSY 1 FOR COMP 19 RMC 011G 009 LABEL ...

Page 93: ... 92 13 SRK T 141 CRBE0365 15 7 7 12 1 5 14 16 8 7 6 4 2 7 7 13 10 11 15 15 9 3 15 PANEL FAN ASSY ...

Page 94: ...RILLE AIR OUTLET 1 1 1 2 3 6 SSA 944B 036B HANDLE 1 7 SSA 913A 034F SCREW TAP 31 4 8 8 SSA 913A 034G SCREW TAP 1 4 12 9 RCV 116A 005B BRACKET ASSY 1 10 SSA 511B 823 MOTOR AC 1 1 1 1 2 11 RCV 116A 003 BRACKET MOTOR U 1 12 RCV 141A 500 PLATE BAFFLE 1 13 SSA 431B 254 PROPELLER 1 1 1 2 4 14 SSA 914B 007AC NUT TH 1 15 W011D04X008 TAP SCREW CRS TRS 2 6 4 8 16 RCV 111A 001D BASE ASSY 1 1 1 1 2 SRC12CM 3 ...

Page 95: ... 94 13 SRK T 141 CRBE0366 1 4 5 2 8 13 14 12 18 19 11 15 17 16 9 10 6 LIQ GAS 3 7 HEAT EXCH CONTROL ...

Page 96: ... 2 3 8 10 RMC 941C 003 CUSHION RUBBER 3 11 SSA 914C 013A NUT FLANGE 3 12 RMC 932C 003 GASKET COVER 1 13 RMC 947K 003 COVER TERMINAL 1 1 1 2 4 14 SSA 914C 016 NUT FLANGE 1 15 SSA 552A 842A CAPACITOR RUNNING 1 1 1 1 2 CFO 2 5µF 450VAC 16 SSA 552A 178F CAPACITOR RUNNING 1 1 1 1 2 CC 40µF 440VAC 17 SSA 561B 669 BLOCK TERMINAL 1 1 1 2 2 18 RMC 504A 010C WIRING ASSY 1 1 1 1 2 FOR COMP 19 RMC 011G 009A L...

Page 97: ...L AIR CONDITIONING TECHNICAL MANUAL PARTS LIST Copyright MITSUBISHI HEAVY INDUSTRIES LTD Because of our policy of continuous improvement we reserve the right to make changes in all specifications without notice C ...

Reviews: