-
-
'13•SRK-T-141
– 28 –
⑤
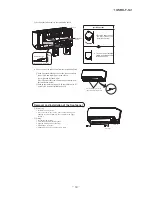
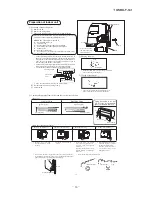
Securing the indoor unit to the installation board
Wall
Indoor unit base lower latch
Installation board
Latch (2 locations)
Installation
board
Indoor unit
v
How to remove the indoor unit from the installation board
①
Push up at the marked portion of the indoor unit base
lower latch, and slightly pull it toward you.
(both right and left hand sides)
(The indoor unit base lower latch can be removed from
the installation board)
②
Push up the indoor unit upward. So the indoor unit will
be removed from the installation board.
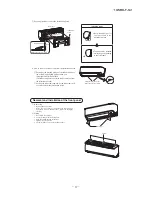
Removal and installation of the front panel
Set screws
①
Removing
v
Remove the 2 set screws.
v
Move the lower part of the panel forward and push
upwards to remove. (Remove the 3 latches in the upper
section.)
②
Fitting
v
Do remove the air
fi
lter.
v
Cover the body with the front panel.
v
Push the circled portion at the front.
v
Tighten the 2 set screws.
v
Fit the air
fi
lter. Carry out in the above order.
The marked portion of the
indoor unit base lower latch
Installing steps
1.Hook the upper part of
the indoor unit to the
installation board.
2.The unit can be installed
simply by gently pushing
in the lower part.
Latches
RMA012A068-70_Install_EN.indd 28
18/1/2556 8:52:52
Summary of Contents for SRK05CM
Page 2: ... 13 SRK T 141 TECHNICAL MANUAL ...
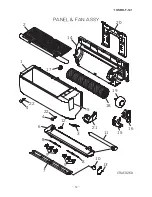
Page 73: ... 72 13 SRK T 141 CRBE0358 7 4 12 6 1 14 15 7 6 5 8 3 6 9 6 13 11 10 2 PANEL FAN ASSY ...
Page 77: ... 76 13 SRK T 141 CRBE0358 7 4 12 6 1 14 15 7 6 5 8 3 6 9 6 13 11 10 2 PANEL FAN ASSY ...
Page 81: ... 80 13 SRK T 141 CRBE0361 7 4 12 6 1 14 15 7 6 5 8 3 6 9 6 13 11 10 2 PANEL FAN ASSY ...
Page 85: ... 84 13 SRK T 141 CRBE0358 7 4 12 6 1 14 15 7 6 5 8 3 6 9 6 13 11 10 2 PANEL FAN ASSY ...
Page 89: ... 88 13 SRK T 141 CRBE0358 7 4 12 6 1 14 15 7 6 5 8 3 6 9 6 13 11 10 2 PANEL FAN ASSY ...

