background image

– 17 –

NOTE

The air inlet panel consists of two parts, the outer air inlet panel (which can
always be seen) and the inner air inlet panel (which is usually hidden from
view).

To open and close the air inlet panel, please place your fingers in the
grooves near the bottom on both sides of it and pull. At the same time,
please also support the face of the outer air inlet panel with your thumbs.
This will prevent the outer air inlet panel from suddenly opening, which
can occur without support from the thumbs, as seen in the picture on the
right. Proper finger placement can be seen in the picture on the left.

The outer air inlet panel will automatically shut about 5 seconds after you
shut the inner air inlet panel (if the unit is plugged in). Please do not shut
forcibly. Doing so will likely damage the unit.

Please do not wash the air inlet panel.

Turn off the power supply.

Remove the air filter

Maintenance

Cleaning the air filter

Standard interval is once every two week

Do not use the following articles:

Hot water (40°C or more)
It may deform or discolour the unit.

Petrol, paint thinner, benzine or cleanser, etc.
They may deform or scratch the unit.

Do not spill any liquid.

Do not touch the aluminum fins on the heat
exchanger.

Stand firmly on a stepladder or other stable
object when removing the inlet panel and filter.

Cleaning

CAUTION

Do not clean the filters with boiling water.

Do not dry them over an open flame.

Pull them out gently.

Cleaning the unit

Wipe the unit with a soft, dry cloth, or use a vacuum cleaner.

If the unit is very dirty, wipe it with a cloth soaked in warm water.

1

2

3

Before maintenance

Reinstall the air filter

Hold firmly the filter at both sides as shown at right
and insert securely.

Operating without putting back the air filters will
make the unit dusty, and may cause damage.

Cleaning the air inlet panel

Removal, installation of air inlet panel.

Wipe the panel with a soft, dry cloth.

Wipe the unit with a soft,
dry cloth.

CAUTION

Do not wash the air inlet panel with water.

During the operational season

Pull up the air inlet panel forward.

Lightly hold the knobs at both sides and lift a
little to remove the panel forward.

If the filter is very dirty, clean it with warm water (approx. 30°C),
and dry it thoroughly.

How to open, close the air inlet panel

Open

Place fingers at the recesses on both sides of the panel and pull up the panel 
forward so that it will be open by about 60 degrees.

Removal

When removing the air inlet panel for internal cleaning or others, open the
panel by 80 degrees and then pull it forward.

Installation

Secure the upper edge of the air inlet panel by lightly pushing it in, and then
close the panel.

Removal, installation of air inlet panel

Close

Push both ends evenly and press further lightly at the center.

Removal

Remove the air inlet panel. 

1

 Hold the handle of the air inlet top panel and 

lift up until you hear a click and the tabs come out. 

2

 Pull the panel towards 

you.

Installation

 Align the air inlet top panel with the rail and slide the panel towards the

back until in strikes the end. Push the panel in until you hear a click and the

 tabs lock into place.

(To install the air inlet top panel. Follow the opposite of the removal 

procedure.)

Removal, installation of air inlet top panel

Please support
with the thumbs

The inner air
inlet panel

The outer air
inlet panel

There's a danger

of electric shock.

Summary of Contents for SRK60ZIX-S

Page 1: ...RANÇAIS ΟΔΗΓΙΕΣ ΧΡΗΣΗΣ ΚΛΙΜΑΤΙΣΤΙΚΟ ΕΛΛΗΝΙΚΑ This air conditioner complies with EMC Directive 2004 108 EC LV Directive 2006 95 EC Ce climatiseur est conforme à la Directive EMC 2004 108 EC LV Directive 2006 95 EC Dieses Kimagerät erfüllt die EMC Direktiven 2004 108 EC LV Direktiven 2006 95 EC Questo condizionatore d aria è conforme alla Direttiva EMC 2004 108 EC LV Direttiva 2006 95 EC Deze aircon...

Page 2: ...t their end of life should be disposed of separately from general household waste If a chemical symbol is printed beneath the symbol shown above this chemical symbol means that the batteries contain a heavy metal at a certain concentration This will be indicated as follows Hg mercury 0 0005 Cd cadmium 0 002 Pb lead 0 004 Please dispose of batteries correctly at your local community waste collectio...

Page 3: ...rkplace the equipment may function poorly It is not advisable to install the system by yourself as faulty handling may cause leakage of water electric shock or fire Gas leaks may cause fire If you do not install an earth leakage breaker you may get an electric shock Improper installation may lead to water drop in the room resulting in wet furniture Earth cables should never be connected to a gas p...

Page 4: ...op off it people could get hurt If you do not repair any damage right away the unit may fall down and cause personal injury It may result in injury Condensation falling from the unit may stain objects and cause accidents or electrical shock Insufficient ventilation may cause accidents due to oxygen deficiency Failure to observe this may result in injury through insecure objects top pling over Neve...

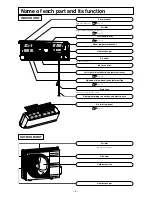
Page 5: ...oor unit Left right airflow direction adjustment louver Page 10 Up down airflow direction adjustment flap Page 10 Air outlet Air blows out of here Heat exchanger Room temperature sensor Air cleaning filter Refrigerant piping connection and electric wire Indoor unit fan Air Inlet top panel OUTDOOR UNIT Air outlet Air inlet On side rear surface Outdoor unit fan Heat exchanger Page 18 Page 17 ...

Page 6: ... unit in a fashion in which the air inlet panel cannot open or place objects near the indoor unit RUN HOT KEEP light green blue Illuminates during operation green except ECONO operation blue ECONO operation Blinks when airflow stops due to the HOT KEEP and CLEAN operation Page 15 ON OFF 1 5 sec 0 5 sec HOT KEEP 3 sec 1 sec ON OFF CLEAN operation Buzzer sound for remote control When preset temperat...

Page 7: ...older Before installing the remote control check that the air conditioner receives the signals properly For installing or removing the remote control move it up or down in the holder Are the batteries running down Replacing the batteries above Replace the batteries with new ones and retry the operation Warning note for remote control handling Operation failure with the remote control If the operat...

Page 8: ...eration Page 11 TEMPERATURE button These buttons set the room temperature These buttons are used for setting the current time and timer function as well Page 10 This button cancels the ON timer OFF timer and SLEEP operation CANCEL button Page 8 9 Operation and display section for remote control Transmission procedure When each button on the remote control is pressed with the remote control pointin...

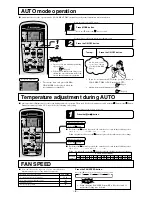
Page 9: ... button is pressed the switch over occurs in the following order 6 A 5 A 1 A 0 A 1 6 When 6 is indicated even if the button is pressed the indicator does not change When the unit is not in AUTO mode Press MODE button Move the mark to the Auto position Point the remote control toward the air conditioner and Press the ON OFF button 1 2 When it is a little cold Press the button When it is a little ho...

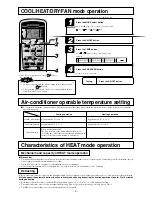
Page 10: ...0 may result in condensation forming on the surface of the indoor unit leading to water drips Characteristics of HEAT mode operation Mechanism and capacity of HEAT mode operation Mechanism The unit draws heat from the cold outside air transfers it to indoors and heats the room As a characteristic of heat pump system the heating capacity reduces when the outside air temperature gets colder It may t...

Page 11: ...OL or DRY operation do not operate for a long period with the airflow blowing straight down Otherwise condensation may appear on the outlet grill and drip down Do not try to adjust the flaps and louvers by hand as the control angle may change or the flap or louver may not be closed completely HEAT Horizontal blowing Slant forward blowing COOL DRY Recommended angle of the flap when stopping When op...

Page 12: ...ditioner turned off start the operation from Step 1 With the air conditioner running start from Step 2 Example You prefer it to stop 22 30 Press the ON OFF button Press the OFF TIMER button OFF TIMER display is blinking Press the or button Every time the button is pressed the display is switched in the order of 0 00 0 10 0 20 Units of ten minutes 1 00 1 10 Every time the button is pressed the disp...

Page 13: ... starts from 5 to 60 minutes before the ON TIMER s set time The timer light is turned off when ON TIMER set time comes Changing of set time Set a new time by using the SLEEP or ON TIMER button How to cancel Press the CANCEL button to turn off the timer display Press the or button Every time the button is pressed the display is switched in the order of 0 00 0 10 0 20 Units of ten minutes 1 00 1 10 ...

Page 14: ...g of set time Set a new time by using the OFF TIMER or ON TIMER button Comfort Start up In ON TIMER operation the unit starts the operation a little earlier so that the room can approach optimum temperature at ON time This is so called Comfort start up Mechanism The room temperature is checked 60 minutes before the ON time Depending on the temperature at that time the operation starts 5 to 60 minu...

Page 15: ...fter ON TIMER operation HIGH POWER operation will start from the set time When the following operations are set HIGH POWER operation will be canceled 1 When the HI POWER ECONO button is pressed again 2 When the operation mode is changed 3 When it has been 15 min since HIGH POWER operation has started 4 When the 3D AUTO button is pressed Not operable while the air conditioner is OFF Concerning ECON...

Page 16: ...s of the air conditioner immediately prior to be switched off by a power cut and then automatically resumes operations after the power has been restored The following settings will be cancelled 1 Timer settings 2 HIGH POWER operations Auto restart function is set at on when the air conditioner is shipped from the factory Consult with your dealer if this function needs to be switched off When power...

Page 17: ... 16 ...
Page 18: ...r 1 2 3 Before maintenance Reinstall the air filter Hold firmly the filter at both sides as shown at right and insert securely Operating without putting back the air filters will make the unit dusty and may cause damage Cleaning the air inlet panel Removal installation of air inlet panel Wipe the panel with a soft dry cloth Wipe the unit with a soft dry cloth CAUTION Do not wash the air inlet pane...

Page 19: ...nnot be cleaned or if it has been for about 1 year The allergen clear filter should be replaced after about 1 year of use However the actual replacement period may vary depending on the conditions in which the filter is used Remove the photocatalytic washable deodorizing filter orange from the filter holder and inspect the filter Periodically remove any dust or dirt from the photocatalytic washabl...

Page 20: ...table installation position Do not put any obstruction in front of the indoor unit preventing proper ventilation and functioning Do not install the unit in any of the following places Where there is a danger of leaking flammable gases Where there is substantial splashing of oil Malfunctioning due to corrosion may occur if the unit is installed in a spa where sulfide gases are generated or in a sea...

Page 21: ...idity moisture may form on the air outlet grills and start dripping You hear a slight gurgling sound This is caused by refrigerating liquid moving within the unit You hear a slight cracking sound This is caused by heat expansion or contraction Remote control signals may not be received if the signal receiver on the air conditioner is exposed to direct sunlight or other bright light If so cut out t...

Page 22: ...operated first will be given priority so the air conditioner that is operated after that will conduct air blowing operation When you want to give priority to the air conditioner that was started later either stop the air conditioner that has priority or cause the operation type of the unit operated first to match that of the unit operated second Automatic Operation When the remote control operatio...

Page 23: ...Compressor locking open phase on compressor output shortcircuit on power transistor closed service valve Defective power supply Broken signal wire defective in outdoor unit boards Power transistor error Broken power transistor Current cut Trouble of outdoor unit Over current Overload operation overcharge Over heat of compressor Error of signal transmission Outdoor fan motor error Defective fan mot...

Page 24: ...RS 16 5 2 Chome Kounan Minato ku Tokyo 108 8215 Japan Fax 03 6716 5926 MITSUBISHI HEAVY INDUSTRIES EUROPE LTD AIR CONDITIONER DIVISION 3rd Floor Thavies Inn House 3 4 Holborn Circus London EC1N 2HA ENGLAND Phone 44 0 20 7842 8171 Fax 44 0 20 7842 8104 ...

Reviews: