-
167
-
'14 • SR-T-157
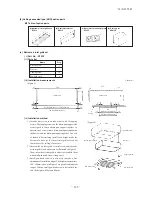
(iv) Installation method
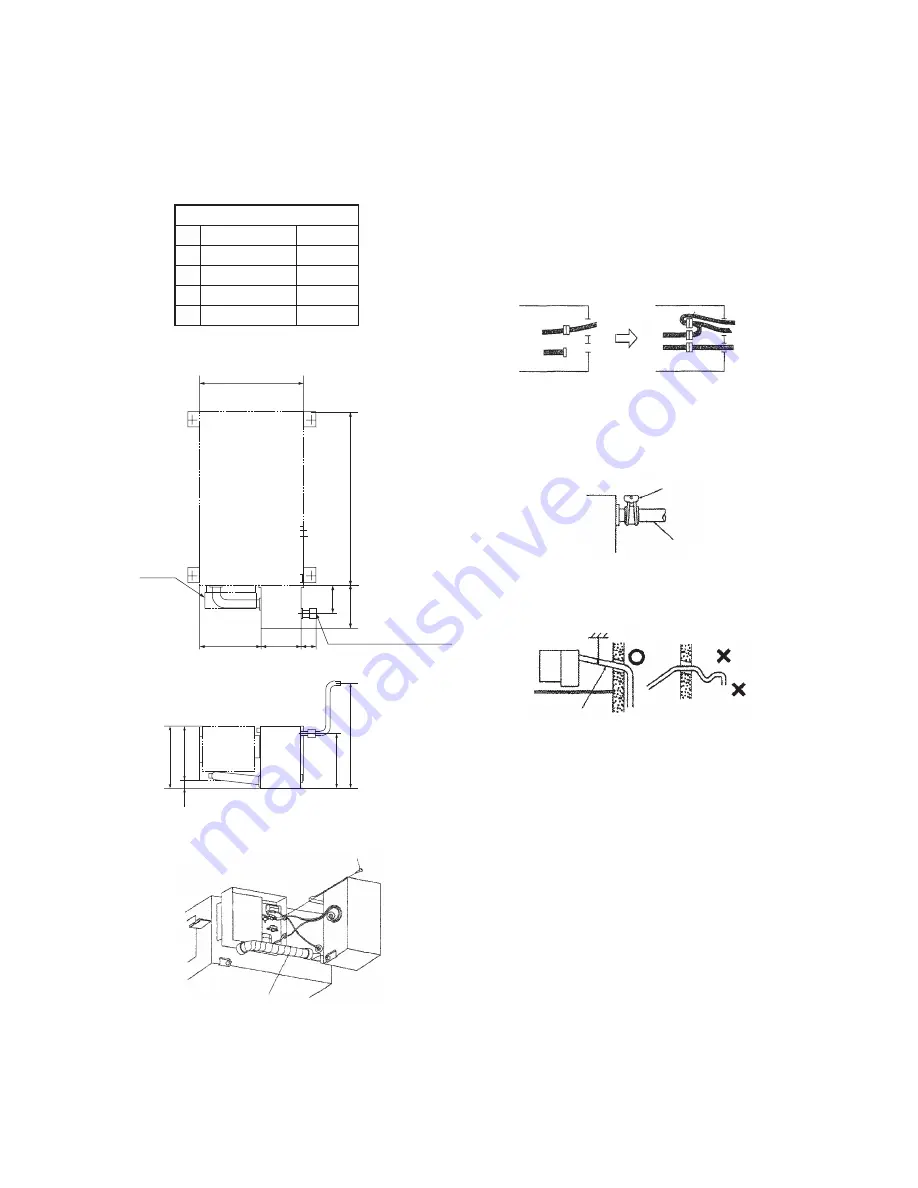
(iii) Installation measurements
Drain up kit accessorles
Quantity
1
1
Name
No.
Drain pump
Drain hose
1
Hose clamp
4
①
②
③
④
Tapping screw
Unit: mm
(d) Drain up kit
( i ) Part No. : RDU12E
(ii) Part list
1) Fix the drain up kit on the right side of the inside unit
with tap screws.
2) Insert the drain hose fully and securely to the drain
sockets of the inside unit and the drain up kit.
Use this drain up kit when the grade of the drain
pipe is not enough.
For indoor
unit
For indoor
unit
For float
switch
For drain
pump
④
Tapping screw
②
Drain hose
3) Connect the drain up kit's connectors for the drain
pump (red 2P) and the float switch (black 2P) to the
connectors of the control box.
(The control box's connectors for drain pump and the
float switch are also red and black respectively.)
Note that the control's connector for the float switch
is already connected to the inside unit's connector for
the float switch, so disconnect them and connect it to
the drain up kit's connector for the float switch.
4) Use hard PVC general purpose pipes VP-25 sold in
the market for drain pipes after draining up.
5) Tighten the PVC pipe securely with the attached
clamp after inserting it in the drain socket.
6) The drain pipe must have downward inclination
gradient of 1/100 or more, and take care not to make
a trap or uphill pass.
7) When connecting the drain pipe, take care not to apply
force on the pipe of the unit, and clamp the pipe as
close as possible to the unit.
8) Don't attach air purge pipe, because the drain might
spout.
9) Be sure to provide heat insulation to indoor side drain
pipe.
RD
RD
WH BK
BK
BU
RD
WH
YE
BK
WH
RD
BU
③
Hose clamp
Drain hose
Up hill pass
Trap
Drain gradient
(1/100 or more)
455
Control
Fitting for drain hose
740
124
186
Vinyl chloride pipe VP-25
267
176 62
Indoor unit
254
224
Max. 500
230
24

