-
-
'14 • SR-T
-157
CONNECTION OF REFRIGERANT PIPINGS
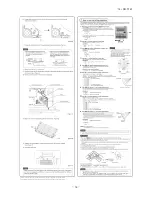
[Connection of pipes]
(1) Preparations
EARTHING WORK
Apply exterior tape and
shape along the place
where the pipes will be
routed. Secure to the
wall with a pipe clamp.
Be careful not to
damage the pipes and
the wires.
Heat insulation for joints
Finish and fixing
Vinyl tape
Cover the joint with
insulation material
for the indoor unit
and tape it.
Position so
the slit
comes on top.
Pipe clamp
Pipes
Crossover wires
Exterior tape
Drain hose
Tapping screw
(2) Connection
HEAT INSULATION FOR JOINTS
○
Earth work shall be carried out without fail in order to
prevent electric shock and noise generation.
○
The connection of the earth cable to the following
substances causes dangerous failures, therefore
it shall never be done. (City water pipe, Town gas pipe,
TV antenna, lightning conductor, telephoneline, etc.)
GAS LEAK DETECTOR
Indoor unit inspection point
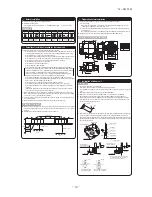
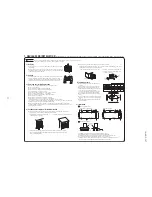
Installation dimensions
Hanging bolt pitch
Hanging bolt pitch
Plan
Securing the ceiling hanging bolts
If steel embedded ceiling
Inserts
Holed anchor
Holed plug
Hanging bolts M8
Concrete
If wooden ceiling
Holes for ceiling hanging bolts
Square bars for hanging the air conditioner
Clamps
Beams
Secure the ceiling hanging
bolts firmly following the
illustrations and other
instructions.
Installing the main unit
○
Attach the washers and nuts to the ceiling hanging bolts.
○
Attach the hanging tool to the above nuts, and tighten the nuts.
⑧
M8 large washer
M8 nut
M8 handling bolt
M8 nut
(standard accessory)
⑧
M8 large washer
M8 spring lock washer
(standard accessory)
Main frame
Securing the wireless receiver
About the option parts
35
35
740
670
455
515
30
30
Side
Liquid side pipes
Gas side pipes
Drain hose
(Connection opening diameter ø16)
150
455
38
236
135 78
○
Front
30
740
106
230
11
●
Regarding the change in the sizes of gas side pipes (usage of the variable joints); If the 5.0 kw and 6.0 kw class
indoor units (gas side pipe 12.7) is going to be connected to the operation valves (9.52), variable joints available as
accessories must be applied to the gas side operation valves.
NOTE
●
Cover the pipes with tape so that dust and sand do not enter the pipe until they are connected.
●
When connecting the pipes to the outdoor unit, be careful about the discharge of fluorocarbon gas or oil.
●
Make sure to match the pipes between the indoor unit and the outdoor unit with the correct operation valves.
○
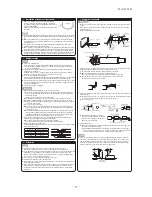
Remove the flared nuts.
(on both liquid and gas sides)
○
Install the removed flared nuts to the pipes
to be connected, then flare the pipes.
Indoor
Press
Remove
A
90
±
0.5
°
Dimension A
Liquid side 9.1(mm)
Gas side
φ
9.52 : 13.2(mm)
φ
12.7 : 16.2(mm)
(Do not turn)
CAUTION
Do not apply refrigerating machine oil to
the flared surface.
○
Connect the pipes on both liquid and gas sides.
○
Tighten the nuts to the following torque.
Liquid side : 14.0 ~ 18.0 N·m (1.4 ~ 1.8 kgf·m)
Gas side (
φ
9.52) : 33.0 ~ 42.0 N·m (3.3 ~ 4.2 kgf·m)
(
φ
12.7) : 49.0 ~ 61.0 N·m (4.9 ~ 6.1 kgf·m)
Indoor
Liquid side
Gas side
(Do not turn)
Installation test check points
Check the following points again after completion of the installation, and before turning on the power.
Conduct a test run again and ensure that the unit operates properly. At the same time, explain to the
customer how to use the unit and how to take care of the unit following the instruction manual.
If the compressor does not operate after the operation has started, wait for 5-10 minutes. (This may be due
to delayed start.)
(Three-minute restart preventive timer)
When the air conditioner is restarted or when changing the operation, the unit will not start operating for
approximately 3minutes. This is to protect the unit and it is not a malfunction.
The power supply voltage is correct as the rating.
No gas leaks from the joints of the operation valve.
Power cables and crossover wires are securely fixed to
the terminal board.
Each indoor and outdoor unit is properly connected (no
wrong wiring or piping).
Operation valve is fully open.
Refrigerant has been additionally charged (when the total
pipe length exceeds the refrigerant charged pipe length).
The pipe joints for indoor and outdoor pipes have been
insulated.
Earthing work has been conducted properly.
The screw of the control lid is tightened securely.
After installation
□
□
□
□
□
□
□
□
□
Air conditioning and heating are normal.
No abnormal noise.
Water drains smoothly.
Protective functions are not working.
Operation of the unit has been
explained to the customer.
The wireless remote control is normal.
Test run
□
□
□
□
□
□
●
Check that there
are no gas leaks
from the pipe
joints using a
leak detector or
soap water.
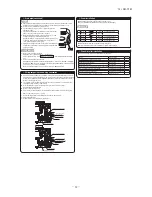
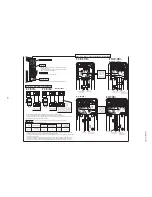
Mounting of interconnecting wires (Field wiring)
①
Remove the control lid.
②
Connect the connection wire securely to the terminal block.
Preparations for the main frame
Use cables for interconnection wiring to avoid loosening
of the wires.
CENELEC code for cables Required field cables.
H05RNR4G1.5 (Example)
H
Harmonized cable type
05
300/500 volts
R
Natural-and/or synth. rubber wire insulation
N
Polychloroprene rubber conductors insulation
R
Stranded core
4
Number of conductors
G
One conductor of the cable is the earth conductor
(yellow/green)
1.5
Section of copper wire (mm
2
)
1) Connect the connection wire securely to the terminal
block. If the wire is not affixed completely, contact will
be poor, and it is
dangerous as the terminal block may
heat up and catch fire.
2) Take care not to confuse the terminal numbers for
indoor andoutdoor connections.
3) Affix the connection wire using the wiring clamp.
③
Attach the control lid.
Clamp
Control lid
Use a flare tool designed for R410A or a conventional flare tool. Please note that
measurement B (protrusion from the flaring block) will vary depending on the type of a
flare tool in use. If a conventional flare tool is used, please use a copper pipe gauge or a
similar instrument to check protrusion so that you can keep measurement B to a correct
value.
Copper pipe diameter
Clutch type flare tool for
R410A
Conventional (R22) flare tool
Clutch type
Wing nut type
Measurement B (mm)
φ
6.35
0.0 ~ 0.5
1.0 ~ 1.5
1.5 ~ 2.0
φ
9.52
0.0 ~ 0.5
1.0 ~ 1.5
1.5 ~ 2.0
φ
12.7
0.0 ~ 0.5
1.0 ~ 1.5
2.0 ~ 2.5
Measurement B
Flaring
block
Copper pipe
○
If it is not leveled, the float switch may malfunction or may not start.
Terminal block
The screw of the
control lid is
tightened securely.
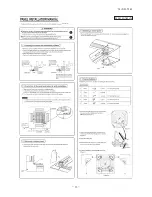
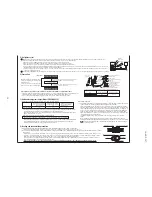
Connecting the Drain Hose
Opposite slope
Traps
Bumps
NOTE
Conduct the installation correctly, and ensure that the water is draining correctly.
It may lead to water leaks.
⑪
Tapping screw
⑤
Drain hose
⑥
Clamp
Unit main body
Filter guide
Air filter
⑫
Plate (display)
⑩
Flat head
machine screw
Flat head
machine screw
(In the pack of
⑫
)
④
Installation frame
③
Wireless receiver
Cut off this section if it interferes with the wall.
○
○
○
○
Calking
Calking
Open a through-hole on the wall to install the reception face for the wireless receiver
③
.
Insert the wireless receiver
③
in the installation frame
④
, and fix the calking section.
Fix the installation frame
④
on the wall using the flat head machine screws
⑩
.
Fix the plate (display)
⑫
on the installation frame
④
using the flat head machine screws packed together
with the plate (display)
⑫
.
Cut off this section if it interferes
with the wall.
INSTALLATION OF INDOOR UNIT
Drilling of holes in the wall and fixture of sleeve
●
The connecting wires may touch the metal inside the wall and cause danger so it is necessary to
always use the sleeve.
Indoor side
Outdoor side
●
Drill a hole with a 65 whole
core drill.
Sleeve
Sleeve
Wall thi 15
(unit : mm)
Sealing plate
Inclination plate
Pipe
Assembled state
φ
65
●
When the pipe is connected at the rear, cut off the lower and the right side
portions of the sleeve collar (as shown by the broken line).
RJD012A201B
3
4
TEST RUN AND HANDLING INSTRUCTIONS
5
2

