-
580
-
'13 • PAC-T-197
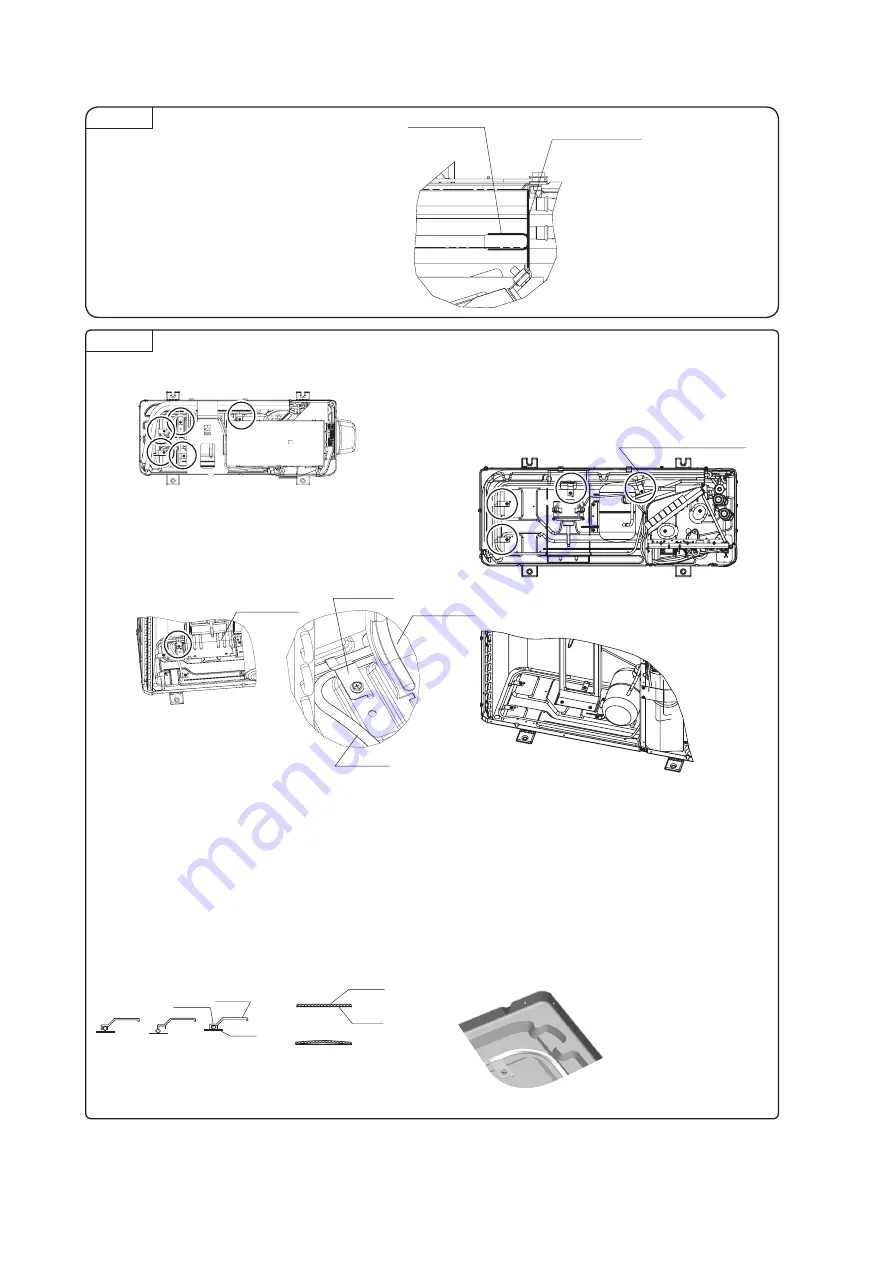
Step 6
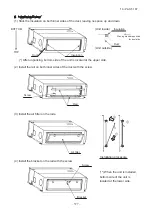
6. Put the heater underneath the heat
exchanger and align the end of heater
with the end plate of heat exchanger.
Step 7
7. Fix the heater with brackets.
<Note>
1) Fix the heater so that the bracket
doesn’t pinch the heater as figure
shows.
�
�
�
2) Place the heater so as to touch the
base completely.
�
�
4) Be careful not to be injured by
aluminum fin when fixing the
heater with screw.
3) In bending position, twist the
heater to make it easier to bend,
and get back to be able to fix it
with bracket.
<Note for model A>
1) Put the end of heating part just after the bracket C
2) Fix the incoming and out going cable with one bracket A on the left of fan
bracket as figure shows.
A
A
Model A
A
A
A
A
A
B
C
For model A, use 3 pcs of bracket A, 1pc of
bracket B and C. Fix bracket A and C with the
attached screw (OD4), and fix bracket B with
the removed screw which is fastened at the
same place.
Model B, C
Model A
Detail view D
D
End of Heater
End plate of Heat
exchanger
This bracket is for
model B only
For model B and C, fix bracket A with the attached screw (OD5).
Fan bracket
Bracket A
Fan bracket
Heater
Heater
Bracket
Heater
Base
Base
Summary of Contents for V Multi 100VNX
Page 98: ... 97 13 PAC T 197 Models FDT100VF1 125VF 140VF H H H H H C B A F G D G PJF000Z285 A ...
Page 101: ... 100 13 PAC T 197 Models FDEN60VF 71VF1 C2 C1 A B A B D C1 C2 C1 C2 E G F C PFA003Z817 ...
Page 116: ... 115 13 PAC T 197 b Wireless remote control RCN E1R 60 17 150 Unit mm ...
Page 291: ... 290 13 PAC T 197 261 12 PAC T 173 ー K ...
Page 590: ... 589 13 PAC T 197 3 8 SUPER LINK E BOARD SC ADNA E F ...
Page 591: ... 590 13 PAC T 197 ...

