-
326
-
'13 • PAC-T-197
(b) RC-E5
(i) Louver control
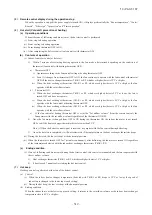
1) Press the “LOUVER” button to operate the swing louver when the air conditioner is operating.
“SWING
” is displayed for 3 seconds and then the swing louver moves up and down continuously.
2) To fix the swing louver at a position, press one time the “LOUVER” button while the swing louver is moving so that
four stop positions are displayed one after another per second.
When a desired stop position is displayed, press the “LOUVER” button again. The display stops, changes to show
the “STOP 1
” for 5 seconds and then the swing louver stops.
3) Louver operation at the power on with a unit having the louver 4-position control function
The louver swings one time automatically (without operating the remote control) at the power on.
This allows inputting the louver motor (LM) position, which is necessary for the microcomputer to recognize the
louver position.
Note (1) If you press the “LOUVER” button, the swing motion is displayed on the louver position LCD for 10 second. The display changes to the
“SWING
” display 3 seconds later.
(ii) Automatic louver level setting during heating
At the hot start with the heating thermostat OFF, regardless whether the auto swing switch is operated or not (auto
swing or louver stop), the louver takes the level position (In order to prevent the cold start). The louver position display
LCD continues to show the display which has been shown before entering this control.
(iii) Louver-free stop control
When the louver-free stop has been selected with the indoor function of wired remote control “
POSITION”, the
louver motor stops when it receives the stop signal from the remote control. If the auto swing signal is received from the
remote control, the auto swing will start from the position where it was before the stop.
Note (1) When the indoor function of wired remote control “
POSITION” has been switched, switch also the remote control function “
POSITION” in the same way.
(4) Timer operation
(a) RC-EX1A
(i)
Sleep timer
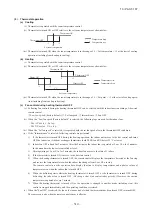
Set the time from the start to stop of operation. The time can be selected in the range from 30 to 240 minutes (in the
unit of 10-minute).
Note (1) Enable the “Sleep timer” setting from the remote control. If the setting is enabled, the timer operates at every time.
(ii) Set OFF timer by hour
Set the time to stop the unit after operation, in the range from 1 to 12 hours (in the unit of hour).
(iii) Set ON timer by hour
Set the time to start the unit after the stop of operation, in the range from 1 to 12 hours (in the unit of hour). It is
allowed also to set simultaneously the indoor temperature, operation mode, air flow rate and warm-up enabled/
disabled.
(iv) Set ON timer by clock
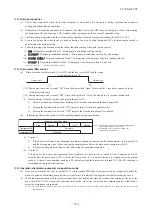
Set the time to start operation. The time can be set in the unit of 5-minute. This setting can be activated only once
or at every time. It is allowed also to set simultaneously the indoor temperature, operation mode, air flow rate and
warm-up enabled/disabled.
Note (1) It is necessary to set the clock to use this timer.
(v)
Set OFF timer by clock
Set the time to stop operation. The time can be set in the unit of 5-minute. This setting can be activated only once or
at every time.
Note (1) It is necessary to set the clock to use this timer.
(vi) Weekly timer
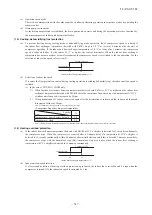
Set the ON or OFF timer for a week. Up to 8 patterns can be set for a day. The day-off setting is provided for
holidays and non-business days.
Note (1) It is necessary to set the clock to use the weekly timer.
Summary of Contents for V Multi 100VNX
Page 98: ... 97 13 PAC T 197 Models FDT100VF1 125VF 140VF H H H H H C B A F G D G PJF000Z285 A ...
Page 101: ... 100 13 PAC T 197 Models FDEN60VF 71VF1 C2 C1 A B A B D C1 C2 C1 C2 E G F C PFA003Z817 ...
Page 116: ... 115 13 PAC T 197 b Wireless remote control RCN E1R 60 17 150 Unit mm ...
Page 291: ... 290 13 PAC T 197 261 12 PAC T 173 ー K ...
Page 590: ... 589 13 PAC T 197 3 8 SUPER LINK E BOARD SC ADNA E F ...
Page 591: ... 590 13 PAC T 197 ...

