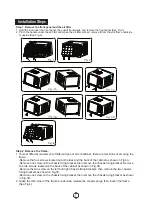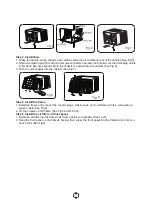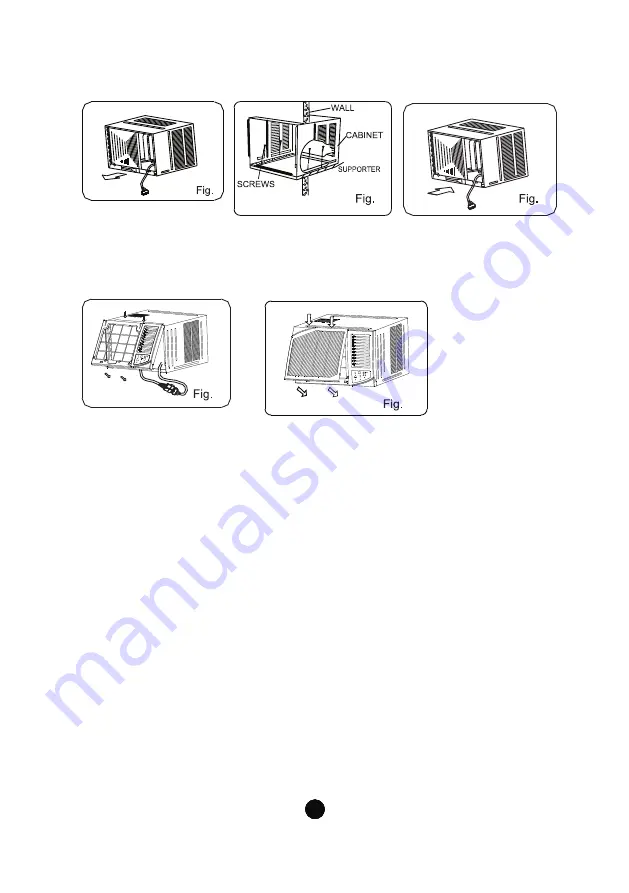
Step 3. Installation.
1. Grasp the handle on the chassis and carefully slide the air conditioner out of the cabinet (See Fig.5).
2. Remove shipping pad from around compressor before operation and make sure the discharge points
to the drain pan are aligned before the chassis is pushed into the cabinet (See Fig.6).
3. Push the unit chassis into the cabinet (See Fig.7).
Step 4. Install the frame.
1. Install the frame and connect the coupler plugs, making sure not to interfere with the temperature
sensor cable (See Fig.8).
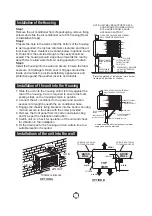
2. Fix the screws on the frame (See Fig.3A,3B,3C,3D).
Step 5. Install the air filter and front panel.
1. Install the air filter into the frame's slot from upside to underside (See Fig.2).
2. Hang the front panel on the frame's buckle, then press the front panel into the frame's slot until you
hear a click (See Fig9).
5
6
7
8
9
14
Summary of Contents for WRK20MA1
Page 10: ...OPERATING INSTRUCTIONS 7 ...
Page 11: ...8 ...
Page 23: ...1 內容 1 安全說明 2 2 部件說明 5 3 操作說明 6 4 安裝說明 11 5 故障檢修表 15 6 參數 16 ...
Page 29: ...7 7 POWER MODE MODE 1 30 1 17 FAN FAN SWING SWING TIMER 24 0 5 10 1 ...
Page 30: ...8 8 17 30 SWING ...
Page 31: ... Note 9 9 ...
Page 32: ...1 2 1 2 3 4 1 2 3 40 4 10 10 1 2 3 4 T RUBBER PLUG SCREW DRAIN PAN DRAIN OUTLET ...
Page 35: ...13 13 1 See Fig 1 2 See Fig 2 4 A B C D 2 1 Fig 3A Fig 3B Fig 3C Fig 3D 2 Fig 4 ...
Page 37: ... 15 15 ...
Page 39: ......

