background image

8

CONNECTIONS

OTHERS

PRECAUTIONS

FEA

TURES

PREP

ARA

TION

TROUBLE-

SHOOTING

CONTENTS

AC  LINE

4

2

1

3

3

1

1

1

1

1

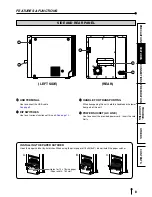
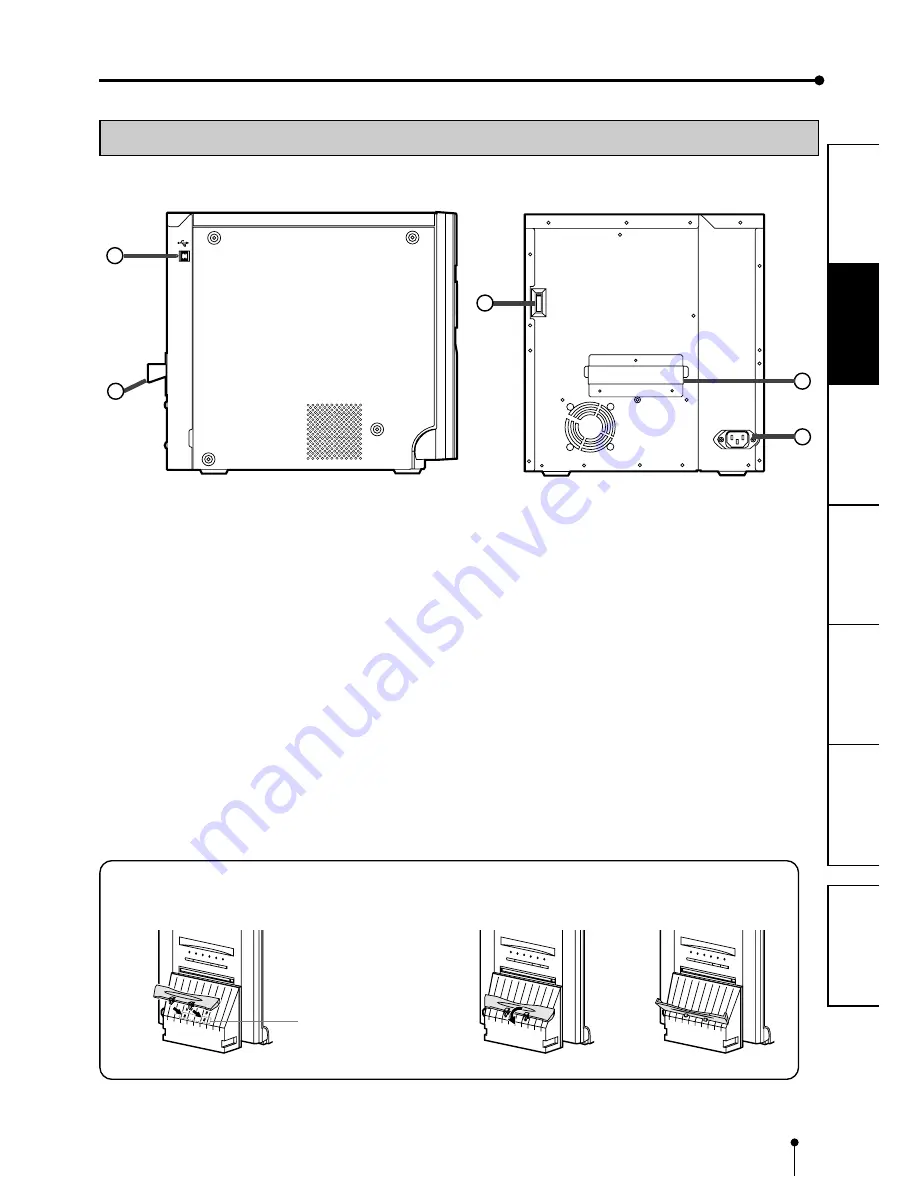
USB TERMINAL

Use to connect the USB cable.

See page 9.

2

2

2

2

2

DIP SWITCHES

Use to set various functions of this unit. 

See page 10.

SIDE AND REAR PANEL

FEATURES & FUNCTIONS

3

3

3

3

3

HANDLE FOR TRANSPORTING

When transporting this unit, hold this handle and the lower

front part of this unit.

4

4

4

4

4

POWER SOCKET (AC LINE)

Use to connect the provided power cord.  Insert the cord

firmly.

(LEFT SIDE)

(REAR)

INSTALLING THE PAPER CATCHER

Hook the paper catcher by its latches. When using the print paper of 15x23(6x9”), do not install the paper catcher.

A.

B.

C.

Holes for 10 x 15 size paper
(Paper width : 152 mm)

Summary of Contents for CP9600DW-S

Page 1: ...th the essential requirements and other relevant provisions of Directive 1999 5 EC This digital color printer complies with the requirements of the EC Directive 89 336 EEC 73 23 EEC 93 68 EEC The elec...

Page 2: ...ing the appliance The Caution hot surface symbol indicates that the marked item may be hot and should not be touched The Electro Static Discharge ESD warning symbol indicates that trouble including eq...

Page 3: ...with IEC60320 1 C13 type 125V 10A or higher rating connector and NEMA 5 15 type 125V 10A or higher rating plug Use the AC power cord as specified above so as not to interfere with radio and television...

Page 4: ...s 9 10 Connection with USB data signal equipment 9 Setting of DIP switches 10 Before operation 11 15 Installation of print paper 11 12 Installation of ink ribbon 13 14 Handling of paper ink ribbon set...

Page 5: ...reason water seeps to the inside of the unit unplug the power cord from the source outlet and contact the sales dealer If used without corrective measures the unit may be damaged In the interest of sa...

Page 6: ...dew is likely to be formed If dew is formed printing is not possible OPERATING AMBIENT TEMPERATURE RANGE The operating ambient temperature range is 5 C 40 C 41 F 104 F and the humidity of 30 80 RH Wh...

Page 7: ...15x23 6x9 size paper the printer may stop printing temporarily for cooling down The COOLING indicator blinks Please wait for the printer to resume printing after its completion of cooling Do not touch...

Page 8: ...rints per roll for 10x15 4x6 is offered Large economical print capacity per roll reduces frequency of exchanging paper and ink ribbon HIGH QUALITY PRINTING CP9600DW S is a dye sublimation thermal tran...

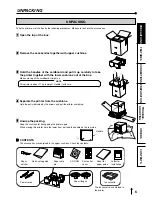
Page 9: ...of the box 2 2 2 2 2 Remove the accessories together with upper cushions 3 3 3 3 3 Hold the handles of the cardboard and pull it up carefully to take the printer together with the lower cushions out o...

Page 10: ...ICATOR This indicator illuminates or blinks when a paper jam occurs or the door is open See page 16 8 8 8 8 8PAPER INK RIBBON INDICATOR When an error concerning the ink ribbon or print paper occurs th...

Page 11: ...EAR PANEL FEATURES FUNCTIONS 3 3 3 3 3 HANDLE FOR TRANSPORTING When transporting this unit hold this handle and the lower front part of this unit 4 4 4 4 4 POWER SOCKET AC LINE Use to connect the prov...

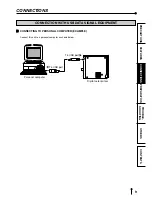
Page 12: ...N TROUBLE SHOOTING CONTENTS CONNECTIONS CONNECTION WITH USB DATA SIGNAL EQUIPMENT To USB port Personal computer Digital color printer To USB port 2 2 2 2 2 CONNECTING TO PERSONAL COMPUTER EXAMPLE Conn...

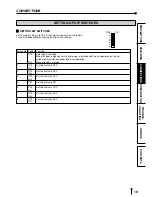
Page 13: ...No Setting Function 1 OFF Auto feed cut mode When the door is closed after the print paper is installed with this unit powered on this unit automatically carries out paper feed cut operation ON Manua...

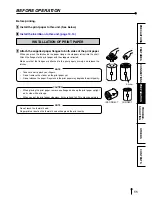
Page 14: ...the print paper with the stoppers retracted Make sure that the flanges are attached to the print paper securely and release the latches NOTE Take care not to pinch your fingers Do not remove the stick...

Page 15: ...emove the sticker before inserting the print paper between rollers Make sure to insert the paper straight NOTE Keep the roller clean Dirt on the roller may degrade the print quality NOTE When taking t...

Page 16: ...nk ribbon roller to the ditches firmly Turn the ivory roller to eliminate any slack Guides Arrows 1 1 2 2 4 4 3 3 1 2 4 3 Ink ribbon Ink cassette Gear ivory Handle 2 2 2 2 2 INSTALLING THE INK RIBBON...

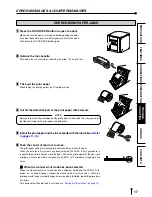
Page 17: ...it until a click is heard If the PAPER INK RIBBON indicator illuminates when the door is closed the print paper may have not been installed correctly In this case open the door to make sure that the p...

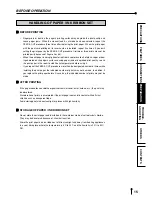
Page 18: ...in the room to stabilize its temperature before using it If you repeat the FEED CUT procedure more than the designated number of times while installing the print paper the indicated number of prints...

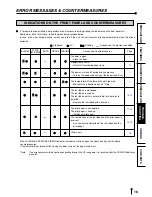
Page 19: ...of the thermal head is too high Wait until the indication goes off Note The ink ribbon is not loaded The ink ribbon is used up The ink ribbon which is not available to this printer is installed Replac...

Page 20: ...being torn 5 5 5 5 5 Install the print paper and the ink cassette with the ink ribbon Refer to pages 11 14 6 6 6 6 6 Push the center of the door to close The print paper setting is initialized two min...

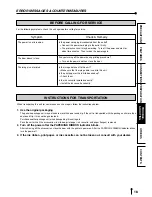
Page 21: ...the ink cassette correctly INSTRUCTIONS FOR TRANSPORTATION When transporting this unit for some reason such as repair follow the instructions below 1 Use the original packaging The genuine package uni...

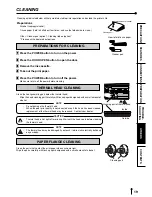
Page 22: ...k cassette 4 4 4 4 4 Take out the print paper 5 5 5 5 5 Press the POWER button to turn off the power Make sure to turn off the power before cleaning THERMAL HEAD CLEANING Clean the heat generating par...

Page 23: ...DPI mode Approx 41 sec sheet Supply method Automatic Interface Hi Speed USB Ver 2 0 Power supply 220 240 V AC 50 60 Hz 120 V AC 50 60 Hz Power consumption 1 6 A 220 240 V AC 50 60 Hz 2 9 A 120 V AC 50...

Page 24: ...asse 8 40880 Ratingen Postfach 1548 40835 Ratingen Germany Phone 49 2102 486 9250 FAX 49 2102 486 7320 French Branch 25 Boulevard des Bouvets 92741 NANTERRE cedex France Phone 33 1 55 68 55 00 FAX 33...

Reviews: