background image

Summary of Contents for CS-35305

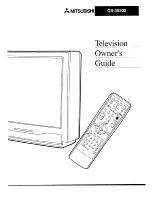
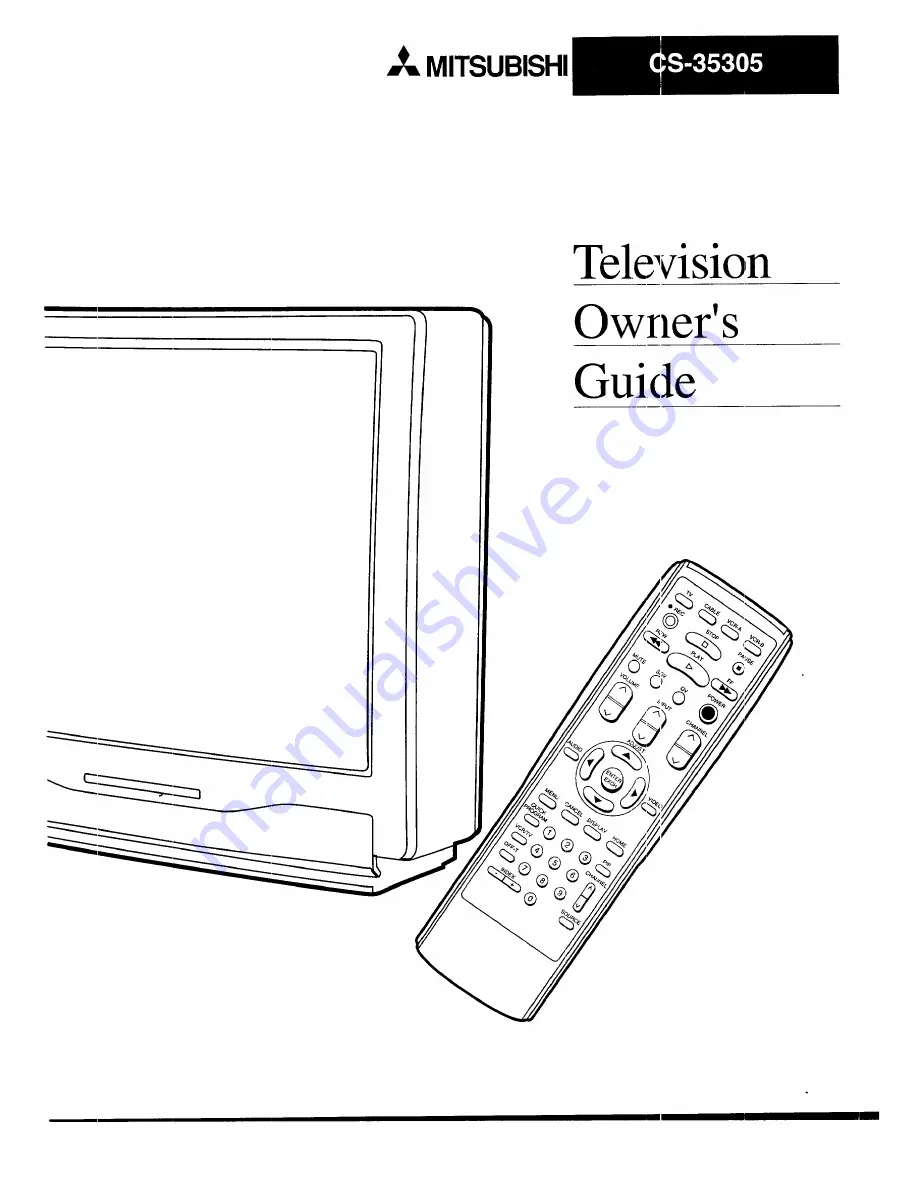
Page 1: ..._ _ MITSUBISHI Television Owner s Guide ...

Page 2: ...on t leave stationary images such as those generated from stock market reports video games statior_ logos or TV displays on screen for more than 10 minutes Still patterns such as these can scar the TV causing permanent damage to the picture tube WARNING TO PREVENT FIRE OR SHOCK HAZARD DO NOT EXPOSE THIS APPLIANCE TO RAIN OR MOISTURE CAUTION TO PREVENT ELECTRIC SHOCK HAZARD DO NOT USE THIS UNIT S P...

Page 3: ...le without a decoder box 25 TV cable with a decoder box 26 TV separate UHF and VHF antennas 27 TV VCR antenna or cable without a decoder box 28 TV VCR cable with a decoder box 31 TV audio system 34 Chapter 3 Operating Your TV 35 Getting Started 36 Adjusting the color purity 37 Using the remote control to operate able boxes and other brands of VCRs 38 Turning the TV on off 41 Selecting the input so...

Page 4: ...r 71 Using the Advanced Picture in Picture PIP Modes 72 Activating the PIP image 73 Selecting the source of the PIP 74 Changing channels while using tile PIP modes 74 Exchanging the PIP image and the main image 75 Moving the PIP image 75 Freezing the PIP image 76 Using the Snap shot feature 77 Using the Replay feature 78 Chapter 5 Troubleshooting 79 Caution and Care 82 Calling for Service 83 Appen...

Page 5: ...ot be blocked or covered The openings should never be blocked by placing the W receiver on a bed sofa rug or other similar surface This _ W receiver should never be placed near or over a radiator or heat register _his TV receiw_r should not be placed in a built in installation such as a bookcase or rack unless proper ventilation is provided or _he manufacturer s instructions have been ad _ered to ...

Page 6: ... yourself as opening or removing covers may expose you to dangero_ s voltage or other hazards Refer all servicing to qualified service personnel 19 Damage Requiring Service Unplug this TV receiver from the wall outlet and refer servicing to qualified service person nel under the followin_ conditions a When the power supply cord or plug is damaged b Ifl quid has been spilled or objects have fallen ...

Page 7: ... provides t _e following impor tant information 0 Summary of Special Features 0 Unpacking Your TV What s in Each Chapter 0 Some Conventions Used in this Guide Mitsubishi has strived to create your TV so that it will bring you years of viewing enjoyment Sirailarly your owner s guide i _ designed with a user friendly philosophy thai will help you take advantage of all of your equipment s features On...

Page 8: ...sion certain Mitsubishi VCRs and also some VCRs an cable boxes from other manufacturers On Screen Displays appear whenever you adjust your TV showing you the status of your TV s various functions On Screen Menu simplifies the television s features with easy to follow instructions Closed Caption Decoder decodes hidden text information included with TV shows and displays the text on screen Extended ...

Page 9: ...d a set of two AA size batteries for the remote control A few suggestions Before you hook up your new TV please take a few minutes to O 0 0 0 Complete the registration card The r _ _tration card asks for the TWs serial number which you ll find on the back of the unit Keep the box and packing materials for future use File your sales receipt Place the TV on a stable surface with suJ_cient lighting t...

Page 10: ...to your _ V Chapter 3 Operating Your TV provides the step by step instructions you need in order to use your TV Chapter 4 Using the Special Features explains how to use some of the special features of the TV Chapter 5 Troubleshooting summarizes the problems you may have along with suggestions for remedying these problems The appendix explains a procedure that allows you to bypass the parental lock...

Page 11: ...paringly and you should carefully rea _t all information highlighted in this manner Ima_o opicortoskl Ilis of ela ed topics or asksl Ba_c Comaec ions Lrelated topics or tasks J _ I_ o 0_to This cue indicates information c_ itical to the operation of your new TV This cue alerts you to informa tion describing dangerous situations that could ruin your equipment or cause electrical shock The step by s...

Page 12: ......

Page 13: ... the range of options available when using the buttons on the remote control or oil tlhe control panel of the TV It also offers some general guideline _ fi r using the remote Most functions can be controlled by using eithc r the control panel or the remote control but certain specialized functions require the use of one or the other This chapter which will familiarize you with the full range of bu...

Page 14: ...Overview of the Control Panel Buttons through 0 are lecated here The STRENGTH DIRECTION swi Bches _ are located here 1 _ _ 2 S STRENGTH DIRECTION 12 Chapter 1 Getting to Know Your TV ...

Page 15: ...controls CH Use the button to switch to a channel with a higher number and the button to switch to a channel with a lower number input button INPUT Use this button to select the input source you want to view TV or Input A V reset button A V RESET Press this button to reset all audio and vi Jeo functions to their normal level or setting except volume reception mode speaker and closed captioning deg...

Page 16: ...e packing bag O Remove the back cover of the remote control by pushing in the direction of the arrow Load the batteries as indicated in the illusl ration making sure that they are positioned correctly to _ and to 0 Replace the back cover of the remote control O O O For best results use Duracell AA MN1500 batteries 14 Chapter 1 Getting to Know Your TV ...

Page 17: ...harsh chemicals Use only a soft slightly moistened cloth general instructions When using the remote control to operate the TV VCR or cable box follow these procedures O Be within 20 feet of the desired equipment O Point the top of the remote control toward the equipment Press the appropriate button or sequence of buttons guidelines for using batteries Don t use a new battery with an old one Don t ...

Page 18: ...trol buttons and functions IV CABLE VCR A VCR B REC STOP PAUSE __ REW PLAY FF VOLUME INPUT CHANNEL MENU CANCEL DISPLAY HOME CD _ CD Q vcpgrv OFF T _Q INDEX I VCR CH SOURCE 2D 16 Chapter 1 Getting to Know Your TV ...

Page 19: ...this button to view the channels t _at you have pro grammed into super quick view memors See page 45 11 quick view button QV Press this button to instantly switch to the channel that you memorized as the quick view channel Se_ page 45 volume control VOLUME Press the top part of the button to turn Ul_the volume press the bottom part of the button to turn down the volume input button INPUT Use this ...

Page 20: ...ss color temperature high middle low or closed captioning adjust buttons ADJUST V rightqeft button _ After selecting the audio or video function use the ADJUST buttons or right left buttons to adjust the function you ve selected These buttons can be used to turn the function on or off e g speakec increase or decrease the function e g color shift from one end of a scale to the othc r e g balance or...

Page 21: ...re information see page _ 72 78 PIP button PIP Press this button to begin displaying the PIP image change t he size of the image or to cancel it VCR channel button VCR CH If you use a VCR as the source for the PIP image use this button to change the channel of the PIP image source button SOURCE Press this button to switch the source of the PIP image between the TV and the exter nal input pause but...

Page 22: ......

Page 23: ...CHAPTER TWO Connechng Your TV This chapter offers step by step instructions for completing the most common hook ups It contains the follcv_Lng sections 0 Overview of the Back Panel t Basic Connections 21 ...

Page 24: ...als to send out the TV s video signal to a VCR a video copy processor etc audio output terminals Use these terminals to send out the TV_s audio signal to a VCR a video copy processor etc Never connect one piece of equipment to both the TV_s input terminals and the TV s output terminals If you do the TV will turn off as a safety precaution 22 Chapter 2 Connecting Your TV ...

Page 25: ...you connect S video equipment the standard video input will be unavailable video input terminal Use this terminal to bring in a video signal from a VCR or another component into the TV audio input terminals Use these terminals to ring in an audio signal from a VCR or other equipment into your TV Overview of the Back Panel 23 ...

Page 26: ...culty making the connections to your TV you may want to contact your Mitsubishi dealer or your local cable company This section explains TV antenna or cable without a decoder box TV cable with a decoder box TV separate UHF and VHF antennas TV VCR antenna or cable without a decoder box TV VCR cable with a decoder box and TV audio system Important You must connect a VCR to see two active images when...

Page 27: ... you ll need One 75 300 ohm transformer _F 75 ohm Coaxial Cable I O O O __ Transformer TV Rear Terminals VHF UHF Tsnl O connecting a cable In Push or screw the end of the cable onto the ANT A te rminal on the TV connecting an antenna with fiat twin leads In Use a screwdriver to connect the leads to the transformer Push or screw the transformer onto the antenna terminal on the TV Basic Connections ...

Page 28: ...8 To complete the hook up you ll need One length of 75 ohm coaxial cable procedure O Connect the incoming cable to the IN terminal on the decoder box O Connect the coaxial cable to the OUT terminal on the back of the decoder box connect the other end of this cable to the antenna terminal on the back of the TV Incoming Cable I 0 Cable Decoder Box Rear Terminals IT 0 TV Rear Terminals VHF UHF 75_ _ ...

Page 29: ...ds Check with your local electronics store for the kind of com biner you need Pictured to the right is a standard combiner I l To connect separate UHF and VHF antennas to your TV O Connect the UHF and VHF antenna leads to the appropriate terminals on the UHF Vt F combiner O Press the combiner onto the antenna terminal on the rear of the TV VHF Antenna UHF Antenna Channels2 13 Channels14 69 _ _P 7 ...

Page 30: ...ct a VCR along with yoar antennas or cable To complete this hook up you may need the following equipment One 75 ohm coaxial cable One set of RCA pin type audio cables One RCA pin type video cable if connecting a standard VCR OR One S Video cable for S VHS VCRs 28 Chapter 2 Connecting Your TV ...

Page 31: ...OUT terminal on the VCR Connect the other end of this cable to the S VIDEO INPUT terminal on the back of the TV O Connect a set of RCA pin type audio cables to the AUDIO OUT terminals on the back of the VCR Use the red cable tc connect the right R channel and the white cable for connecting the left L channel Connect the other ends of these cables r2 the AUDIO INPUT terminals on the back of the TV ...

Page 32: ...ng Cable _ _ or Antenna O Cable O White Lead _ 33 O Red Lead VCR Rear Terminals IN Antenna OUT O AUDIO OUT VIDEO OUT S VIDEO OUT lI l _ _Connect one Yellow Lead _ _ or the other _ J but not both TV Rear Terminals _ v ol _111 30 Chapter 2 Connecting Your TV ...

Page 33: ... you complete this hook up you should set up your remote control to operate your cable box see page 38 To complete the hook up you will need One two way splitter Three lengths of 75 ohm coaxial cable One set of RCA pin type audio cables fl OUT OUT One RCA pin type video cable if connecting a standard VCR OR One S Video cable for S Sr IS VCRs Basic Connections 31 ...

Page 34: ...TV If you are connecting an S VHS VCR use an S Video cable instead of an RCA pin type video cable Connect this S Video cable to the S VIDEO OUT terminal on the VCR Connect the other end of this cable to the S VIDEO INPUT terminal on the back of the _V O Connect a set of RCA pin type audio cables to the AUDIO OUT terminals on the back of the VCR Use the red cable to connect the right R channel and ...

Page 35: ... Incoming Cable l AUDIO OUT VIDEO OUT S VIDEO OUT Antenna L _ _ Cable Decoder Box E_C _ q Rear Terminals OUT _N VCR Rear Terminals OUT TV Rear Terminals Basic Connections 33 ...

Page 36: ...back of the audio system O Turn off the television s speakers To do this press the AUDIO function button on the remote control until you see the Speaker display Set the speakers to Of by pressing the ADJUST buttons See A_usting the sound on page 54 Set the audio system s input to the ALE_ position White Lead _ RedLead O Audio System Rear Terminals AUX L _ R _ TV Rear Tern inals White Lead Red Lead...

Page 37: ...antenna or external components it s time to enjoy your equipment This chapter will explain how to operate the TV first focusing on functions that are basic and easy and then explaining some advanced features This chapter explains 0 Getting Started Using the Advanced Features 35 ...

Page 38: ...he color purity Using the remote control to operate cable boxes mad other brands of VCRs Turning the TV on off Selecting the input source Changing channels Understanding the on screen menus Setting the clock Memorizing channels Adding and deleting channels Renaming the input Selecting the menu language Using video mute Adjusting the sound Adjusting the picture and Using the closed caption decoder ...

Page 39: ...CTION North North East North West South South East South West East West DIRECTION SWITCtt S NEUTRAL N X X X X X X X X _ Important O Turn the TV on and check the color performance If color impurity is still present change the STRENGTH switch to position 1 If there is still impmfity wait a few minutes then press the DEGAUSS button on the control panel You must adjust the color purity switches each t...

Page 40: ...CR from another manuihcturer or if y _u have a cable box you should set up the remote control Each layer on the remote control CABLE VCF A or VCR B can be set for either a cable box or a VCR setting up the remote control to operate y _ur VCR O Turn off your VCR Press one of the select buttons across the top of the remote control to choose the layer that you want to set up You can choose between VC...

Page 41: ...your brand of cable box Be sure to enter both dig s of the number If more than one number is listed try the firs _ one If yourcablebox If yourcablebox is this brand isthis branc General Instrument Philips Hamlin Jerrold Macom Oak Panasonic enterthis code 54 55 56 57 58 59 60 67 68 72 85 87 52 53 69 54 55 56 57 58 59 60 67 68 72 85 87 71 61 62 82 _____ 63 70 Pioneer Oak Regency ___ Scientific Atlan...

Page 42: ... B or CABLE O Point the remote control at the VCR and p ress the desired buttons If you are using a Mitsubishi VCR you will be able to use all of the buttons on the remote control to operate your VCR except fi r MUTE VOLUME and the PIP fhnction buttons which will always operate the TV itself If you are using another brand of VCR you c an use the POWER CHANNEL REC STOP PAUSE REW PI_ kY and FF butto...

Page 43: ... ll amount of current that continues to flow into the 3_V This maintains any changes to the settings and operates the built in clock and timing functions Unplugging the set will erase these settings requiring you to set them again Unplug the TV only when it won t be used for a long time 000 _ _000_ _O00U Zzz_ 0 b POWER When you turn on your TV for the first time he screen may be displaying the Sel...

Page 44: ...TV you will need to change the input source to view the signal from the component To select an input source press the input butto _ INPUT o_ the control panel or on the remote control 0 The name of the input you have selected will be displayed briefly in the corner of the screen 42 Chapter 3 Operating Your TV ...

Page 45: ...unction to switch between chan nels on a user chosen list_ To change channels faster use either of the ollowing procedures Enter three digits for every channel number using ze ros where needed For example enter 004 to view channel 4 and 028 to view channel 28 Press the ENTER button after selecting the number of the channel For example press 4 and E_FrER to view channel 4 Cable channel numbers 0 an...

Page 46: ...ed channel DImportant You cannot change channels sequentially until available channels have been programmed into memory See Memorizing channels page 49 changing cha anels directly ooo0 o O O_ _000 oOOO_ To move directly to a particular channel without going through the programmed Cl Lannels in bel_ween O Use the remote control to select the number of the channel you want to vie _ Press the ENTER b...

Page 47: ...utton to immediately return to the memoI zed channel 0 If you press QV while you are watchi_ g the memorized channel you will sw itch to last channel you were watching The memorized channel will remain the _ame until you memorize a new channel with the procedure described above _klJ _ U 0 0_ _ _O O O _OOO_ c _ 0 using the Super Quick View option To view selected channels pro grammed into Super Qui...

Page 48: ...elected within 5 minutes Unavailable menu items are indicated by light blue letters instead of the normal white letters Some on screen menu items must be set before other items are available For example Set the timer will only be available if Set the clock has been set You can exit the on screen menus any time by pressing the MENU button repeatedly You will then return to regular TV viewing You ca...

Page 49: ...ton on the remote control The TV Main Menu will appear on the screen O Select First Time Set Up using the ADJUST buttons then press the ENTER button O You _LI1 see the First Time Set Up screen Select Set the clock using the ADJUST buttons then press the ENTER button O If you want your TV to set its clock aul omatically use the ADJUST buttons to set Auto clock to On if you want to set the clock you...

Page 50: ...Data Services XDS The clock will start just after the TV receives the XDS signal Set the clock Auto clock Off Day Clock Time zone Daylight savings Use ADJUST to select Then press ENTER Press MENU to return to First Time Set Up Menu setting the clock yourself Set Auto clock to Off using the ADJUST buttons Press the ENTER button _ Set the clock Day Clock Monday Use ADJUST to select Then press ENTER ...

Page 51: ...he ADJUST buttons then p_ e s ENTER Select Memorize channels using the ADJUST buttons then p ress ENTER Use the _ _DJUST buttons to choose the type of antenna you connected Cable antenna or Indoor outdoor anten_ a Press ENTER _ Memodze chaRnels Now memorizing all the stations you can receive Channel 004 Net in memory Please stand by To cancel memorization press CANCEL 0 You will see a message that...

Page 52: ...ENTER Select Ad delete channels using the ADJUST button then press ENTER 1 Add delete channels Channel 006 In memory Use ADJUST to select another channel Press CANCEL to delete Press MENU to return to First Time Set Up Menu The Add delete channels screen will appear Use the ADJUST buttons to select the channel you would like to add or delete You can also use the CHAN NEL button o a the remote cont...

Page 53: ...hen press ENTER Press MENU to return to IV Main Menu You will see the Customize Viewing screen Select Re name the input using the ADJUST buttons press ENTER Rename the input Input label New name _ Input Use ADJUST to select Then press ENTER Press MENU to return to Customize Viewing Menu O Set each character in t he new name u _ing the ADJUoT buttons and the ENTER button You can rename the inputs u...

Page 54: ...e English EspaSol Franc ais Use ADJUST to select Then press ENTER Press MENU to return to Customize Viewing Menu O Press the Mt_ NU button on the remote control The TV Main Menu will appear on the screen O Select Customize Viewinl_ using the _DJUST buttons press ENTEP Select Select Language using the ADJUST buttons press ENTER O Use the ADJ JST buttons to select the language you want O Press the E...

Page 55: ...MENU to return to TV Main Menu _Use Video mute l Automatic Off Use ADJUST to select Then press ENTER Press MENU to return to Customize Viewing Menu O Press the MENU butto a on the remote control The TV Main Menu will appear on the screen O Select Customize Viewing using the _DJUST buttons press ENTER Select U_e Video mute using the ADJ_LIST buttons press ENTER O Using the ADJUST bu Ltons select Au...

Page 56: ...r on screen when you tune to that channel Choose Listen to SAP to hear the S A P signal Use the Mono setting if you are receiving a weak audio signal This setting will reduce background noise However with this setting the TV will only play in m_no even if tlhe program you are watching is in stereo An on screen display appears when programs are broadcast in stereo or when a separate audio programmi...

Page 57: ...Oc oQQQ _QQQB adjusting tile audio functions 0 Press the AUDIO button on the remote control repeatedly until the function you want to adjust appears on screen The func tions appear at the center of the bottom of the screen O While the function is slfill on the screen use the ADJUST buttons tc adjust the function s setting O The funct ions will disappear from the screen after a few seconds You cann...

Page 58: ...ghtness controls the overall brightness of the picture Sharpness adjusts the detail and clarity of the picture The Color temp Color temperature function allows you to set how the TV will display white images With the Low setting white images on screen will have a yellow cast to them With the High setting white images on screen will haw_ a blue cast to them With the Middle setting white images on s...

Page 59: ...h station may be broadcasting only one or two captioning signals or none at all When setting the decoder you can choose to display one of four standard captioning signals _ _ C7 1 2 _ 3 _ 4 to display one of four text captioning signals _ _ Text 1 Text 2 Text 3 _ _ Text 4 to display captions when muting _rhen Muting or to turn the captions off Off If you select When Muting the standard captioning ...

Page 60: ...y pressing the HOME button on the remote control during normal TV viewing uses for closed captioning Closed captioning was initially de_ _igned so that lhose with hearing difficulties could better enjoy viewing television However clo_sed captioning can also be used in other ways such as helping children learn to read learning a foreign language and using the television without disturbing others If...

Page 61: ...ed Features This section explains how to use some of the more advanced func tions You ll learn about Setting the timer Using the parental lock Using the Super Quick View tuning and Selecting an advanced PIP function 59 ...

Page 62: ... time Channel Use ADJUST to select Then press ENTER Press MENU to return to Advanced Features Menu 0 Use the ADJUST buttons and the ENTER button to set Day Start time and Channel After setting the timer make sure that the program timer indicator is lit The indicaS_r will light in orange when the TV is turned on and light in red when the TV is turned off The indicator will light in green when using...

Page 63: ... turn the lock off permanently To turn the lock off perma nently follow the procedure later in this section _ Advanced Features Set the timer b Use Parental lock Use Super Quick View Use Advanced PIP Use ADJUST to select Then press ENTER Press MENU to return to TV Main Menu _ Use Parental lock _ Lock the TV Lock the channel Use ADJUST to select Then press ENTER Press MENU to return to Advanced Fea...

Page 64: ...he TV will appear Enter a four digit secret code using the number buttons 0 9 then press the ENTER button Use the ADJUST buttons to select Start press ENTER Use the ADJUST buttons to set the time at which you want the TV lock to turn on Press ENTER Use the ADJ2JST buttons to set the time at which you want the TV lock to turn off Press EN_FER If you want the T7 lock to be in effect all the time set...

Page 65: ... to select a position Press ENTER _ Lock the channel I_ Channel 0 0 3 Use ADJUST to select Then press ENTER Press MENU to return to Advanced Features Menu This Channel is locked Enter your personal code using NUMBER buttons Then press ENTER to watch this channel Use the ADJUST button to choose the channel you want to lock Press ENTER Repeat the steps above to lock additional channels When you are ...

Page 66: ...ss ENTER Select Use parental lock using the ADJUST buttons press ENTER Use Parental lock Channel Now the lock is on Enter your personal code using NUMBER buttons Then press ENTER to turn the lock off Press MENU to return to Advanced Features Menu 0 Use the ADJT_IST button to select the lock you want to cancel Press ENTER Entor the fbur digits of your secret code using the number buttons 0 9 press ...

Page 67: ... the MENU button on the remote control The TV Main Menu will appear on the screen O Select Advanced Features using the ADJUST buttons press ENTER Select Use Super Quick View using the ADJUST buttons then press the ENTER button O Use the _DJUST buttons to select a position in the list press ENTER O Use the ADJUST buttons CHANNEL buttons or number buttons to add a channel 1Lo the list press ENTER Yo...

Page 68: ...to return to TV Main Menu _ Use Advanced PIP Current setting TV Still Use ADJUST to select Then press ENTER Press MENU to return to Advanced Features menu Use Advanced PIP Current setting Replay Reptayspeed 1 Use ADJUST to select Then press ENTER Press MENU to return to Advanced Features Menu O Press the MENU button on the remote control The TV Main Menu will appear on the screen Select Advanced F...

Page 69: ...ous chapter this TV offers the user several special features not generally available on other brand TVs This chapter will explain how to use these distinctive features It contains the following topics 0 Understanding the On Screen Displays 0 Using the Off Timer 0 Using the Advanced Picture in Picture PIP Modes 67 ...

Page 70: ...m Input S VIDEO O23 Thursday 10 23 am network name I programname 1 program description The first setting _ hows channel nuraber the call letters for this chanrml stereo and or SAP are available for reception on this channel this channel is programmed into Super Quick View memory PIP input source when a PIP image is showing current day of the week and time The second setting shows the externa input...

Page 71: ...et the TV to turn off automati cally You can set the TV to turn off after a period of time ran_ng from 10 to 120 minutes in ten minute intel q_ds_ In this section you ll learn Setting the off timer and Changing or canceling the off timer Using the Off timer 69 ...

Page 72: ...F T The time will decrease in 10 minute intervals each time you press the button If you later want to check on how much time is left in the off timer press the off timer button OFF T once The on screen display reads off timer and shows the amount of time remaining During the last minute before the TV is set to turn off Off timer 1 min will flash in red to remind you that the off timer is set TV Of...

Page 73: ...te control An on screen display will indicate the amount of time remaining until the TV will turn off O Continue pressing the off timer button OFF T repeatedly to change the remaining time or cancel the off timer The off timer is canceled when appears instead of the remain ing time Using the Off timer 71 ...

Page 74: ...ctivating the PIP image Selecting the source of the PIP image Changing channels while using the PIP modes Exchanging the PIP image and the main image Moving the PIP image Freezing the PIP image Using the Snap shot feature and Using the Replay feature _ Important You must have a VCR connected to the TV to see two different live pictures when using PIP The instructions for connecting your VCR are de...

Page 75: ...3 0 Press the PIP button again within 10 _econds the PIP image will change to a s ma ler size If you wait longer than 10 seconds the PIP image will disappear when you press the PIP button Press the PIP button once again to cancel the PIP image When the main image is black and white the PIP image will also appear in black and white If you move the PIP image and then turn it off it will remain in it...

Page 76: ... modes c _ c o D ooo0 988 _ x ccJO 0 II You can use t he buttons on the remote control to change the channels of both the main image and the small PIP image as if your TV had two tuners _ Point the remote at the VCR and press the VCR channel button VCR CH on the remote control to change the channel of the PIP image Press the CI L_NNEL button on the remote control to change t he channel of the main...

Page 77: ...N Stereo SAP SQV Input input 23 Moving the PIP image c _o 0ooO dmb _1 o I _ qmmJ OOOO oO00 oOO0_ _0 o Press the ADJUST up down buttons or right left buttons to move the PIP image _Important If you move the PIP image and then turn it off it will remain in its new position when you turn it on again Using the Advanced Picture in Picture PIP Modes 75 ...

Page 78: ... Selecting an advanced PIP function page 6 O Use the MENU button to return to the normal picture 000_ _O00Q oO00O O Press the PAUSE button to freeze the PIP image on the screen O Press PAUSE again to return the PIP image to a live picture Important When you press the pause button while viewing the normal pictm e the PIP image will appear and be _ ozen TV Still disappears after a few seconds 76 Cha...

Page 79: ...s tile PAUSE button again a third PIP image will appear moving The previous two PIP images will be frozen Each time you press the PAUSE button the PIP images will shift upwards one by one the top ima_ e will be replaced by the second image the second image will be replaced by the third and a new moving image will appear in the third space To cancel the PIP image press the PIP button twice if the P...

Page 80: ...age 66 O Set the replay speed between 1 short intelwal and 9 long interval Use the MEI_FU button to return to t he normal picture O Press the PAUSE button The TV will memorize seven frames of video from the main image and display the first three of these frames as PIP images The interval between the frames is determined by the replay speed set in step 0 ooo0 888 O00_ _ 00 _ 008 A PAUSE B Each time...

Page 81: ... advanced operations of the TV you may rlln into trouble from time to time as you become accustomed to the TV This chapter offers solutions to some of the common problems you may encounter We suggest that you consult this chart before contacting a Mitsubishi service representative 79 ...

Page 82: ...emote control The TV takes several seconds to respond to button commands Use the ENTER button to avoid delays See Changing channels in Chapter 3 which explains the function of the ENTER button You can t access a channel Be sure that the channel you want to view is programmed into memory Check that the TV is tuned to the correct input source antenna for that channel See Memorizing channels in Chapt...

Page 83: ...ct the appropri ate reception mode You forget the code you used to set the parental lock Use the alternate procedure that doesn t require the use of the code See the Appendix Proce dure for Bypassing the Parental Lock You can t program the TV to turn on automatically The TV may be locked See Using the parental lock under Using the Advanced Features in Chapter 3 The sound doesn t match the image on...

Page 84: ...V please read the IMPORTANT SAFEGUARDS carefully and apply them properly To keep your TV from toppling in the event of an earthquake you can use the clamp attached to the back of the te e_ision to secure it to the wall Simply run a cord or cope through the clamp then attach the rope to the wall directly behind the tele_rision Cleaning Normally light dusting with a non scratching duster will keep y...

Page 85: ...cial displays used by the factory _ Initial Hotel Off Power res Off Ant 1 Input 1 When mute On P Initial 3 dia On E2RESET CCD On Hotel Off Auto clock On Power res Off SystemlA Off Ant 1 PIP On or Off Input I Mntr fix Off When m_Jte On VCH 0 0 COL 63 If one of these displays appears make sure that all of the on off settings are the same as the illustrations above and then turn the TV off If any of ...

Page 86: ......

Page 87: ... 9 button on the remote control at the same time This will unlock the TV O Press the MENU button to view the main menu Use the ADJUST button to select Advanced Features Press ENTER Use the ADJUST button to select Use Parental Lock Use the ADJUST button to choose the lock you want to turn off If the TV is locked select Lock the TV OR If the channel was locked select Lock the Channel O If you select...

Page 88: ......

Page 89: ...ton 13 deleting channels 50 direction switch 13 display button 19 displays 68 E enter button 17 1 9 espafiol 52 exchange button 17 19 exchanging PIP image 75 F features advanced 5 special 6 6 7 fran_ais 52 freezing PIP 76 front panel 17 H home button 19 I important safeguards 3 input button 13 17 input audio video 23 renaming 51 selecting 42 installing batteries 14 L language selecting 52 lock byp...

Page 90: ...und adjusting 54 source button 19 source PIP 74 special features 6 67 SQV button 17 stereo 54 strength switch 13 super quick view 45 65 super quick view button 17 surround 54 T text 57 time setting 47 timer 60 timer indicatcr 13 timer off 69 tint 56 treble 54 troubleshooting 79 turning your TV on off 41 TV lock 61 TV connecting 21 TV unpac_dng 7 U unpacking your TV 7 V VCR buttons 17 codes 39 conn...

Page 91: ...se which could affect you 2 AFTER THE FlRST YEAR to obtain warranty service for a defective picture tube you are responsible for d qivering the television or monitor to an authorized MITSUBISHI service center at your own expense 3 THIS WARRANTY DOES NOT COVER damage caused by modification alteration repair or service o this product by _nyone other than all authorized MITSUBISHI service center phys...

Page 92: ... _ MITSUBISHI MITSUBISHI CONSUMER ELECTRONICS AMERICA INC 6100 Atlantic Boulevard Norcross GA 30071 1305 _D1995 Mitsubishi Consumer Electronics America Inc 1371C908A1 Printed in U S A ...

Reviews: