EN-16
Setting up your projector (continued)
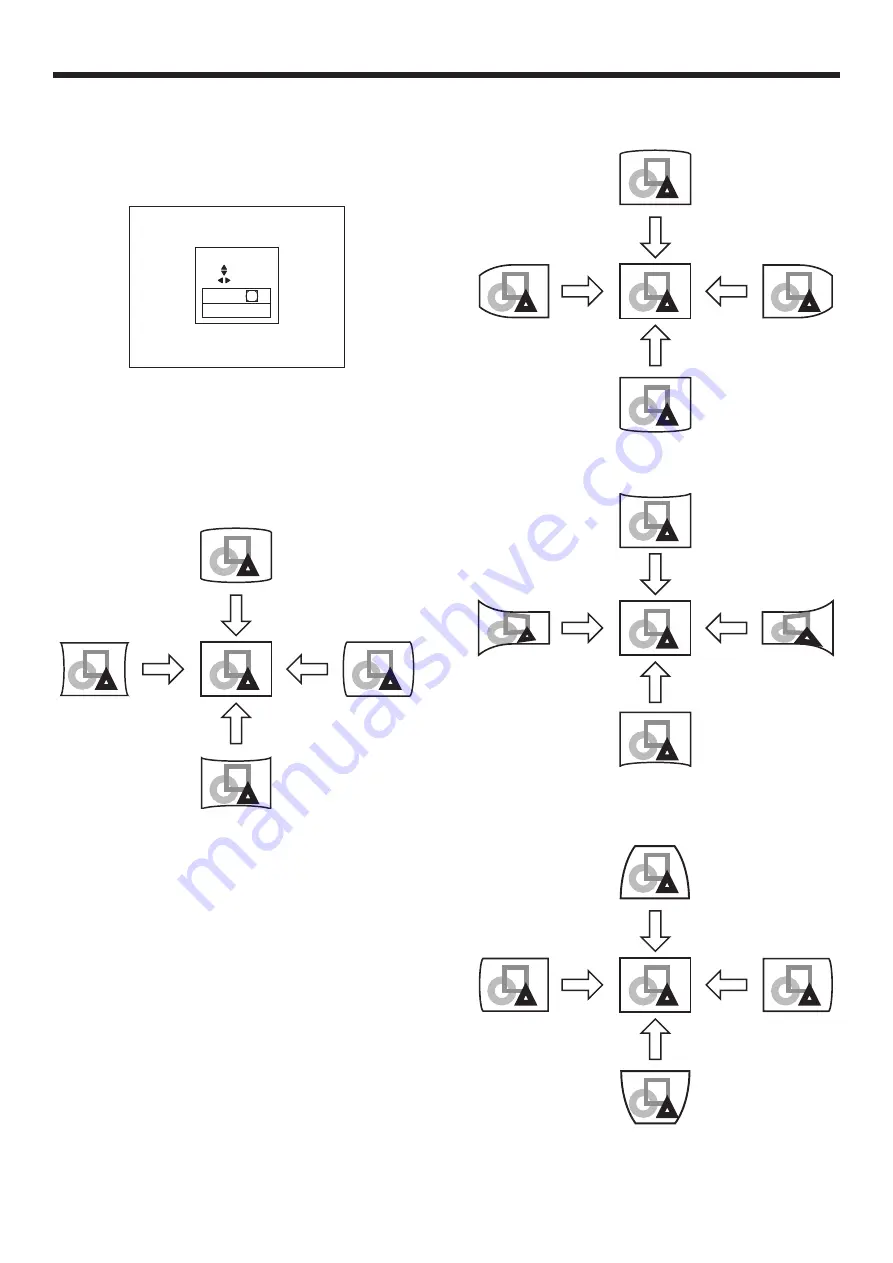
Adjustment using the CURVED mode
To adjust images projected on a curved surface, press
the ENTER/GEOMETRY button on the projector or the
GEOMETRY button on the remote control to display
the CURVED mode, and then press the
,
,
or
button to correct the distortion.
CURVED
ARC
SELECT : BLANK
: 0
: 0
Every time you press the BLANK button, the
adjustment menu changes as follows:
ARC
→
HORIZ. ORIGIN
→
VERT. ORIGIN
→
RESET
→
ARC...
ARC menu
You can correct the arc vertically or horizontally
focusing on the screen center.
Press the
button.
Press the
button.
Press the
button.
Press the
button.
HORIZ. ORIGIN or VERT. ORIGIN menu
When the CURVED-mode adjustment has excessive
effect on either top or bottom or either right or left side
of the screen, adjust the horizontal or vertical position
of the origin to the horizontal or vertical arc. Without
the arc adjustment, the image shape won’t change.
Adjusting the origin to the horizontal arc
• When the horizontal arc adjustment is negative (-)
(or the ARC is adjusted in the
direction)
Press the
button.
Press the
button.
Press the
button.
Press the
button.
• When the horizontal arc adjustment is positive (+)
(or the ARC is adjusted in the
direction)
Press the
button.
Press the
button.
Press the
button.
Press the
button.
Adjusting the origin to the vertical arc
• When the vertical arc adjustment is negative (-) (or
the ARC is adjusted in the
direction)
Press the
button.
Press the
button.
Press the
button.
Press the
button.


