77/100
5.3.5
Changing the displayed camera
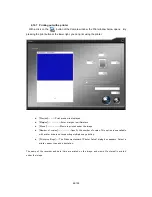
In order to change the camera image displayed in an individual Camera window, drag a
desired camera from the camera list at the right of the screen and drop it in the Camera window
where you want to change the display camera. Not only you can change the display position
among cameras in display, but you can also display a non-displayed camera (in gray characters)
by setting the camera list to the All Camera display mode.
When the dropped window is in live, the live operation is continued. When the dropped
window is in recorder image display, the recorder displaying operation is continued.
Image quality of the displayed image and speed are adjusted from the Camera Window panel
(refer to Sec. 3.3.2). Use the control area in Section 3.3.5 to adjust all the displayed cameras
simultaneously.
Notice
In DX-TL2500 series recorders, recorded images are transferred at the picture quality level
applied when those images were recorded. You can’t change this picture quality level. Even in
DX-TL5000 series recorders, you can’t improve the picture quality of the image that was
recorded at a low picture quality level.
Regardless of the picture quality, you can adjust the image refresh speed using the refresh
speed slide bar. This slide bar adjusts the interval of loading images. The larger this interval is,
the less the restrictions become on the communication band to be used and the load applied to
the recorder.
1. Drag and drop the camera name.
2. The displayed camera is changed.


