background image

-VII-

Assembling Components

•  Assemble components using only the sealant

(or equivalent) that is specified in the service
procedure.

•  Sealing surfaces must be clean and free of

debris or oil.

•  Specific components such as crankshaft oil

seals or valve stem oil seals may require
lubrication during assembly.

•  Components requiring lubrication will be

identified in the service procedure.

•  Apply only the amount of sealant specified in

the service procedure to a component.

•  Do not allow the sealant to enter into any blind

threaded holes, as the sealant may prevent the
fastener from clamping properly or cause
component damage when tightened.

•  Tighten fasteners to the proper specifications.

DO NOT overtighten the fasteners.

Assembly
Cleanliness and Care

This engine is a combination of many machined,
honed, polished and lapped surfaces with toler-
ances that are measured in ten thousandths of an
inch. Care and cleanliness are important when any
internal engine parts are serviced. During assembly,
a liberal coating of engine oil should be applied to
friction areas to protect and lubricate the surfaces
on initial operation. Throughout this section, it
should be understood that proper cleaning and
protection of truck surfaces and friction areas are
part of the repair procedure. This is considered
standard shop practice, even if not specifically stated.

When valve train components are removed for
service, they should be retained in order. At the
time of installation, they should be installed in the
same locations and with the same mating surface
as when removed.

1.

Wash all parts, except for oil seals, O-rings,
rubber sheets, etc., with cleaning solvent and
dry them with air pressure.

2.

Always use tools that are in good condition and
be sure you understand how to use them
before performing any service work.

3.

Use only good-quality lubricants. Be sure to
apply a coat of oil, grease or sealant to parts as
specified.

4.

Be sure to use a torque wrench to tighten parts
for which torques are specified.

5.

Replace gaskets and packings with new ones.
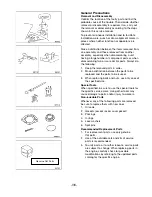
Tools and Equipment

Special tools are listed and illustrated throughout
this manual. The tools (or equivalents) are specially
designed to quickly and safely accomplish the
operations for which the tools are intended. The use
of special tools will also minimize possible damage
to engine components. Some precision measuring
tools are required for inspection of certain critical
components. Torque wrenches and a torque angle
meter are necessary for the proper tightening of
various fasteners.

To properly service the engine assembly, the
following items should be readily available:

• Approved eye protection and safety gloves

• A clean, well-lit, work area

• A suitable parts cleaning tank

• A compressed air supply

• Trays or storage containers to keep parts and

fasteners organized

• An adequate set of hand tools

• Approved engine repair stand

• An approved engine lifting device that will

adequately support the weight of the
components

Summary of Contents for FG35-FG50

Page 1: ...Service Manual 99789 74120 For use with the FGC35K FGC70K FG35 FG50 FG40K FG50K Chassis Service Manuals GM 4 3L G6 Gasoline Engine 003103 up...

Page 2: ...reserves the right to change specifications or design without notice and without incurring obligation Whenever a question arises regarding this engine or this manual consult your Cat lift truck deale...

Page 3: ...automatic transmission fluid or air conditioner compressor oil Engine oil or gear oil Symbols for Lubrication Sealants and Adhesives Information concerning the locations for lubrication and applicatio...

Page 4: ...15 Plug 16 Valve 17 Spring 18 Filter 19 Fitting 20 Valve 21 Bolt 22 Adapter Oil Filter 23 Gasket 24 Connector 25 Gasket 22 20 19 18 25 24 21 10 9 8 14 13 12 11 7 6 17 16 15 23 Lubricate all inter nal...

Page 5: ...ck unless you have read and understand the instructions in the OPERATOR S MANUAL Improper truck operation is dangerous and could result in injury or death 5 Use steps and grab handles if applicable wh...

Page 6: ...ard or paper to locate pin hole leaks 19 Tighten connections to the correct torque Make sure all heat shields clamps and guards are installed correctly to avoid excessive heat vibration or rubbing aga...

Page 7: ...necting rod cap Crankshaft bearings and connecting rod bearings Engine camshaft and valve lifters Valve lifters valve rocker arms and valve rocker arm supports Valve to valve guide Valve spring to cyl...

Page 8: ...emoved for service they should be retained in order At the time of installation they should be installed in the same locations and with the same mating surface as when removed 1 Wash all parts except...

Page 9: ...parts in order 2 Make a distinction between the parts to be replaced and the parts to be reused 3 When replacing bolts and nuts use only ones of the specified size Special Tools When specified be sur...

Page 10: ...disconnecting a connector do not pull the harness Hold the halves of the connector to separate them from each other When disconnecting a lock type connector push the lock lever s in the direction s s...

Page 11: ...bber hoses or tubes otherwise the rubber is likely to deteriorate Greasing During assembly or installation coat the designated surfaces with the specified grease or oil Cooperation When two or more pe...

Page 12: ...epairing the Leak 23 Engine Lubrication 25 Intake Manifold 29 Intake Manifold Removal 30 Intake Manifold Installation 31 Exhaust Manifold 33 Oil Level Indicator and Tube Removal 34 Exhaust Manifold an...

Page 13: ...on 86 Crankshaft Flywheel Rear Seal and Bearings 89 Engine Flywheel Removal 90 Crankshaft Rear Oil Seal and Housing Removal 90 Crankshaft and Bearings Removal 91 Crankshaft and Bearings Clean and Insp...

Page 14: ...165 Alternator 167 Accessory Drive Belt Replacement 168 Starter Motor 169 Starter Motor Testing 170 Troubleshooting 170 Fuel System Gasoline Units built before 01 01 2004 173 Fuel Pump and Fuel Hose U...

Page 15: ...er troubles Engine Set Up and Testing After overhaul the engine must be tested before it is installed in the truck If a suitable test stand is not available the following procedures can be used after...

Page 16: ...BUY NOW Then Instant Download the Complete Manual Thank you very much...

Reviews: