14 - 19
14.7 I/O Check
14.7.3 I/O check operation
9
UTILIT
Y
FUNCTION
10
C
O
MMUNICA
TION
INT
E
RF
A
C
E
SETTI
NG
11
DISP
LA
Y AND
OPE
R
A
T
IO
N
SETTIN
G
S
12
CLOCK
SE
T
T
IN
GS
AND
BA
TTER
Y
ST
A
T
US
DI
SPL
A
Y
13
FIL
E
D
ISP
LA
Y AND
COP
Y
14
G
O
T SE
L
F
C
H
EC
K
15
CLE
A
NING OF
DISPL
A
Y
S
E
CTION
16
IN
ST
AL
LA
TI
ON
O
F
BOO
TOS
AN
D
ST
ANDA
RD MONI
TO
R O
S
2
Self-loopback
1
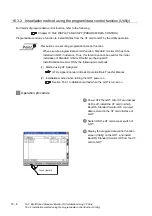
For preparation for the self-loopback communication
check, insert the connector for self-loopback check
(Customer purchased) shown in the diagram left in
the RS-232 interface.
For this connector, short 2 and 3 pins, 7 and 8 pins, 4
and 6 pins, respectively.
2
If touch the
button, the hardware check for the
RS-232 interface is carried out.
3
After selecting
, the transferred data and
received data are verified through the self-loopback
connector. If data can not be received during data
transmission, the dialog shown left is displayed,
which notifies the self-loopback connector failure,
self-loopback connector communication error or RS-
232 interface hardware failure.
4
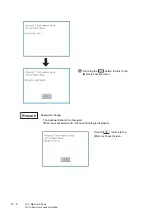
During check, the dialog shown left is displayed.
5
When all checks end normally, the dialog shown left
is displayed, and the GOT restarts.
6
If an error occurs the dialog is displayed at that point,
notifying the GOT has terminated abnormally and
which byte the error occurred, and then the GOT
restarts.
If a verification error occurs, the RS-232 interface
hardware may be faulty.
Display unit (back)
RS-232
CF CARD
I/F
ACCESS
BATTERY
24V DC
INPUT
RESET
+
-
(FG)
CF CARD
OFF
ON
RS-422
4 3 2
8 7 6
Self
Self
Summary of Contents for GOT1000 GT11
Page 1: ......
Page 2: ......
Page 251: ...Index 2 U Utility function list 9 2 W Wiring 7 1...
Page 252: ...Index 3 MEMO...
Page 255: ......
Page 256: ......


