4. STARTUP
4 - 16
4.4 Startup in torque control mode
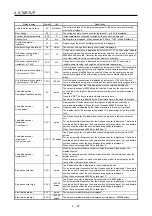
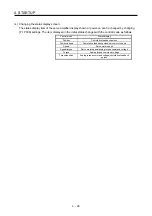
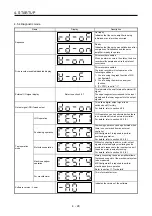
Make a startup in accordance with section 4.1. This section provides the methods specific to the torque
control mode.
4.4.1 Power on and off procedures
(1) Power-on
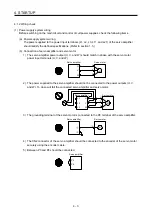
Switch power on in the following procedure. Always follow this procedure at power-on.
1) Switch off SON (Servo-on).
2) Make sure that RS1 (Forward rotation selection) and RS2 (Reverse rotation selection) are off.
3) Switch on the main circuit power supply and control circuit power supply.
Data is displayed in 2 s after "U" (Analog torque command) is displayed.
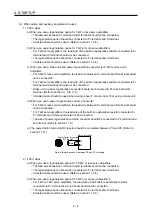
(2) Power-off
1) Switch off RS1 (Forward rotation selection) or RS2 (Reverse rotation selection).
2) Switch off SON (Servo-on).
3) Switch off the main circuit power supply and control circuit power supply.
4.4.2 Stop
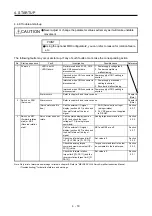
If any of the following situations occurs, the servo amplifier suspends the running of the servo motor and
brings it to a stop. Refer to section 3.10 for the servo motor with an electromagnetic brake.
Operation/command Stopping
condition
Switch off SON (Servo-on).
The base circuit is shut off and the servo motor coasts.
Alarm occurrence
The servo motor decelerates to a stop with the command. With some alarms,
however, the dynamic brake operates to bring the servo motor to a stop. (Refer to
chapter 8. (Note))
EM2 (Forced stop 2) off
This stops the servo motor with the dynamic brake. [AL. E6 Servo forced stop
warning] occurs. EM2 has the same function as EM1 in the torque control mode.
Refer to section 3.5 for EM1.
STO (STO1, STO2) off
The base circuit is shut off and the dynamic brake operates to bring the servo motor to
a stop.
Simultaneous on or off of RS1 (Forward
rotation selection) and RS2 (Reverse rotation
selection)
The servo motor coasts.
Note. Only a list of alarms and warnings is listed in chapter 8. Refer to "MELSERVO-J4 Servo Amplifier Instruction Manual
(Troubleshooting)" for details of alarms and warnings.
Summary of Contents for MR-J4-100A
Page 9: ...A 8 MEMO ...
Page 61: ...1 FUNCTIONS AND CONFIGURATION 1 44 MEMO ...
Page 67: ...2 INSTALLATION 2 6 MEMO ...
Page 137: ...3 SIGNALS AND WIRING 3 70 MEMO ...
Page 261: ...6 NORMAL GAIN ADJUSTMENT 6 24 MEMO ...
Page 291: ...7 SPECIAL ADJUSTMENT FUNCTIONS 7 30 MEMO ...
Page 299: ...8 TROUBLESHOOTING 8 8 MEMO ...
Page 319: ...9 OUTLINE DRAWINGS 9 20 MEMO ...
Page 461: ...12 ABSOLUTE POSITION DETECTION SYSTEM 12 36 MEMO ...
Page 511: ...14 COMMUNICATION FUNCTION 14 38 MEMO ...
Page 559: ...16 USING A DIRECT DRIVE MOTOR 16 20 MEMO ...
Page 583: ...17 FULLY CLOSED LOOP SYSTEM 17 24 MEMO ...
Page 621: ...APPENDIX App 38 ...
Page 639: ......


