BODY ±
Window Glass
42-13
7.
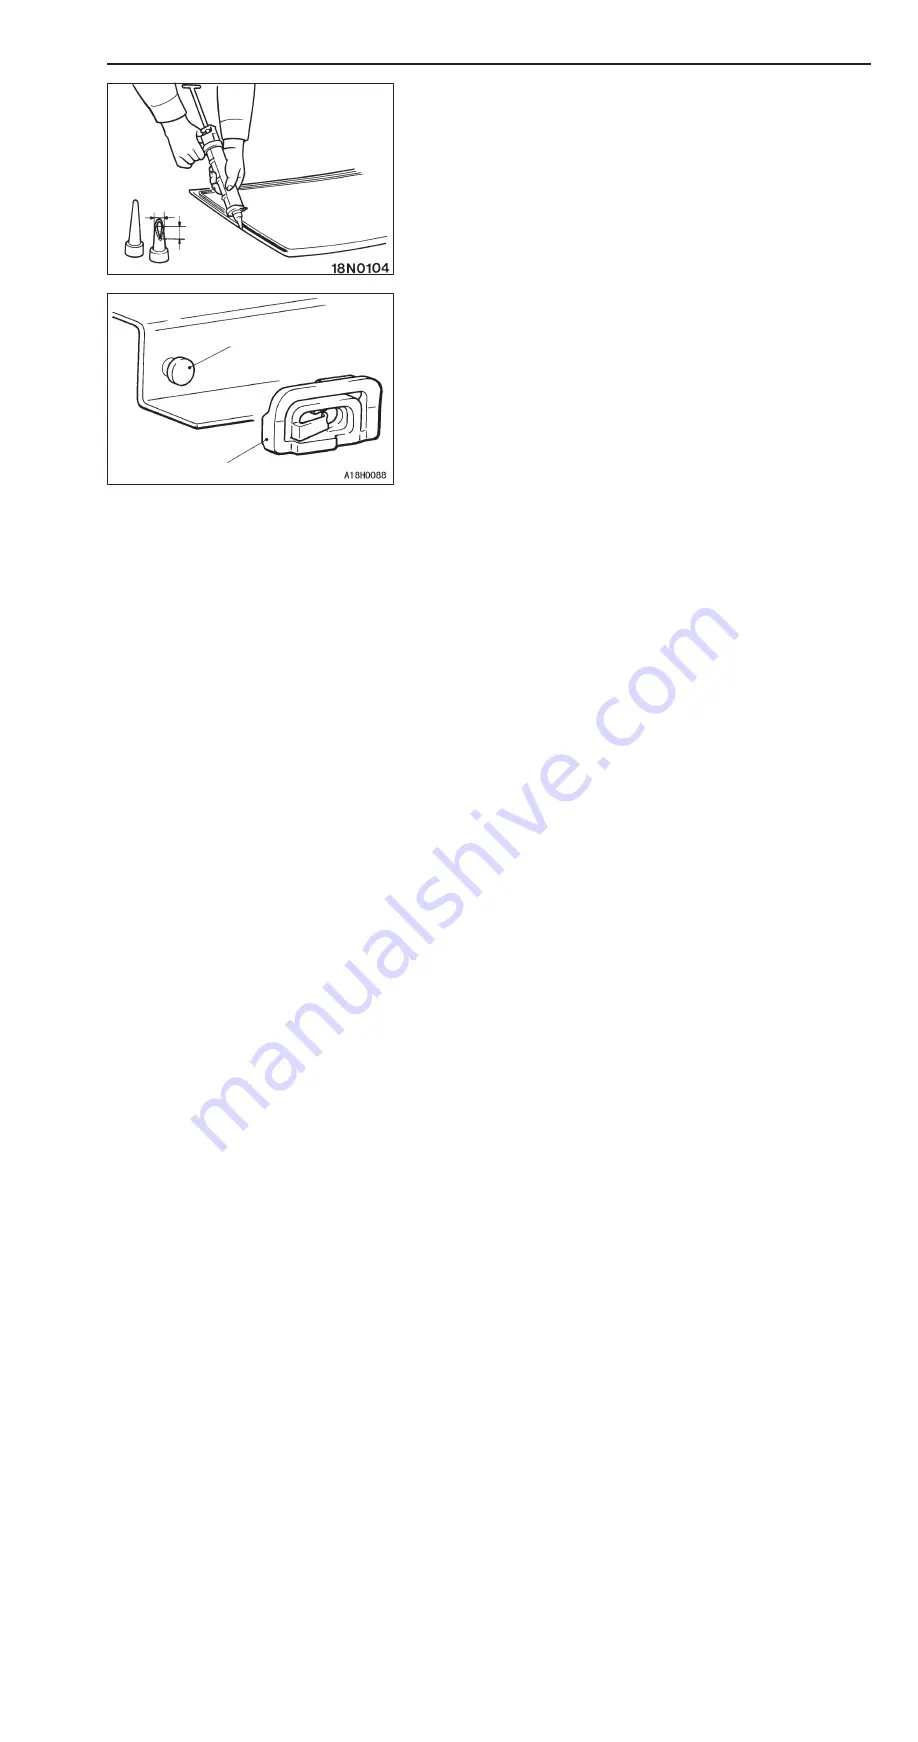
Fill a sealant gun with adhesive. Then apply the adhesive
evenly around the windshield within 30 minutes after
applying the primer.
NOTE
Cut the tip of the sealant gun nozzle into a V shape to
simplify adhesive application.
8.
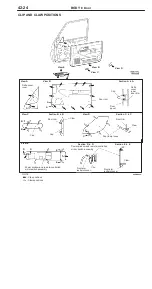
Install the clip to the clip stud.
9.
After applying the adhesive, align the alignment marks
on the windshield and body. Then, press the windshield
gently to seat.
10. Use a spatula or the like to remove any excessive adhesive.
Then clean the surface with isopropyl alcohol. Install the
windshield moulding before the adhesive hardens.
11. Wait 30 minutes or more, and then test for water leakage.
Caution
(1) Do not move the vehicle unless necessary. If doing
so, move it very gently.
(2) When testing for water leakage, do not pinch the
end of the hose to spray the water.
10 mm
15 mm
Clip stud
Clip
Summary of Contents for Pajero Pinin 1999
Page 32: ...NOTES ...
Page 73: ...13A 1 FUEL CONTENTS GASOLINE DIRECT INJECTION GDI 13A FUEL SUPPLY 13B ...
Page 190: ...NOTES ...
Page 191: ...13B 1 FUEL SUPPLY CONTENTS FUEL TANK 2 Fuel Pump Module 4 ...
Page 214: ...NOTES ...
Page 222: ...NOTES ...
Page 256: ...NOTES ...
Page 274: ...NOTES ...
Page 282: ...NOTES ...
Page 360: ...NOTES ...
Page 412: ...NOTES ...
Page 443: ...32 1 POWER PLANT MOUNT CONTENTS ENGINE MOUNTING 2 TRANSMISSION MOUNTING 3 ...
Page 446: ...NOTES ...
Page 447: ......
Page 448: ......
Page 449: ......
Page 450: ......
Page 451: ......
Page 452: ......
Page 453: ......
Page 454: ......
Page 455: ......
Page 456: ......
Page 457: ......
Page 458: ......
Page 459: ......
Page 460: ......
Page 461: ......
Page 467: ...NOTES ...
Page 468: ...BASIC BRAKE SYSTEM 35A ANTI SKID BRAKING SYSTEM ABS 4WD 35B 35A 1 SERVICE BRAKES CONTENTS ...
Page 499: ...NOTES ...
Page 531: ...NOTES ...
Page 541: ...NOTES ...
Page 649: ...NOTES ...
Page 728: ...54A 1 CHASSIS ELECTRICAL CONTENTS CHASSIS ELECTRICAL 54A SMART WIRING SYSTEM SWS 54B ...
Page 883: ...NOTES ...
Page 919: ...NOTES ...


