2-9
Installation
2Unpacking to Installation
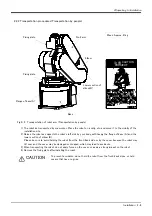
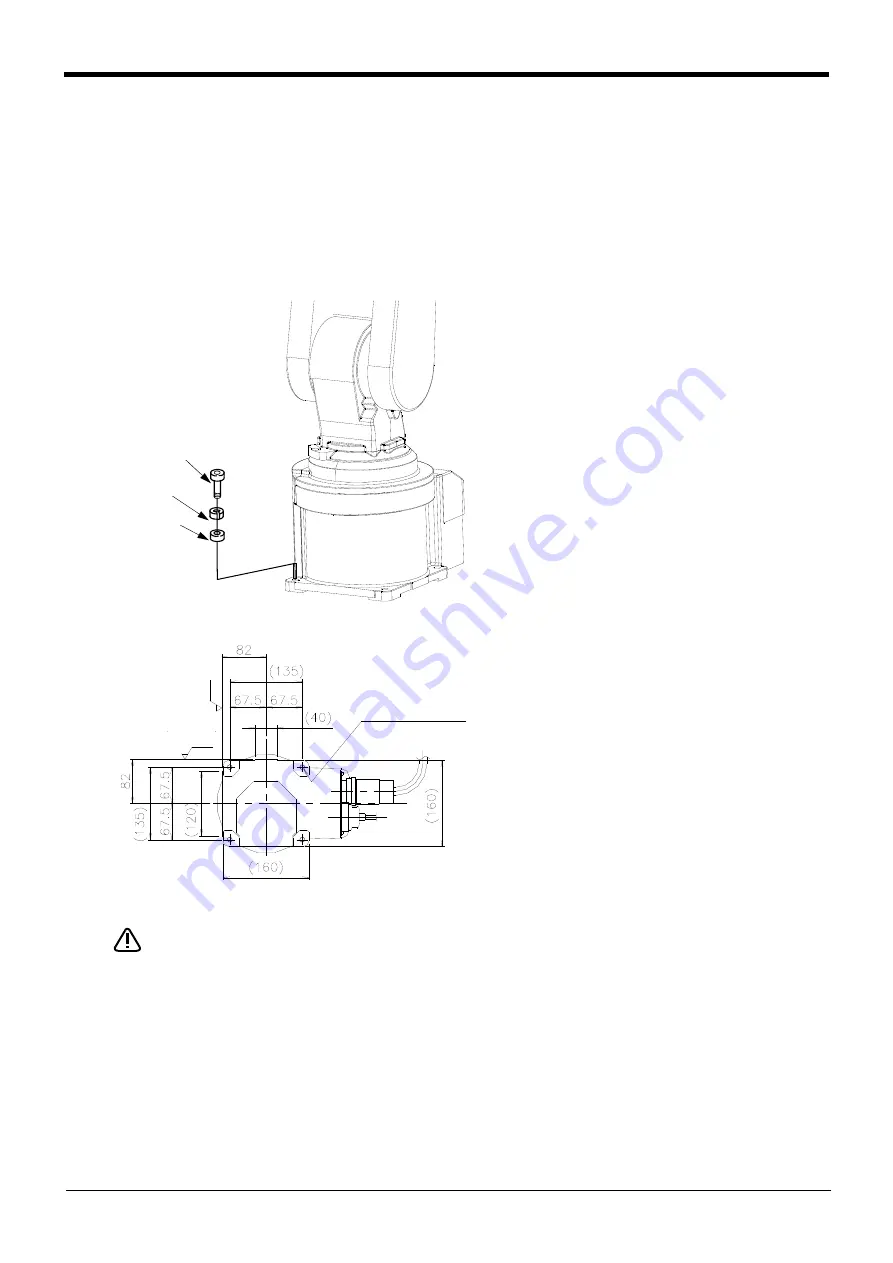
2.2.3 Installation procedures
The installation procedure of the robot arm is shown below.
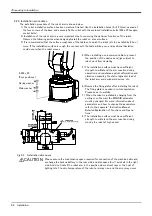
1) The robot installation surface has been machine finished. Use the installation holes (4-φ9 holes) opened at
the four corners of the base, and securely fix the robot with the enclosed installation bolts (M8 x 35 hexagon
socket bolts).
2) Installation of the robot arm is a very important step for ensuring the optimum functions of the robot.
Observe the following points when designing.Install the robot on a level surface.
3) It is recommended that the surface roughness of the table onto which the robot is to be installed by 6.3a or
more. If the installation surface is rough, the contact with the table will be poor, and positional deviation
could occur when the robot moves.
4) When installing, use a common table to prevent
the position of the devices and jigs subject to
robot work from deviating.
5) The installation surface must have sufficient
strength to withstand the arm reaction during
operation, and resistance against deformation and
vibration caused by the static (dynamic) load of
the robot arm and peripheral devices, etc.
6) Remove the fixing plates after installing the robot.
The fixing plate is needed in re-transportation.
Please keep it carefully.
7) When the robot is installed by hanging from the
ceiling or on the wall, the MEGDIR parameter
must be changed. For more information about
parameters and how to change the parameters,
refer to the separate "Instruction Manual/
Detailed Explanation of Functions and Opera
-
tions".
8) The installation surface must have sufficient
strength to withstand the arm reaction during
moving the robot at high speed.
Fig.2-3 : Installation dimensions
Please secure the maintenance space required for connection of the machine cable and
exchange the backup battery in the rear side, and also space for J1 axis belt in the right
side. And don't install the robot arm in the position where direct rays or the heat of
lighting hits. The skin temperature of the robot arm may rise, and the error may occur.
Rz
2
5
Rz 25
4-M8 x 35
(Four positions)
Spring washer
Plain washer
4-φ9 installation hole
(Installation)
(Installation)
CAUTION
Summary of Contents for RV-2F Series
Page 2: ......


