background image

16

EFFICIENT OPERATION: For your phone to operate most efficiently, do 
not touch the antenna unnecessarily when the phone is in use. Contact 
with the antenna affects call quality and may cause the phone to operate 
at a higher power level than otherwise needed.

DRIVING

Check the laws and regulations on the use of wireless telephones in the 
areas where you drive. Always obey them. Also, if using your phone while 
driving, please:
• Give full attention to driving - driving safely is your first responsibility.
• Use hands-free operation, if available.
• Pull off the road and park before making or answering a call if driving 

conditions so require.

ELECTRONIC DEVICES

Most modern electronic equipment is shielded from RF signals. However, 
certain electronic equipment may not be shielded against the RF signals 
from your wireless phone.

Pacemakers
The Health Industry Manufacturers Association recommends that a 
minimum separation of six (6”) inches be maintained between a 
handheld wireless phone and a pacemaker to avoid potential 
interference with the pacemaker. These recommendations are 
consistent with the independent research by and recommendations 
of Wireless Technology Research.

Persons with pacemakers:
• Should ALWAYS keep the phone more than six inches from their 

pacemaker when the phone is turned ON

• Should not carry the phone in a breast pocket
• Should use the ear opposite the pacemaker to minimize the poten-

tial for interference

• If you have any reason to suspect that interference is taking place, 

turn your phone OFF immediately

Hearing Aids
Some digital wireless phones may interfere with some hearing aids. 
In the event of such interference, you may want to consult your serv-
ice provider (or call the customer service line to discuss alternatives).
Other Medical Devices
If you use any other personal medical device, consult the manufac-
turer of your device to determine if they are adequately shielded 
from external RF energy. Your physician may be able to assist you in 
obtaining this information. 

Summary of Contents for T255

Page 1: ...ency Calls 25 Sounds On Off 26 Mute Unmute 26 Adjusting Volume 26 Sending DTMF Tones 27 Pause Feature 27 Memory Link Feature 28 Calling Card Calling 28 Conversation Mode 29 Menu System 31 Access to th...

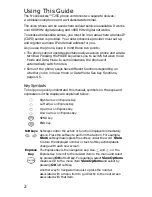
Page 2: ...in Voice Mode or Data Mode See Key Functions pages 4 5 Key Symbols To help you quickly understand this manual symbols on the keys and expressions in the display are explained below Right arrow on Exp...

Page 3: ...tly above Mode key Press and hold to turn the phone on or off Press to toggle between Voice Data Mode Clear key Erases characters Turns off alerts Express Key Navigation key Press and hold left arrow...

Page 4: ...creen Press hold Terminate call Press hold left voice mailbox Press hold right SMS messages Press up down Ringer volume control Press up down Volume control earpiece Press Clear previous character Pre...

Page 5: ...selection Press left right Move to next character or word in text entry Not active Press Clear previous character Press hold Clear entire entry Press Move directly to menu item next screen In text ent...

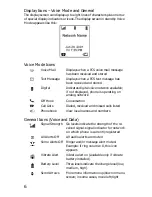
Page 6: ...displayed phone is operating on analog network Off Hook Conversation Call Lists Dialed received and missed calls listed Phonebook View local names and numbers Signal Strength Six levels indicate the...

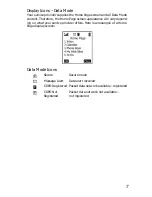
Page 7: ...age screen appearance will vary depend ing on what your service provider offers Here is an example of a Home Page display screen Data Mode Icons Secure Secure mode Message Alert Data alert received CD...

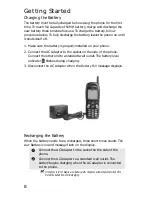
Page 8: ...of the phone Connect the other end to a standard wall outlet The battery level indicator flashes during charging 3 Disconnect the AC Adapter when the Battery Full message displays Recharging the Batte...

Page 9: ...he condition and history of the battery Use only the Mitsubishi chargers specified for this battery Using other chargers or batteries may cause damage Do not leave NiMH batteries connected to a charge...

Page 10: ...ttery near a heat source such as a stove oven heater or fire 170 F 76 C or higher The battery is not waterproof Do not immerse it in liquid or allow it to get wet Avoid contact of the battery terminal...

Page 11: ...Making a Call The off hook indicator displays and you ll hear a network tone As the call connects the dialed number if stored time and date display To store the dialed number in the Phonebook press S...

Page 12: ...our Phonebook Press any key to mute ring tone To answer the call Ending a Call Turning Off the Phone A turn off tone will sound and power OFF will briefly display Unanswered Calls If you miss a call t...

Page 13: ...ccess the selected mailbox Press and select 2 Messages 1 Voice Mail 2 Setup then press Add right softkey Enter your 8 digit Security Code Default code is 00000000 Enter the Access Number PIN number an...

Page 14: ...menu option For example Press and hold or press and select 2 Messages 2 Msg Inbox At the text message list screen to select a message either press the number key associated with the message or press...

Page 15: ...health agencies and industry reviewed the available body of research to develop the ANSI Standard C95 1 The design of your phone complies with the FCC guidelines and those standards Your phone has bee...

Page 16: ...nimum separation of six 6 inches be maintained between a handheld wireless phone and a pacemaker to avoid potential interference with the pacemaker These recommendations are consistent with the indepe...

Page 17: ...o Obey all signs and instructions POTENTIALLY EXPLOSIVE ATMOSPHERES Turn your phone OFF when in any area with a potentially explosive at mosphere and obey all signs and instructions Sparks in such are...

Page 18: ...hese questions no clear picture of the biological effects of this type of radiation has emerged to date Thus the available science does not allow us to conclude that mobile phones are absolutely safe...

Page 19: ...tion was found between mobile phone use and acoustic neuroma There was also no association between mobile phone use and gliomas when all types of types of gliomas were considered together It should be...

Page 20: ...we do not have enough information at this point to assure the public that there are or are not any low incident health problems associated with use of mobile phones FDA continues to work with all par...

Page 21: ...ons at this time FDA has urged the mobile phone industry to take a number of steps to assure public safety The agency has recommended that the industry support needed research into possible biological...

Page 22: ...which the antenna is located outside the vehicle a hand held phone with a built in antenna connected to a different antenna mounted on the outside of the car or built into a separate package or a head...

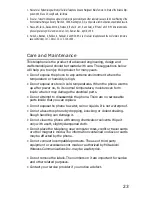
Page 23: ...y years Do not expose the phone to any extreme environment where the temperature or humidity is high Do not expose or store in cold temperatures When the phone warms up after power on to its normal te...

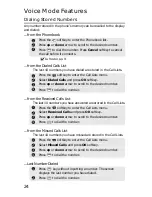
Page 24: ...to dial the number Press Cancel softkey to cancel the call before it connects See Phonebook page 38 Press the softkey to enter the Call Lists menu Select Dialed Calls and press OK softkey Press up or...

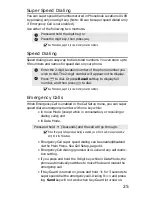
Page 25: ...ing ignores Auto Lock and any call restric tion setting If you press and hold the 9 digit key while in Data Mode the phone automatically switches to Voice Mode and makes the emergency call If Key Guar...

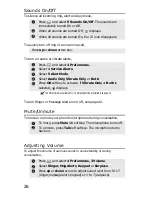
Page 26: ...ys When all sounds are turned On the icon disappears Press up or down arrow key Press and select 4 Preferences Select 1 Service Alerts Select 5 Alert Mode Select Audio Only Vibrate Only or Both Press...

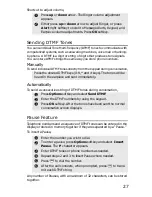
Page 27: ...a maximum of 32 characters can be stored together Press up or down arrow The Ringer volume adjustment appears Either press up or down arrow to adjust Ringer or press Alert right softkey to scroll to...

Page 28: ...t each DTMF string Press and select 4 Preferences 2 Call Setup Select 2 Calling Cards Enter Security Code and press OK softkey Press Setup softkey in the next screen If you already have three Calling...

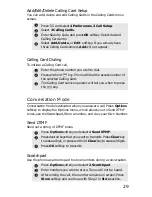
Page 29: ...and press OK softkey Select desired Calling Card entry Select Add Delete or Edit softkey If you already have three Calling Cards stored Add will not appear Enter the phone number you wish to dial Pre...

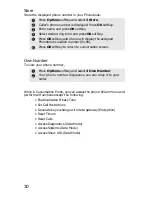
Page 30: ...Reset Calls Access Diagnostics Data Mode Access Systems Data Mode Access Show URL Data Mode Press Options softkey and select 3 Store Caller s phone number is displayed Press OK softkey Enter name and...

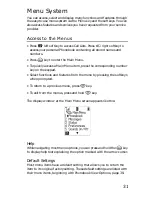
Page 31: ...nu item press the corresponding number key on the keypad Select functions and features from the menu by pressing the softkeys when prompted To return to a previous menu press key To exit from the menu...

Page 32: ...Inbox Voice SMS Data Alerts Information on 3 Status 1 Call Lists voice calls 2 Last Talk Time operating time 3 Total Talk Time and network 4 Accumulated Talk Time 5 Phone Number 6 IP Address Customize...

Page 33: ...e keypad 6 Key Guard Network service 7 Systems Voice Mode only information 1 Automatic Selection 2 Manual Selection 3 New System Selection 4 Setup Private Systems Data Mode Options Diagnostics for 7 D...

Page 34: ...key one two or three times corresponding to the letter s sequence in the keypad For example to add a new name and number in the Phonebook select New Entry Enter the new phone number and press OK softk...

Page 35: ...or entering symbols when in Alpha Mode is to press key to enter a 1 then continue to press key to cycle through other choices 1 _ Deleting Characters and Words To erase errors press to back space and...

Page 36: ...o type a word in Quick Type press right softkey until QUICK appears Press keys corresponding to the letters you need just as if the phone keypad were a typewriter Type for space and for period For exa...

Page 37: ...symbols that can be entered this way are Entering Other Symbols For symbols other than periods in Quick Type text press right softkey to access SYM1 softkey The first set of symbols will display For a...

Page 38: ...or Memory Link See Pause Feature and Memory Link Feature on pages 27 28 New Phonebook entries can also be made While in the Call Lists screen pressing Store left softkey While entering a phone number...

Page 39: ...ok 3 View Options Select By Location By Name Location List or Name List The options By Location and By Name display entries one by one with details The options Location List and Name List display entr...

Page 40: ...Message Inbox An audio alert and message icon signal the arrival of a Text Message In Voice Mode these are SMS Text Messages In Data Mode these are CDPD alerts See Text Messages SMS page 14 for detail...

Page 41: ...ect 2 Received Calls to view the last 10 Received Calls Select 3 Missed Calls to view the last 10 Missed Calls When you make a selection the details of each call display Select Store or Delete softkey...

Page 42: ...desired level To choose a Message Alert Tone Default setting Tone 1 Press and select 4 Preferences 1 Service Alerts Select 1 Ringer Type Select from four tones and four melodies To hear a selec tion p...

Page 43: ...sounds Default setting 5 Times Press and select 4 Preferences 1 Service Alerts Select 4 Msg Alert On Off Select Disable The icon displays To turn Msg Alert on select Enable Press and select 4 Prefere...

Page 44: ...the default phone number Make sure Enable is selected in Emergency Call screen Press and select 4 Preferences 2 Call Setup Select 2 Calling Cards Enter Security Code To add a Calling Card press Setup...

Page 45: ...arning tone sounds You can turn this warning tone on or off To enable disable Privacy Tone Default setting Disable To enable disable Send Caller ID Default setting Send Normal Press and select 4 Prefe...

Page 46: ...lect 4 Preferences 3 Volume Select 1 Ringer 2 Msg Alerts 3 Keypad or 4 Earpiece and press OK softkey Press up or down arrow to adjust volume and press OK softkey You can also press the right softkey t...

Page 47: ...K softkey to return to the previous screen Press and select 4 Preferences 7 Clock Select 1 Set Time or press Time softkey in the Set Date screen The current set time displays at the top of the screen...

Page 48: ...s 7 Clock Select 4 Date Format Select Day Month or Month Day and press OK softkey Press and select 4 Preferences 8 Advanced Select 1 Font Size Select Small 6 pt or Large 9 pt and press OK softkey Pres...

Page 49: ...you have lost your Security Code If an incorrect Security Code is entered Security Code is not correct flashes and you are returned to the previous menu The Restrict Calls option in the Security menu...

Page 50: ...OK softkey Select 2 Security Code Enter the New Code using 4 8 digits and press OK softkey The screen will prompt you to reenter the same code to confirm Enter the code again and press OK softkey If...

Page 51: ...lect 5 Reset Timers Press Yes softkey to clear Timers except for Accumulated Talk Time and return to previous screen Press and select 4 Preferences 9 Security Enter the Security Code and press OK soft...

Page 52: ...of your cellular area To restart scanning for Network Systems Press and select 5 Sounds On Off or press icon will display at the top of the screen To turn on all sounds Press and select 5 Sounds On O...

Page 53: ...of preset public private and residential Systems will display Scroll to desired System and press Select softkey The phone attempts to register to the selected System Press and select 7 Systems Select...

Page 54: ...rvice is provided Your network service provider must set up and register a unique IP and email address for you Connecting to Data Mode To switch from Voice Mode to Data Mode press Or if you wish to se...

Page 55: ...creen displays To register from this screen press Retry softkey Press Done softkey to return to the previous page stored in the phone s cache When the phone successfully registers to the network the D...

Page 56: ...Main Menu Map Additions The key provides direct access to the same menu items that are available in Voice Mode except for Systems in the Preferences menu This key also provides access to the followin...

Page 57: ...Level Tx Power Wide Area Service Identifier WASI Power Product System Preference SysPref Press End Back key to return to previous screen Press and select 7 Diagnostics Select 2 Reset Cache As soon as...

Page 58: ...Access T255 as a modem on your computer Set up dial up networking Connect a cable between the phone and the modem Using the software follow these instructions You can also install the phone as a stand...

Page 59: ...59 5 Select Other type of modem and click Next 6 Check Don t run the Hardware Installation Wizard box then click Next...

Page 60: ...60 7 Check Don t detect my modem I will select it from a list box then click Next 8 At the if you have an installation disk screen click Have Disk...

Page 61: ...61 9 Insert the installation disk in the CD ROM drive and click OK 10 The Model list screen should list only the Mitsubishi CDPD T255 Modem Click Next...

Page 62: ...Communications Port COM 1 then click Next Note If you have an internal modem in your computer the computer may assign Com2 If you experience any difficulties please check with your IT department or th...

Page 63: ...he Modems Properties box will list the Mitsubishi CDPD T255 Modem as set up Click Properties 14 Click on Maximum speed Set to 38400 then click OK 15 To continue proceed with Set Up Dial Up Networking...

Page 64: ...ck on Add Remove Programs icon 3 Select Windows Setup tab 4 Check the Communications box and click Details button 5 Check the Dial Up Networking box and click OK button 6 Click Apply button Installati...

Page 65: ...puter you are dialing and select the Mitsubishi CDPD T255 Modem Click Next 6 Type any number in the area code box then select a country code Note with CDPD service your computer does not dial a teleph...

Page 66: ...created a new dial up networking connection called T255 Click Finish to save it in your Dial Up Networking folder 8 Double click on My Computer 9 Double click on Dial Up Networking icon 10 Click once...

Page 67: ...67 11 The T255 Properties dialog box appears 12 In the T255 Properties dialog box select Server Types tab...

Page 68: ...68 13 Uncheck everything except TCP IP box Click TCP IP Settings button 14 Select Server assigned IP address Uncheck Use IP header compression...

Page 69: ...ary DNS Domain Name Server address and if applicable the Second ary DNS address These addresses should be obtained from your service provider Click OK button 16 Click OK button again Now your computer...

Page 70: ...he phone as a modem connect the PC cable to both your phone and the RS232 port DB9 port on your computer Click on Dial Up Networking and the icon for your wireless IP connection Then click Connect You...

Page 71: ...tery NiMH L EBT P9 Vibrating Battery NiMH S vibrating VBT P2 Desktop Battery Charger for phone spare battery QCK P10 AC Rapid Charging Adapter 120V for battery charging using wall outlet ACP P3 Cigare...

Page 72: ...nstruct Web pages for computers HTTP Hypertext Transmission Protocol used by computers to communicate with each other on the Internet IP address Internet Protocol address the unique number representin...

Page 73: ...ows many users to employ the same radio frequency channel simultaneously without interference This reduces the number of base stations needed in a service area and increases the speed and reliability...

Page 74: ...on your location Check the received signal strength indicator make sure your antenna is fully extended and try again after the signal strength increases another bar appears In addition to geographic...

Page 75: ...work service provider for repairs Your network service provider should be able to solve the problem over the phone Low Battery and phone beeps The phone will turn off for 1 minute The phone should be...

Page 76: ...de 46 CDPD Sleep 46 Charging Battery 8 Clock 47 Connecting to Data Mode 54 Connecting to the Internet 70 Consumer Update on Mobile Phones 18 Conversation Mode 29 Conversation Options 12 Copyright Noti...

Page 77: ...y 3 Modem Installation Procedure 58 Muting 12 26 N Network Systems 52 Numeric Mode 34 O Own Phone Number 30 41 P Pause Feature 27 Phone Overview 3 Phonebook 24 38 Preferences 42 Privacy Tone 45 Proble...

Page 78: ...et 49 Tethered Mode 58 Text Messages SMS 14 40 Text Entering 34 Time Set 47 Total Talk Time 41 Troubleshooting 74 Turning Off the Phone 12 Turning On the Phone 11 U Unanswered Calls 12 Unlock Code 50...

Reviews: