background image

Summary of Contents for TS-4557

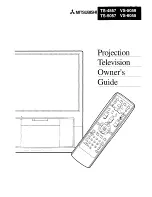
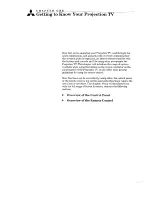
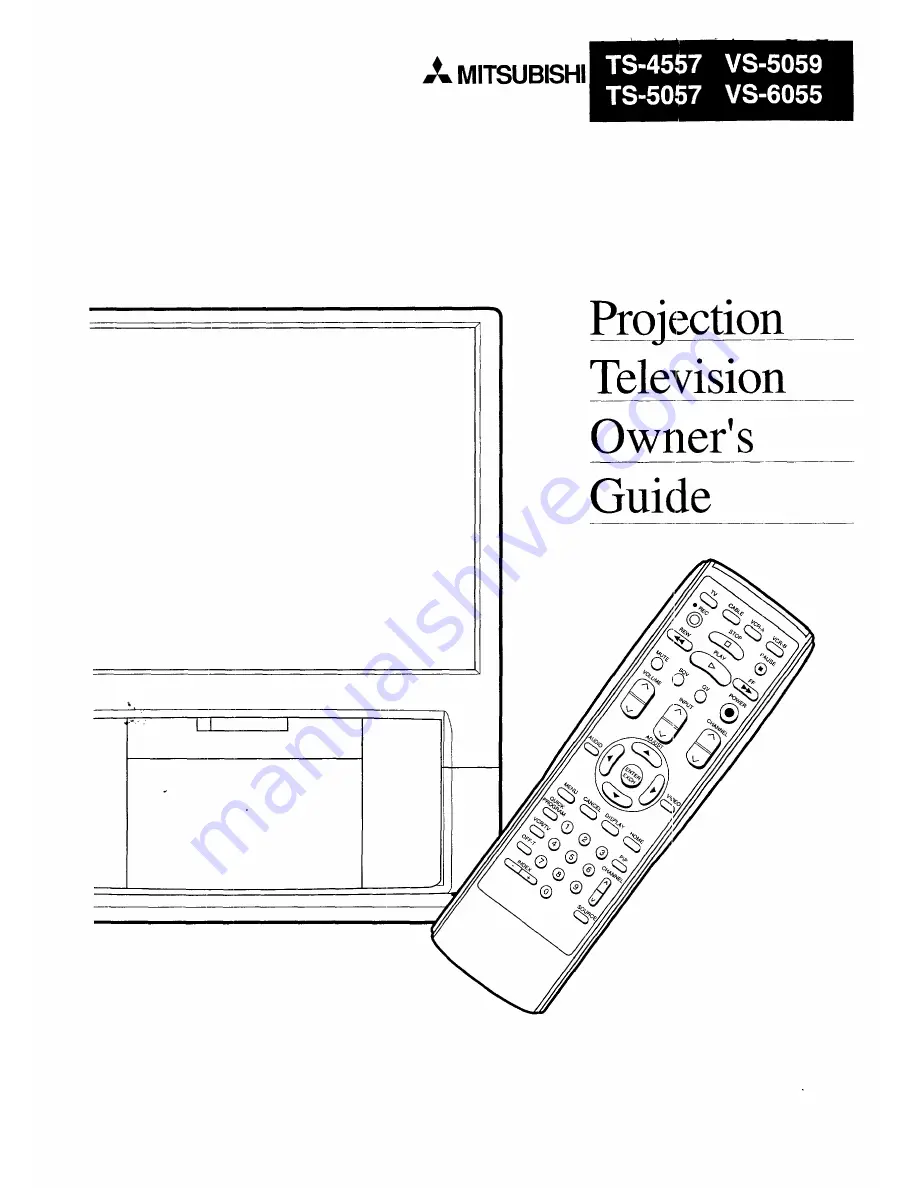
Page 1: ..._ _ MITSUBISHI _ II i Projection Television Owner s Guide ...

Page 2: ...ning Don t leave stationary images such as those generated from stock market reports or video games on screen for more than 10 minutes Still patterns such as these can scar the Projection TV causing permanent damage to the picture tubes WARNING TO PREVENT FIRE OR SHOCK HAZARD DO NOT EXPOSE THIS APPLIANCE TO RAIN OR MOISTURE CAUTION TO PREVENT ELECTRIC SHOCK HAZARD DO NOT USE THIS UNIT S POLARIZED ...

Page 3: ...der box 27 Projection TV cable with a decoder box 28 Projection TV separate UHF and _TIF antennas 30 Projection TV VCR antenna or cable without a decoder box 31 Projection TV VCR cable with a decoder box 34 Projection TV audio system 37 Projection TV Mitsubishi products that have A V Network terminals 38 Chapter 3 Operating Your Projection TV 41 Getting Started 42 Using the remote control to opera...

Page 4: ...mer 82 Changing or canceling the off timer 83 Using the Advanced Picture in Picture PIP Modes 84 Selecting the PIP image 85 Selecting the PIP source 86 Selecting the PIP channel 86 Exchanging the PIP image a nd the main image 87 Moving the PIP image 87 Freezing the PIP image 88 Using the Snap shot feature 89 Using the Replay feature 90 Using the Active A V Network Feature 91 Chapter 5 Troubleshoot...

Page 5: ...th care Quick stops excessive force and uneven surfaces may cause the appliance and cart combination to overturn 9 Ventilation Slots and openings in the cabinet are provided for ventilation and to ensure reliable operation of the TV receiver and to protect it from over heating and these openings must not be blocked or covered The openings should never be blocked by placing the TV receiver on a bed...

Page 6: ...U PMENT _I_ _ J GROUNDING L _ _ _____ _ __ CONDUCTORS x _ _ _ GROUND CLAMPS POWER SERVICE GROUNDING ELECTRODE SYSTEM NEC NATIONAL ELECTRICAL CODE NEC ART 250 PART H 18 Servicing Do not attempt to service this TV receiver yourself as opening or removing covers may expose you to dangerous _oltage or other hazards Refer all servicing to quahfied service personnel 19 Damage Requiring Service Unplug th...

Page 7: ... which provides the following important information 0 Summary of Special Features Unpacking Your Projection TV What s in Each Chapter Some Conventions Used in this Guide Mitsubishi has strived to create your Projection TV so that it will bring you years of viewing enjoyment Similarly your owner s guide is designed with a user friendly philosr phy that will help you take advantage of all of your eq...

Page 8: ... from other manufacturers On Screen Displays appear whenever you adjust your Projection TV showing you the status of your Projection TV s various functions On Screen Menu simplifies the television s features with easy to follow instructions Closed Caption Decoder decodes hidden text information included with TV shows and displays the text on screen Extended Data Services also known as XDS allows b...

Page 9: ...ze batteries for the remote control aad an A V network cable A few suggestions Before you hook up your new Projection TV please take a few minutes to _ Complete the registration card The re_fistration card asks for the Projection TV s serial number which you ll find on the back of the unit O Keep the box and packing materials for future use File your sales receipt Place the Projection TV on a stab...

Page 10: ...r Projection TV Chapter 3 Operating Your Projectio a TV provides the step by step instructions you need in order to l_se your Projection TV Chapter 4 Using the Special Features explains how to use some of the special features of the Projection TV Chapter 5 Troubleshooting summa dzes the problems you may have along with suggestions for remedying these problems The appendix explains a procedure that...

Page 11: ...n highlighted in this manner should be read carefully _in_ opic or task I 1 list ofrelated topics or tasks t maectl ni _or_aot II_Wa_in_ m related topics or tasks I Proje ctlon TV _ or c_ _le withal r _ IIo e _c This cue indicates information critical to the operation of your new Projection TV This cue alerts you to informa tion describing dangerous situations that could ruin your equipment or cau...

Page 12: ......

Page 13: ...ntroduce the range of options available when using the buttons on the remote control or on the control panel of the Projection TV It also offers some general guidelines for using the remote control Most functions can be controlled by using eithe c the control panel or the remote control but certain specialized functions require the use of one or the other This chapter which will familiarize you wi...

Page 14: ...een when you turn the Projection TV on it lights up in red when the timer is set and the Projec tion TVs power is off and it lights in orange if the timer is set and the Projection TV s power is oil power button POWER Use to turn the Projection TV on or off When you turn the Projection TV on the power indicator will light in green 12 Chapter 1 Getting to Know Your Projection TV ...

Page 15: ...ch to a channel with a higher number and the button to switch to a channel with a lower number A V reset button AN RESET Press to reset all audio and video functions to their normal level or setting except for volume reception mode Stereo SAP Mono Speaker on off monitor out variable fixed and closed captioning This button also resets the clock menu button MENU Use this button to display the on scr...

Page 16: ...dio function button AUD O _ The audio func tions you can select are stereo SAP mono bass treble balance surround off simulate hall speaker on off or monitor out variable fixed video function button VIDEO _ The video functions you can select are tint color contrast brightness sharpness color temperature high middle low or closed captioning testing buttons You can also use the control panel buttons ...

Page 17: ...om the packing bag O Remove the back cover of the remote control by pushing in the direction of the arrow Load the batteries as indicated in the illustration making sure that they are positioned correctly to and to Replace the back cover of the remet_ control O O For best results use Duracell AA MN 1500 batteries Overview of the Remote Control 15 ...

Page 18: ...se any harsh chemi cals Use only a soft slightly moistened cloth general instructions When using the remote control to operate the Projection TV VCR or cable box follow these procedures O Be within 20 feet of the desired equipment O Point the top of the remote contro L toward the equipment O Press the appropriate button or sequence of buttons guidelines for using batteries Don t use a new battery ...

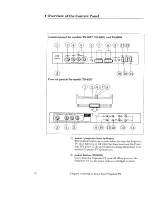
Page 19: ...Remote control buttons and functions Overview of the Remote Control 17 ...

Page 20: ...ew button SQV Press this button to view the chs nnels that you have pro grammed into super quick view memory quick view button QV Press this button to instantly switch to the last channel you viewed or the channel that you memorized as the quick view channel See page 51 7 volume control VOLUME Press the top part of the button to turn up the volume press the bottom part of the button to turn down t...

Page 21: ...s ADJUST right left buttons _ After selecting the audio or video Yunction use the ADJUST buttons or right left buttons 4 to adjust the function you ve selected These buttons can be used to turn the function on or off e g peaker ON OFF increase or decrease the function e g color shift from one end of a scale to the other e g balance or select a sub function e g stereo You will also use the adjust b...

Page 22: ...t l your VCR will turn on and the VCP s Program to record menu will appear When you are fir ished programming your VCR press this button again your VCR will turn off and your Projection TV will return to its previous state If you press this button while the Projection TV is locked or while using the television s menus the VCR will turn on but the Projection TV will not switch inputs You must have ...

Page 23: ...tton to change chan nels on the VCR source button SOURCE Press this button to switch the source of the reduced PIP image between the TV and the external inputs pause button PAUSE Press this button to freeze the reduced PIP image or to return the image to a live picture You can also use this button with the advanced PIP flanc tions enter and exchange button ENTERfEXCH Press this button to exchange ...

Page 24: ......

Page 25: ...TER TWO Connecting Your Projection TV This chapter offers step by step instructions for completing the most common hook ups It contains the following sections t Overview of the Back Panel t Basic Connections ...

Page 26: ...inals to send out the TV s video signal to a VCR a video copy processor etc _ audio monitor tuner output terminals Use these terminals to send out the TV s audio signal to a VCR a video copy processor etc Never connect one piece of equipment to both the TV s input terminals and the TWs output terminals If you do the TV will turn off as a safety precaution 24 Chapter 2 Connecting Your Projection TV...

Page 27: ...t for viewing your VCR _ video input terminals Use these terminals to bring in a video signal from a VCR or another component into the Projection TV _ Active AN Network terminal Use this terminal to connect Mitsubishi products that have A V network terminals 7 audio input terminals Use these terminals to bring in an audio signal from a VCR or other equipment into your Projection TV Overview of the...

Page 28: ...ur Mitsubishi dealer or your local cable company This section explains Projection TV antenna or cable without a decoder box Projection TV cable with a decoder box Projection TV separate UHF and VHF antennas Projection TV VCR antenna or cable without a decoder box Projection TV VCR cable with a decoder box Projection TV audio system and Projection TV Mitsubishi products that have A V Net work termi...

Page 29: ... One 75 300 ohm transformer Cable Flat Twin Leads O 0 0 __ Trans of_rmer Projection TV Rear Terminals t_ _r 2 INPUT I OUfrUlr _UT Basic Connections 27 connecting a cable 0 Push or screw the end of the cable onto the ANT A terminal on the Projection TV connecting an antenna with flat twin leads Use a screwdriver to connect the _ads to the transformer Push or screw the transformer onto the ANT A ter...

Page 30: ...UT three lengths of 75 ohm coaxial cables Procedure O Connect the incoming cable to the IN terminal on the two way splitter O Connect a coaxial cable to one of the OUT terminals on the splitter connect the other end of this cable to the ANT A terminal on the back of the Projection TV Connect the second coaxial cable to the second OUT terminal on the same splitter connect the other end of this cabl...

Page 31: ...li_ _r _ _l Incoming Cable Projection TV Rear Terminals f h _ o 0_ Cable Decoder Box Rear Terminals IN OUT Basic Connections 29 ...

Page 32: ...ind of com biner you need Pictured to the right is a standard combiner To connect separate UHF and VHF antennas to you r Projection TV O Connect the UHF and VHF antenna leads to the appropriate terminals on the UHF VHF combiner Press the combiner onto the ANT A terminal on the rear of the Projection TV I1_ IMI VHF Antenna UI4F Antenna Channels2 13 Channels14 69 nil _ V Flat Twin Lead Extemal Anten...

Page 33: ...o connect a VCR along with your antennas or cable To complete this hook up you may need _he following equipment One 75 ohm coaxial cable I One set of RCA pin type audio cables S One RCA pin type video cable if connecting a standard VCR or One S Video cable for Super VHS VCRs Basic Connections 31 ...

Page 34: ...to the S VIDEO INPUT terminal on the back of the Projection TV O Connect a set of RCA pin type audio cables to the AUDIO OUT terminals on the back of the VCR Use the red cable to connect the right R channel and the white cable for connecting the left L channel Connect the other ends of this cable to the AUDIO INPUT terminals on the back of the Projection TV If your VCR is monaural non stereo you o...

Page 35: ...r Antenna Red Lead VCR Rear Terminals AUDIO OUT 1 Connect either one_ _ Projection TV Rear Terminals ANT A A__ B vHF_HF _75n _ ACTIV NETWORK MONITOR S _ V TUNER VlOEO I O 0 I IT 1 INPUT 2 INP OUTPUT INPUT Red Lead O _t_hite Lead O Yellow Lead Basic Connections 33 ...

Page 36: ...nnels while viewing another channel To complete the hook up you will need Four lengths of 75 ohm coaxial cable One two way splitter IN OUT OUT One set of RCA pin type audio cables One RCA pin type video cable if connecting a standard VCR or One S Video cable for Super VHS VCRs 34 Chapter 2 Connecting Your Projection TV ...

Page 37: ...cable to the VIDEO OUT terminal on the back of the VCR Connect the other end of this cable to the VIDEO INPUT terminal on the back of the Projection TV If you are connecting a Super VHS S VttS VCR use an S Video cable instead of an RCA pin type video cable Connect this S Video cable to the S VIDEO OUT terminal on the VCR Connect the other end of this cable to the S VIDEO INPUT terminal on the back...

Page 38: ...PUT l select Input l if you connected the VCR to INPUT 2 select Input 2 VCR Antenna Terminals OUT 0 Incoming Cable Cable Recorder Box Rear Term nals 1 VCR Rear erminals O Projection IV Rear Terminals ACTIVE A v NE3WORK _O TO S_ EO _ v TUNER V I o E VHF_JHF I TS_ o fNpLIT 2 INPUT 1 OUTPUT INPUT Connect either one _ O Yellow Lead White Lead _ ZL_ Q Red Lead _ 36 Chapter 2 Connecting Your Projection ...

Page 39: ...he other ends of these cables to the AUX IN terminals on the back of the audio system O Turn off the television s speakers To do this press the AUDIO function button on the control pane or remote control until you see the SPEAKER display Set the speakers to OFF by pressing the adjust up down or right left button See Adjust ing the sound page 63 O Set the audio system s input to the AUX position Wh...

Page 40: ...rocedure O Connect one end of the A V network cable to the ACTIVE AiV NETWORK terminal on the back of the Projection TV Connect the other end of this cable to the _W NETWORK IN terminal on the back of a Mitsubishi component that has A V network terminals You can now point your coraponent remote such as a VCR remote directly at the televL ion The A V cable will pass the remote commands to the corn ...

Page 41: ...TV Rear Terminals NETWORK _ONITOR VSDEOI b_ _ V TUNER U _ _lVJ I D E o A _ U D I O _T A __ B H_tuHF ITS l INPUT 2 tNPUT 1 OUTPUT fNPUT Mitsubishi Component Rear Terminals G z_ _l k _iiii _ i I Basic Connections 39 ...

Page 42: ......

Page 43: ... cable antenna or external components it s time to enjoy your equipment This chapter will explain how to operate the Projection TV first focusing on functions that are basic and easy and then explaining some advanced features This chapter explains 0 Getting Started 0 Using the Advanced Features ...

Page 44: ...operate cable boxes and other brands of VCRs Turning the Projection TV o _ off Selecting the input source Changing channels Understanding the on screerL menus Setting the clock Memorizing channels Adding and deleting channel s Setting the A V Network Aligning the colors Renaming the inputs Selecting the menu language Using video mute Adjusting the sound Adjusting the picture and Using the closed c...

Page 45: ...rers The remote control is pre set to operate Mitsubishi VCRs but it can also operate VCRs from other manufacturers as well If you have a VCR from another manufactu __er or if you have a cable box you should set up the remote contrch Each layer CABLE VCR A or VCR B can be set for either a cable box or a VCR setting up the remote control to operate your VCR O Turn off your VCR Press one of the sele...

Page 46: ...e remote control to operate your cable box 0 0 0 0 0 Turn off your cable box Press one of the select button across the top of the remote control to choose the layer that you want to set up You can choose between VCR A VCR B or CABLE While holding in the POWER button on the remote control enter the code number listed in the chart on the following page for your brand of cable box Be sure to enter bo...

Page 47: ...he batteries in your remote control the remote will return to its initial setting using your remote control to operate your VCR After you have set up your remote control for your particular brand of VCR you can use the remote to ope a_ e your VCR O Use the select buttons across the top of the remote control to choose the layer you set up to operate the VCR VCR A VCR B or CABLE O Point the remote c...

Page 48: ...and of cable box you can use the remoLe to operate your cable box O Use the select buttons across the top of the remote control to choose the layer you set up t_ operate the cable box VCR A VCR B or CABLE Point the remote control at the cable box and press the desired buttons Only the POWER and CHANNFL buttons can be used when operating your cable box 46 Chapter 3 Operating Your Project ion TV ...

Page 49: ...t continues to flow into the Projection TV This maintains any changes to the settings and operates the built in clock and timing functions Unplugging the set will era e these settings requiring you to set them again Unplug the Projection TV only when it won t be used for a long time c c D _ c _ _o o o_o 000 _j _O O OC_ oOOO_ TS 4557 TS 5057 VS 5059 VS 6055 J When you turn on your Projection _i for...

Page 50: ...e input button INPUT on th_ control panel or on the remote control to select the input source you wish to view Ant A Ant B Input l Input 2 or Input 3 _ TS 4557 7 TS 5057 VS 5059 VS 6055 __ o_00g 48 Chapter 3 Operating Your Projection TV ...

Page 51: ...ew function to switch between chan nels on a user chosen list To change channels faster use either of the following procedures Enter three digits for every channel number using zeros where needed For example enter 004 t_ view channel 4 and 028 to view channel 28 Press the ENTER button after selecting the number of the channel For example press 4 and ENTER to view channel 4 Cable channel numbers 0 ...

Page 52: ...ally tune to the next memorized channel Important You cannot change channels sequentially until available channels have been programmed into memory See Memorizing channels page 55 changing channels directly _ Ol _ _1 To move directly to a particular channel without going through the prog ammed channels in between O U _ethe remote control to select Lhe number of the channel you _ant to view O Press...

Page 53: ...ar on the screen indicating that you have memorized that channel O After you ve changed to another channel press he quick view QV button to immediately return to the memorized channel c_ cD _ c_ 4 O 0 0 fl using the Super Quick View option To view selected channels pro grammed into Super Quick View memory Enter the desired channels into Su per Quick View memory See Using the Super Quick View tunin...

Page 54: ...em is selected within 5 minutes Unavailable menu items are indicated by light blue letters instead of the normal white letter _ Some on screen menu items must be set before other items are available For example Set the timer will only be available if Set the clock has been set You can exit the on screen menus any time by pressing the MENU button repeatedly You wi l then return to regular TV viewin...

Page 55: ...s MENU to return to TV Main Menu _ Set the clock _ Auto clock On Day Clock Time zone Atlantic Daylight savings On Use ADJUST to select Then press ENTER Press MENU to return to First Time Set Up Menu You will see the First Time Se_ Up screen Select Set the clock using the AX JUST buttons then press the ENTER button O If you want your Projection TV to set its clock automatically use the ADJUST butto...

Page 56: ...a Sei_dces XDS The clock will start just after the Projection TV receives the time data Set the clock b Auto clock Off Day Clock Time zone Daylight savings Use ADJUST to select Then press ENTER Press MENU to return to First Time Set Up Menu setting the clock yourself Set Auto clock to Off using the ADJUST buttons Press the ENTER button _ Set the clock 1_ Day Clock Monday Use ADJUST to select Then ...

Page 57: ...channels using the ADJUST buttons then press ENTER Use 1 he ADJUST buttons to choose the terminal you con netted your antenna or cable to A_ tenna A Ant A or Antenna B Ant B If you connected an antenna to each terminal then yoa should memorize the channels for the one antenna now and for the other antenna later Press ENTER O Use the ADJUST buttons to choose the type of antenna you connected Cable ...

Page 58: ...sing the ADJUST buttons then press ENTER Add delete channels Antenna Ant A Channel 006 In memory Use ADJUST to select another channel Press CANCEL to delete Press MENU to return to First Time Set Up Menu The Add delete channels szreen will appear Select the clhannel you would like to add or delete using the ADJUST buttons O I Y a channel is labeled In memory use the CANCEL button to remove it from...

Page 59: ...hen press ENTER Use ADJUST to select Set A V Ne_ work then press ENTER Use the ADJUST buttons to selecl Active Basic or Off Check the rear terminals of your VCR then use the chart below to determine how you shou d set your Projection TV Press the ENTER or MENU bu ton to return to the First Time Set Up menu If your VCR has a rear and you have s t your then set your Projection terminal that reads VC...

Page 60: ...Pc Mah Menu _ Align colors Press ENTER to select Red or blue Then on each screen press ADJUST until the cresshairs appear white Press MENU to return to First Time Set Up Menu 4 Red 1 4 0 Press the MENU button on the remote control The TV Main Menu will appear on the screen Select First Time Set Up using the ADJUST buttons then press the ENTER button Select Align colors using the ADJUST buttons pre...

Page 61: ...cted red or blue with the green lines When they are aligned the green line will turn white O Next use the ENTER button to select the other color red or blue Use the arrow buttons to ali_ _ these colored lines with the green lines After aligning both the red and blue lines press the ENTER button and the adjust down button at the same time to ret _rn to normal viewing The cross bar pattern is intend...

Page 62: ...ress MENU to return to Customize Viewing Menu O ross the MENU button on the remote control The TV Main Menu will appear on the screen O _e ect Customize Viewing using the ADJUST buttons then press ENTER O You will see the Customize Viewing screen Select Re name the inputs using the ADJUST buttons then press ENTER 0 Us e the ADJUST buttons to select the input Input l Input 2 or Input 3 you want to ...

Page 63: ... Language English Espa fel Franga s Use ADJUST to select Then press ENTER Press MENU to return to Customize Viewing Menu O Pres s the MENU button on the remote control The TV Main Menu will appear on the screen O Select Customize Viewing using the ADJUST buttons then press ENTER Select Select Language using the _DJUST buttons then press ENTER O Use the ADJUST buttons to select the language you wan...

Page 64: ...in Menu Use Video mute Automal_c Off Use ADJUST to select Then press ENTER Press MENU to return to Customize Viewing Menu O Press the MENU button on the remote control The TV Main Mena will appear on the screen 0 Select Customize Viewing usin_g the ADJUST buttons then press the ENTER button O Select Use Video mute using the _ JUST buttons then pres _ the ENTER button U_ ing the ADJUST buttons sele...

Page 65: ...s The separate audio programming S A P setting offers you the option of listening to either of two separate audio programs For example a station may broadcas _ news weather or a foreign language soundtrack on the S A P program The Mono setting reduces unwante l background noise when the Projection TV is receiving a weak stereo broadcast signal When you use the Mono setting you will hear the broadc...

Page 66: ... such flmctiom as volume and mute Choose Fixed if you connected an audio system This lets you control functions such as volume and mute through the audio system TS 4557 TS 5057 VS 5059 VS 6055 adjusting the audio functions 0 Use the AUDIO button on the remote control or on the control panel to select one of the f_nctions 0 Use the ADJUST up down button or right left buttons on the remote control o...

Page 67: ...ted what you will adjust Tint adjusts the proportion of red to green that deterraines the delicate tones of color Color determines the intensity of the color Contrast controls the level of white to black in the picture Brightness controls the light level of the image on screen Sharpness adjusts the detail and clarity of the picture Color temp erature Low Middle High is used to change the relative ...

Page 68: ... VIDEO button on the reraote control or on the control panel to select one of the fi_nctions 0 Use the ADJUST up down bu ton or right left buttons on the remote control or the ADJUST buttons on the control panel to adjust the function 66 Chapter 3 Operating Your Projection TV ...

Page 69: ...each TV channel However each station may be broadcasting only one or two captioning signals or none at all _QO0_ TS 4557 TS 5057 VS 5059 VS 6055 To use the closed caption decoder O Repeatedly press the VIDEO bu_ tc n on the remote control or on the control panel until the closed captioning _ display appears on the screen Pres s the ADJUST buttons or ri_ hffleft button on the remote control or the ...

Page 70: ...nguage and using the television without dis_m __bing others If you cannot display any captions on the screen please keep in mind that not all broadcasters video tapes or laserdiscs supply closed caption signals Additionally captions will not appear if you are playing a video tape that is worn or deteriorated or if you are switching from STILL mode or SEARCH mode to PLAY mode on a Laser Disc player...

Page 71: ...ed Features This section explains how to use some of the more advanced func tions You ll learn about Setting the timer Using the parental lock Using the Super Quick View tuning and Selecting an advanced PIP featm e 69 ...

Page 72: ...me Input Channel Use ADJUST to select Then press ENTER Press MENU to return to Advanced Features Menu Use the ADJUST buttons and the ENTER button to set Day _ _tart time Input and Channel After setting the timer make sure that the program timer indicator is l it ap The indicator will light in orange when the TV is turned on and l ght in red when the TV is turned off The indicator will not light up...

Page 73: ...hen press ENTER Press MENU to return to TV Main Menu Use Parentai lock Lock the TV Lock the channel Use ADJUST to select Then press ENTER Press MENU to return to Advanced Features Menu O Press the MENU button The TV Miain Menu will appear Select Advanced Features usin_ the ADJUST buttons then press ENTER Select Use parental lock using the ADJUST buttons then press ENTER Select Lock the TV or Lock ...

Page 74: ... Features Menu This TV is locked Enter your personal code using NUMBER buttons Then press ENTER to watch this TV Use the ADJUST buttons to set the time at which you want the TV lock to turn off Press ENTER If you want the TV ock to be in effect all the time set the same End time as you _e for the Start time Press HOME to exit the menus When you turn on a locked TV you will be asked to enter your f...

Page 75: ...will appear Enter a four digit secret code using the number buttons 0 9 then press the ENTER button You can clear the code by pressini _ the CANCEL button You will see the channel lock set up screen Use tile ADJUST buttons to select a position Press ENTER Use the ADJUST buttons to choose _ he input that has the channel you want to lock Press ENTEP Use thE ADJUST button to choose he channel you wan...

Page 76: ...then press the ENTER button 0 Enter the four digits of your sec et code using the number buttons 0 9 press ENTER _ IjTyou were using the TV lock press the CANCEL button to tur a off the TV lock _Important _ Lock the channel Antenna Channel Use ADJUST to select Then press ENTER Press CANCEL to clear Press MENU to return to Advanced Features Menu If you were using the channel lock use the ADJUST but...

Page 77: ... Quick View Antenna Ant A Channel 003 Use ADJUST to select Then press ENTER Press MENU to return to Advanced Features Menu customizing the Super Quick View list with the menus O Press the MENU button on the remote control The TV Main Menu will appear on the screen Selecl Advanced Features using the A DJTLTS buttons then press the ENTER button Select Use Super Quick View usin8 the ADJUST buttons th...

Page 78: ...rols to l une the Projection TV to the ch _nnel you want to add to the ist O Press and hold the SQV button for about 2 seconds When you _elease the button the letters SQV will appear under the channel number indicating shat the channel has been programmed into Super Quick View memory 76 Chapter 3 Operating Your Projection TV ...

Page 79: ...urn to TV Main Menu I Use Advanced PIP Current setting TV Still Use ADJUST to select Then press ENTER Press MENU to return to Advanced Features Menu _Use Advanced PIP Current setting Replay Replay speed 1 Use ADJUST to select Then press ENTER Press MENU to return to Advanced Features Menu O Press the MENU button on the remote control The TV Main Menu will appear o11the screen O Select Advanced Fea...

Page 80: ......

Page 81: ...V offers the user several special features not generally available on other brand Projection TVs This chapter will explain how to use these distinctive features It contains the following topics t Understanding the On Screen Displays 0 Using the Off Timer t Using the Advanced Picture in Picture PIP Modes t Using the Active AN Network Feature ...

Page 82: ...annel _tcreo and or SAP are available tbr reception on this channel this channel is programmed into Super Quick View memory PIP input source when a PIP image is showing cuzTent day of the week and ti_e The second setting shows tlhe external input source or input name S Video cable has been con nected PIP input source when a PIP image is showing curl ent day of the week and time The third setting s...

Page 83: ...set the Projection TV to turn off automatically You can set the Projection TV to turn off after a period of time ranging from 10 to 120 miautes In this section you ll learn Setting the off timer and Changing or canceling the off timer Using the Off timer 81 ...

Page 84: ... T The time will decrease in 10 minute intervals each time you press the button O f you later want to check on how much time is left in the off timer press the off timer button OFF T once The on screen display reads off timer and shows the amount of time emaining During the last minute before the Projection TV is set to turn off Off timer 1 min will flash in red to remind you that the off timer is...

Page 85: ...l An on screen display will indic ate the amount of time remaining until the Projection TV will turn off Coni irl ue pressing the off timer butt an OFF T repeatedly to change the remaining time or cancel the off timer The off timer is canceled when appears instead of the remain ing time Using the Off timer 83 ...

Page 86: ...time In this section you ll learn about Selecting the PIP image Selecting the PIP source Selecting the PIP channel Exchanging the PIP image an d the main image Moving the PIP image Freezing the PIP image Using the Snap shot feature and Using the Replay feature Important You must have a VCR connected to the Projection TV to see two different live action pictures when u sing PIP 84 Chapter 4 Using t...

Page 87: ...eo SAP SQV 0 Press the PIP button again within 10 seconds the PIP image will change to a smaller size If you wait longer than 10 seconds the PIP iraage will disappear when you press the PIP batton Press the PIP button once again to cancel the PIP image When the main image is black and white the PIP image will also appear in black and white If you move the PIP image and then tu_ n it off it will re...

Page 88: ...ut l In put 2 _lnput 3 _ _Important To change the input of the background main image while a PIP image is on the screen press the input button INPUT on the control panel or on the remote control Selecting the PIP channel CHANNEL Pre _s the PIP channel button CHANNEL on the remote control to change the channel of the PIP image _ mportant When the source of the main image and the PIP image is the TV...

Page 89: ... contents of the main background image and the PIP image AnI A 023 I SPN Stereo SAP SQV Input 1 Input 1 A 023 Moving the PIP image _ c j o o o 0 _OD Dc_ 0 D g r o 0 5 1 Press _h_ adjust up down button or right left button to move the PIP image Using the Picture in Picture PIP Mode 87 ...

Page 90: ...till See Selecting an advanced PIP function page 77 Use the MENU button to return to the normal picture 19 _00 3_ cDOQ 3 Pres the PAUSE button to freeze the PIP image on the scre n Press PAUSE again to return the PIP image to a live pict_re _Important When you press the pause button while viewing the normal picture the PIP image will appear and be frozen disappears after a few seconds 88 Chapter 4...

Page 91: ... 0 Press the PAUSE button again a third PIP image will appear moving The previous two PIP images will be frozen Eacl ti me you press the PAUSE button the PIP images will shift upwards one by one the tot image will be replaced by the second image the second ima_ e will be replaced by the third and a new frozen image will appear in the third space To cancel the PIP image press the PIP button once if...

Page 92: ...cting an advanced PIP function page 77 O C __ etthe replay speed between 1 short interval and 9 long interval Use the MENU button to return t _ the normal picture Press the PAUSE button The 2_7 will memorize seven frames of video from the main image _md display the first three of t lhese frames as PIP images The interval between the fimmes is determined by the replay speed set in step _ F ach time...

Page 93: ...twork before you begin You must have connected an A V Network cable from the Active A V Network terminal of your Projection W to the A V Network IN terminal of your VCR See TV Mitsubishi products that have A V Network terminals page 38 You must have connected your VCR to Input 1 of your Projection TV You must have set your Projection TV s _JV Network setting to Active or Basic See Setting the A V ...

Page 94: ... turn offyour VCR unless a tape is currently playing or recording Active A V Network will return your Projection TV to the channel it was on before or turn i1 oil if it was off originally using the PLAY button AUTO PI kY When you press PLAY on the remote Active A V Network will turn your VCR on and b dn playing the tape if any Active A V Network will turn your Projection TV on and switch it to Inp...

Page 95: ...on An enna A or Antenna B when you turn the Projection TV back on If you leave the Projection TV turned on set to Input l but the Projection TV is not receiving a signal on Input l it will automati cally turn off after five minutes If you use a TV menu during this time the Projection TV will turn off five minutes after you stop using the menus You should not press the PIP button while you are watc...

Page 96: ......

Page 97: ...operations of the Projection TV you may ru n into trouble from time to time as you become accustomed to the Projection TV This chapter offers solutions to some of the common problems you may encounter We suggest that you consult this chart before contacting a Mitsubishi service representative ...

Page 98: ... buttons are located See Getting ready to use tlhe remote control in Chapter 1 which contains pointers for using the remote cow rol The Projection TV takes several seconds to respond to button commands Use the ENTER button to avoid delays See Changing channels in Chapter 3 which explains the function of the ENTER tmtton You can t access a channel Be sure that the channel you want to view is progra...

Page 99: ...pri ate reception mode You forget the code you used Use the alternate procedure to set the parental lock that doesn t require the use of the code See the Appendix_ Proce dure for Bypassing the Parents Lock You can t program the Projection TV to turn on automatically The Projection TV may be locked See Using the parental lock under Using the Advanced Features in Chapter 3 The sound doesn t match th...

Page 100: ...es For maximum enjoyment and safe operation of your MITSUBISHI Color Projection TV please read the IMPORTANT SAFE GUARDS carefully and apply them properly To keep your TV from toppling in the event of an earthquake you can use the clamp attached to the back of the television to secure it to the wall Simply run a cord or rope through the clamp then attach the rope to the wall directly belhi_ d the ...

Page 101: ...n to secure it to the wall Simply run a cord or rope through the clamp then attach the rope to the wall directly behind the television Calling for service If you are unable to correct a problem with your Projection TV consult your MITSUBISHI dealer or MITSUBISHI Authorized Warranty Service Center Do not adjust any controls not described in this owner s guide Do not remove the protective back cover...

Page 102: ......

Page 103: ... l Important Unlocking with this procedure is only temporary To cancel the lock completely follow the procedure below O Press the QV button and the 9 button on the remote control at the same time This will allow you to _mrn on a locked TV Press the MENU button to view the main menu Use the ADJUST button to select Advanced Features Press ENTER O Use the ADJUST button to select Use Parental Lock Pre...

Page 104: ...e control at the same time This will allow you to turn on a locked TV O Press the MENU button to view the main menu Use the ADJUST button to select Advanced Features Press ENTER Use the ADJUST button to select Use Parental Lock Press ENTER Press the QV button and the 9 button on the remote control at the same time instead of entering the code If you were using the TV lock press the CANCEL button t...

Page 105: ...rk 38 antenna 27 31 audio system 37 basic 26 cable 27 28 31 34 UHF VHF 30 VCR 31 34 contrast 35 control panel 12 D deleting channels 56 display button 20 displays 80 E enter button 13 18 21 espafiol 61 exchange button 18 21 exchanging the PIP image 137 F features advanced 69 features special 6 19 frangais 31 freezing PIP 88 front panel 12 H home button 20 I Important Safeguards 3 input button 13 1...

Page 106: ...sound adjusting 63 source button 21 86 source PIP 86 special features 6 SQV button 18 stereo 63 super quick view button 18 super quick view using 51 75 surround 63 TV locking 71 TV unpacking 7 two tuner PIP 92 U UHF VHF connecting 30 unpad_ng your I_V 7 using video mute 62 _T VCR buttons 18 VCR connecting 31 34 VCR l emote control codes 44 video controls 14 19 video input 13 25 video output 24 vid...

Page 107: ...CAR1 IS NOT A CONDITION OF WAR RANTY COVERAGE However please return the Owner Registration Card so that we can contact you should a question cf safety arise which could affect you 2 THIS WARRANTY DOES NOT COVER damage caused by modification alteration repair or service of the product by anyone other than an authorized MITSUBISHI service center physical abuse to or misuse of the product operation i...

Reviews: