background image

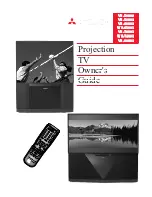
Projection
TV
Owner's
Guide

VS-50800

VS-50800

VS-50800

VS-50800

VS-50800
VS-50803

VS-50803

VS-50803

VS-50803

VS-50803
VS-60803

VS-60803

VS-60803

VS-60803

VS-60803

WS-65903

WS-65903

WS-65903

WS-65903

WS-65903

VS-70803

VS-70803

VS-70803

VS-70803

VS-70803

WS-73903

WS-73903

WS-73903

WS-73903

WS-73903

VS-80803

VS-80803

VS-80803

VS-80803

VS-80803

ENTER

EXCH

MENU

ADJUST

GUIDE

SLEEP

VIDEO

AUDIO

PIP

PIP INPUT

PIP CH

HOME

PAUSE

STOP

REC

REW/REV

PLAY

FF/FWD

INFO

CANCEL

INPUT

MUTE

VOLUME

8

9

0

RCL

7

4

5

6

3

2

1

SQV

CHANNEL

POWER

VCR

DVD/CABLE

TV

AUDIO

SUB

VCR  PLUS+

FORMAT

Summary of Contents for VS-50800

Page 1: ...WS 65903 WS 65903 VS 70803 VS 70803 VS 70803 VS 70803 VS 70803 WS 73903 WS 73903 WS 73903 WS 73903 WS 73903 VS 80803 VS 80803 VS 80803 VS 80803 VS 80803 ENTER EXCH MENU ADJUST GUID E SLEEP VID EO AUD...

Page 2: ...ARNING WARNING WARNING WARNING WARNING TO REDUCE THE RISK OF FIRE OR ELECTRIC SHOCK DO NOT EXPOSE THIS APPLIANCE TO RAIN OR MOISTURE TO PREVENT ELECTRIC SHOCK HAZARD DO NOT USE THIS UNIT S POLARIZED P...

Page 3: ...TV Chapter 1 Getting to Know Your TV 13 13 13 13 13 Overview of the Control Panel 14 Overview of the Remote Control 17 getting ready to use the remote control 18 remote control keys and functions 20 u...

Page 4: ...ormat 86 Special Features of Models WS 65903 WS 73903 87 displaying the POP image 88 changing the screen format 90 Diamond ShieldTM Removal 92 Chapter 4 Troubleshooting Chapter 4 Troubleshooting Chapt...

Page 5: ...here they exit from the appliance 13 Lightning For added protection for this TV receiver during a lightning storm or when it is left unattended and unused for long periods of time unplug it from the w...

Page 6: ...ogos or the TV s displays on screen for more than 10 minutes Still patterns and repeated display of the same pattern can scar the picture tube causing permanent damage to the TV 14 Power Lines An outs...

Page 7: ...Preface which provides the following important information Unpacking Your TV A Few Words About HDTV Summary of Special Features What s in Each Chapter Some Conventions Used in this Guide Mitsubishi ha...

Page 8: ...r new TV please take a few minutes to Complete the registration card The registration card asks for the serial number of the TV You will find the number on the back of the unit File your sales receipt...

Page 9: ...s the same way as the broadcast stations you currently receive The similarity ends here as digitally sent pictures are of a much higher quality than analog signals Each Major main channel will have se...

Page 10: ...color bandwidth information that is not possible using composite or S Video connections Offers the highest possible picture resolution when using a digital video source such as DVD Wide Screen Televi...

Page 11: ...losed Caption Decoder decodes hidden text information included with many TV programs and displays this text on screen 2 Tuner Advanced Picture in Picture Mode allows you to view two different broadcas...

Page 12: ...unique to the operation of TV Guide Plus are highlighted For instructions on using the TV GUIDE Plus feature see the TV GUIDE Plus Operating Guide Chapter 3 Using the Special Features Operating instr...

Page 13: ...CABLE LOOP OUT terminal on the back of the TV Connect the other end of the coaxial cable to the ANTENNA IN terminal on the VCR Connect the second coaxial cable from the VCR ANT OUT to TV ANT B Connect...

Page 14: ...12 Preface Welcome to Mitsubishi...

Page 15: ...e of options available when using the buttons on the remote control or on the TV s control panel It also offers some general guidelines for using the remote control Most functions can be controlled by...

Page 16: ...UST S VIDEO VIDEO MONO AUDIO R INPUT 4 L INPUT VOL CHANNEL POWER CANCEL ENTER MENU Overview of the Control Panel A V RESET ADJUST S VIDEO VIDEO MONO AUDIO R MENU INPUT 4 L INPUT CHANNEL VOLUME CANCEL...

Page 17: ...w TV channels on Antenna A Ant A or Antenna B Ant B other equipment connected to Inputs HDTV if connected channel controls CH Use the key to switch to a channel with a higher number Use the key to swi...

Page 18: ...nd down keys ADJUST In the menu screens use this key to move up through the screen choices or select an option in the selection field In the menu screens use this button to move down through the scree...

Page 19: ...on the use of these keys refer to the instruction section for that feature Features are listed by name in the Index at the end of this guide Getting ready to use the remote control installing the batt...

Page 20: ...ontrol don t use any harsh chemicals Use only a soft slightly moistened cloth general instructions When using the remote control to operate the TV VCR DVD Cable box or audio equipment Be within 20 fee...

Page 21: ...O FORMAT GUIDE INFO HOME PAUSE REC FF FWD REW REV PLAY STOP ENTER VCR DVD CABLE TV AUDIO CANCEL MENU PIP PIP INPUT PIP CH EXCH VCR PLUS ADJUST SUB 3 7 1 15 13 11 16 5 9 17 19 2 4 6 12 14 18 20 8 10 Ge...

Page 22: ...key INPUT Use to select the input source TV channels on Antenna A or B Other equipment connected to Input 1 Input 2 Input 3 or DVD Input 4 TV channels on HDTV receiver recall key RCL Press this butto...

Page 23: ...ing area flsleep timer key SLEEP Use to program the TV to turn off automati cally at a later time adjust keys Within menus use ADJUST key to select and change options Also use to adjust convergence an...

Page 24: ...D layer is programmed to operate your Mitsubishi DVD player and the AUDIO layer is programmed for your Mitsubishi A V receiver You can set up layers in the remote control to operate a cable box some d...

Page 25: ...that brand of equipment seems to work try all of the codes for the equipment type For VCR s try codes 01 to 21 For Cable Boxes and Satellite Receivers try codes 47 99 To reset an individual layer to...

Page 26: ...56 57 52 53 69 57 54 55 56 57 58 59 60 85 87 71 94 51 61 62 82 63 70 45 51 73 74 75 76 77 93 94 98 99 64 65 84 48 51 63 49 53 79 65 84 66 88 89 91 92 57 47 63 54 55 56 87 55 67 68 72 51 44 62 54 93 94...

Page 27: ...p down on some models ENTER on some models CANCEL ARROW up down left right on on some models some models Mitsubishi AV Receiver and CD player functions POWER PAUSE VOLUME STOP MUTE FF PLAY REW Additio...

Page 28: ...26 Chapter 1 Getting to Know Your TV blank page...

Page 29: ...apter will explain how to operate the TV first focusing on functions that are basic and easy and then explaining some advanced features This chapter explains The ViewPoint On Screen Operating System U...

Page 30: ...Important notes to help you use your new Mitsubishi television to its full capacity You ll find information on Understanding the ViewPoint on screen menus The Main Menu The Setup Menu Memorizing chan...

Page 31: ...n set For ease of use all menu selections are made the same way ADJUST up down moves up or down to your menu choice After making a menu choice ADJUST right moves you to the selection field where you c...

Page 32: ...ain Menu Screen and will always be the first screen that ap pears when you press the MENU key If the menu name has a picture next to it it means that you will go to another screen to make choices for...

Page 33: ...eed to make your SETUP menu choices again The SETUP menu is where you will memorize the channels you can receive set the Clock select how your television will work with other AV equipment AV Connectio...

Page 34: ...N BE MEMORIZED DTV 2 through 69 2 through 69 1 through 125 1 through 125 1 through 99 not available if TV GUIDE Plus is activated not available if TV GUIDE Plus is activated You will need to select th...

Page 35: ...CK AV CONNECTION Home Theater Language Idioma English DTV Channel Guide Off ADJUST to select item then move to and change option ENTER for menu or to start MENU to return Select the input you want to...

Page 36: ...4 and 028 to view channel 28 or Press the ENTER button after selecting the number of the channel For example press 4 then press ENTER in less than three seconds to view channel 4 For DTV channels you...

Page 37: ...ll need to select the time zone Atlantic Eastern Central Moun tain Pacific Alaska and Hawaii and choose the Daylight Savings Time DST option that your state uses applies or ignores The clock time and...

Page 38: ...ion used TV Feature Setting Active AV Network External Audio System Volume Changed by AV Receiver VCR without Active AV Network VCR with Active AV Network non remote controlled receiver or stereo syst...

Page 39: ...can be Fixed or Variable No N A AV CONNECTION menu Home Theater ADJUST to select item then move to and change option MENU to return External Audio System N A AV Receiver at Input 1 MAIN Menu SETUP Men...

Page 40: ...tton as explained below before you begin be sure you have Connected an A V Network cable from the Active A V Network terminal of your TV to the A V Network IN terminal of your VCR Connected your VCR t...

Page 41: ...t is either off or not connected will cause the TV to automatically turn off within two minutes using the PLAY key on the remote control Active A V Network will turn your VCR on and play a tape if any...

Page 42: ...to prevent a sudden increase of volume make sure you have turned down the TV s volume first AV Receiver at Input 1 To make this selection the External Audio System must be set to YES When an AV receiv...

Page 43: ...ed with the Language Idioma selection highlighted If you do not want to change the current selection you may skip this section SETUP menu Memorize Channels Ant A Air CLOCK AV CONNECTION Home Theater L...

Page 44: ...play the DTV Channel Guide Major and minor channels are accessible with the CHANNEL up down key To scroll through the available major channels press the CHANNEL key and hold When you have selected a m...

Page 45: ...morize Channels Ant A Air CLOCK AV CONNECTION Home Theater Language Idioma English DTV Channel Guide Off ADJUST to select item then move to and change option ENTER for menu or to start MENU to return...

Page 46: ...after the first two numbers enter the 2 digit Minor channel number The number may be displayed as follows 63 86 Major channel is 63 Minor channel is 86 04 Major channel is 04 no Minor channel has bee...

Page 47: ...CHANNEL VOLUME MUTE INPUT AUDIO SLEEP VIDEO FORMAT GUIDE INFO HOME PAUSE REC FF FWD REW REV PLAY STOP ENTER VCR DVD CABLE TV AUDIO CANCEL MENU PIP PIP INPUT PIP CH EXCH VCR PLUS ADJUST SUB DTV channel...

Page 48: ...ver each station may be broadcasting only one or two captioning signals or none at all When setting the decoder you can choose to display captions when muting On if mute one of four standard captionin...

Page 49: ...then move to and change option MENU to return Gray For the text display the CAPTIONS menu allows you to select the type of captioning standard or text you will receive the background color black or t...

Page 50: ...manually Important Adding a channel to memory allows you to tune to the channel with the CHANNEL up down keys If a channel is not in memory you can only tune to it with the number keys Name TV Guide...

Page 51: ...menu Input Ant A Channel Memory Name SQV SQV 1 Off ADJUST to select item then move to and change option ENTER for menu or to start MENU to return CANCEL 002 Deleted MAIN Menu Getting Started Channel...

Page 52: ...ortant If you use only the first memory bank SQV will appear under the channel number any time it is displayed If you use additional banks the letters SQV1 SQV2 etc will appear under the channel numbe...

Page 53: ...Y STOP ENTER VCR DVD CABLE TV AUDIO CANCEL MENU PIP PIP INPUT PIP CH EXCH VCR PLUS ADJUST SUB 2 3 5 6 7 8 9 0 RCL 4 POWER CHANNEL VOLUME MUTE INPUT AUDIO SLEEP VIDEO FORMAT GUIDE INFO HOME PAUSE REC F...

Page 54: ...erating Your TV This section explains how to use some of the more advanced features You ll learn about Setting the timer Using the parental lock Using Video Mute Adjusting the Convergence Using the Ad...

Page 55: ...S menu TIMER PARENT LOCK Video Mute CONVERGENCE Off ADJUST to select item then move to and change option ENTER for menu or to start MENU to return CANCEL MAIN Menu Using the Advanced Features The Adva...

Page 56: ...ing the timer If you have not set the time and or day you will automatically be routed to the Set the Clock menu Setting the timer Timer The timer will remain off until you choose to turn it On or mov...

Page 57: ...imer Set Time Set Day Input Everyday ADJUST to select item then move to and change option MENU to return Off 12 00 AM Ant A Channel 002 MAIN Menu ADVANCED FEATURES Menu Setting the timer Using the Adv...

Page 58: ...one space When you enter the fourth digit the new passcode is set To set your 4 digit passcode using the ADJUST up down keys At the Set Passcode selection field using ADJUST up down scroll through the...

Page 59: ...BY CHANNELS Lock by Time Lock Time Off ADJUST to select or change option ENTER for menu to start MENU to return CANCEL 12 00 AM Unlock Time 12 00 AM MAIN Menu ADVANCED FEATURES Menu Using the Advanced...

Page 60: ...tely prevent access to cable channels This is because your cable box channels can be controlled outside the TV changing the lock To change the lock use ADJUST up down in the Parent Lock menu to move t...

Page 61: ...l Lock Input Channel In Memory Ant A ADJUST to select item then move to and adjust option MENU to return On 002 Lock Locked MAIN Menu ADVANCED FEATURES Menu PARENT LOCK Menu Using the parental lock co...

Page 62: ...gnal or no signal at all from Input 1 Input 2 Input 3 DVD or Input 4 If a PIP is displayed the screen will be gray If no PIP is displayed the screen will be blue When Video Mute is OFF the screen will...

Page 63: ...EATURES menu TIMER PARENT LOCK Video Mute CONVERGENCE Off ADJUST to select item then move to and change option ENTER for menu or to start MENU to return MAIN Menu Using the Advanced Features Using vid...

Page 64: ...2 Operating Your TV CONVERGENCE menu Red Convergence Blue Convergence Reset Factory Default ADJUST to select item ENTER for menu or to start MENU to return MAIN Menu ADVANCED FEATURES Menu The Conver...

Page 65: ...nced aligns 64 individual adjustment positions static convergence example Press ADJUST to converge the lines Press VIDEO to switch from Red to Blue Press MENU to go back Press CANCEL to delete changes...

Page 66: ...s ENTER when convergence complete Press ADJUST to select the point that will be converged Press ENTER to begin convergence Press ADJUST to converge the lines Press ENTER when convergence done Press VI...

Page 67: ...return MAIN Menu ADVANCED FEATURES Menu Resetting Factory Defaults To reset the alignment to the original factory settings press ENTER EXCH at Reset Factory Defaults The message in progress will appea...

Page 68: ...66 Chapter 2 Operating Your TV Audio Video Settings This section explains how to customize the audio and or video settings for your television Setting the A V Memory Customizing the AV Memory settings...

Page 69: ...ance IRIS PIP Audio Out Stereo SAP Mono Although the preset A V Memories are designed to optimize the picture and sound quality for different types of environments you can adjust individual settings t...

Page 70: ...r TV AUDIO VIDEO SETTINGS A V Memory Standard A V Reset for Standard AUDIO SETTINGS VIDEO SETTINGS ADJUST to select item then move to and change option ENTER for menu or to start MENU to return MAIN M...

Page 71: ...UST up down keys to select AUDIO VIDEO SETTINGS Press ENTER EXCH At the AUDIO VIDEO SETTINGS menu use the ADJUST up down keys to select AV Reset Press ENTER EXCH Press the MENU key twice to exit all m...

Page 72: ...mory 1 2 3 5 6 7 8 9 0 SQV RCL 4 POWER CHANNEL VOLUME MUTE INPUT AUDIO SLEEP VIDEO FORMAT GUIDE INFO HOME PAUSE REC FF FWD REW REV PLAY STOP ENTER VCR DVD CABLE TV AUDIO CANCEL MENU PIP PIP INPUT PIP...

Page 73: ...brant Brightness provides a scale that controls the overall brightness of the picture Sharpness provides a scale that adjusts the detail and clarity of the picture Color provides a scale that determin...

Page 74: ...TV will receive a broadcast audio signal and play back the sound that you hear You can set this function to Stereo S A P or Mono For almost all situations you should choose Stereo With this setting th...

Page 75: ...B is in the main picture and the PIP PIP AUDIO OUT will perform the same function as Listen To SURROUND creates simulated stereo and surround effects You can set this setting to Off Simulate or Surro...

Page 76: ...omizing the A V Memory settings cont AUDIO VIDEO SETTINGS A V Memory Standard A V Reset for Standard AUDIO SETTINGS VIDEO SETTINGS ADJUST to select item then move to and change option ENTER for menu o...

Page 77: ...en use the ADJUST right left buttons to change it access with the audio or video key Press the AUDIO or VIDEO key repeatedly until the desired setting displays at the bottom of the screen While the se...

Page 78: ...AUSE REC FF FWD REW REV PLAY STOP ENTER VCR DVD CABLE TV AUDIO CANCEL MENU PIP PIP INPUT PIP CH EXCH VCR PLUS ADJUST SUB MENU VIDEO 1 2 3 5 6 7 8 9 0 SQV RCL 4 POWER CHANNEL VOLUME MUTE INPUT AUDIO SL...

Page 79: ...chapter your TV offers some special features that you can use when operat ing your TV This chapter contains the following topics Understanding the On Screen Displays Using the Sleep Timer Using the Pi...

Page 80: ...ntenna A Channel 002 format NTSC with a tradi tional 4 3 shape stereo and SAP are available channel programmed into SuperQuickView memory current time current day of the week signal strength for DTV T...

Page 81: ...t the TV to turn off automatically You can set the TV to turn off after a period of time ranging from 30 to 120 min utes in thirty minute intervals In this section you will learn Setting the sleep tim...

Page 82: ...er Press the SLEEP key on the remote control An on screen display will indicate the amount of time remaining until the TV turns off Repeatedly press the SLEEP key to change the remaining time or to ca...

Page 83: ...size screen Wide screen models WS 65903 and WS 73903 can also display a 4 3 picture The picture in picture PIP mode for these televisions allows you to view two different sources at the same time In t...

Page 84: ...ce again to cancel the PIP image If you move the PIP image and then turn it off it will appear in the new position when you turn it on again Important When the main image is an HD signal from DTV PIP...

Page 85: ...t pictures when both the PIP and main pictures are from ANT A Turn the PIP image on by pressing the PIP key To select the PIP input press the PIP INPUT key Each time you press the key the PIP input wi...

Page 86: ...PAUSE again to return to a live picture Important If you press the PAUSE key while viewing a picture without a PIP image a PIP image will appear and be frozen To remove the frozen PIP image press the...

Page 87: ...Input 1 Input 1 NTSC 4 3 S VIDEO PIP A 023 Ant A ENTER EXCH Using the Picture in Picture PIP Modes ADJUST Moving the PIP image You may move the image while viewing an on screen picture by pressing th...

Page 88: ...03 and VS 80803 a press of the FORMAT key allows you to zoom in on the picture If you are watching a movie that is in letterbox format with bars at the top and bottom pressing FORMAT will reduce the s...

Page 89: ...screen format of models WS 65903 and WS 73903 allow you addi tional functions with picture outside picture POP modes You can also change the size and shape of the picture that is displayed In this sec...

Page 90: ...of ways By using the remote control you can see images side by side with three small POPs or with nine small POPs TV PICTURE POP Side by side Press the PIP key once To change the POP right channel pr...

Page 91: ...left of the main picture press the ENTER EXCH key TV PICTURE POP 1 POP 3 POP 2 POP 4 POP 6 POP 9 POP 8 POP 5 POP 7 displaying the POP image cont Three POPs For 3 POPs press the PIP key once after disp...

Page 92: ...casts that are shown in 4 3 aspect ratio and movies that are shown in 16 9 aspect ratio By using the FORMAT key you can change the size of the picture This allows you to decide which format you view A...

Page 93: ...the screen With the WS 65903 or WS 73903 you can leave the bars in the picture or with the press of the FORMAT key eliminate them Press the FORMAT key NTSC EXPAND Press FORMAT again NTSC ZOOM changing...

Page 94: ...side Pull gently toward you to create a slight outward bow in the shield This will cause it to pop out of the top panel After shield removal reinstall the side molding panels To reinstall the DiamondS...

Page 95: ...with the basic and advanced operations of the TV you may occasionally encounter a problem This chapter offers answers to some of the most frequently asked questions of TV owners We suggest that you co...

Page 96: ...t work Use the ENTER EXCH button to avoid delays Enter 3 digits for channel For More Information See Getting Ready to Use the Remote Control in Chapter 1 for an explanation of how to install batteries...

Page 97: ...io program S A P Check that External Audio System setting is set to NO Use the alternate procedure that doesn t require the use of the code See Customizing AV Memory in Chapter 3 which explains how to...

Page 98: ...distortion however will not harm the picture tubes For maximum enjoyment and safe operation of your Mitsubishi TV please read IMPORTANT SAFEGUARDS pages 3 and 4 of your Owners Guide Caution and care v...

Page 99: ...ee the following display on your screen you should not change any settings This is a special display used by the factory If any settings are changed your warranty may be void NOTE Firmware Versions ar...

Page 100: ...98 Chapter 4 Troubleshooting Solid Red Page...

Page 101: ...MENU key to view the main menu Use the AD JUST key to select Advanced Features Press ENTER EXCH Use the ADJUST key to select Parental Lock Press ENTER EXCH At Passcode use ADJUST right to move to the...

Page 102: ...100 Chapter 5 Troubleshooting SOLID RED PAGE...

Page 103: ...ility 8 I I I I I Important Safeguards 3 4 Information Key 20 Input Front Panel Display 15 Key Remote 20 Inputs Naming 48 Intelligent Room Illumination Sensor IRIS 9 71 K K K K K Keys front panel 15 1...

Page 104: ...cting the Image Source 83 Picture outside Picture POP Modes See POP POP WS 65903 WS 73903 87 90 Changing 90 91 Displaying 88 89 Power Key Front Panel 16 Power Key Remote 20 Problems and Solutions 94 9...

Page 105: ...HE OWNER REGISTRATION CARD IS NOT A CONDITION OF WAR RANTY COVERAGE However please return the Owner Registration Card so that we can contact you should a question of safety arise which could affect yo...

Page 106: ...MITSUBISHI CONSUMER ELECTRONICS AMERICA INC 9351 Jeronimo Road Irvine CA 92618 1904 1998 Mitsubishi Consumer Electronics America Inc 871D253A20 Printed in U S A...

Reviews: