


VS-SH10U Set-up and Installation Manual
31
B: T/B PHASE
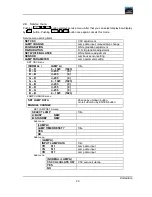
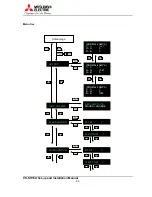
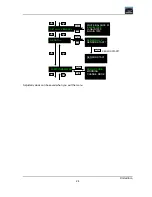
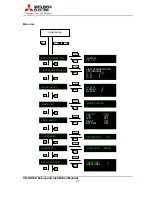
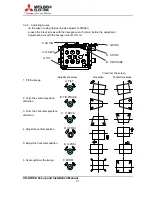
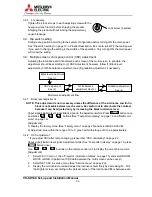
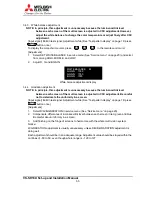
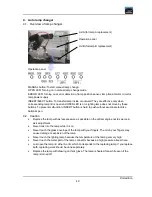
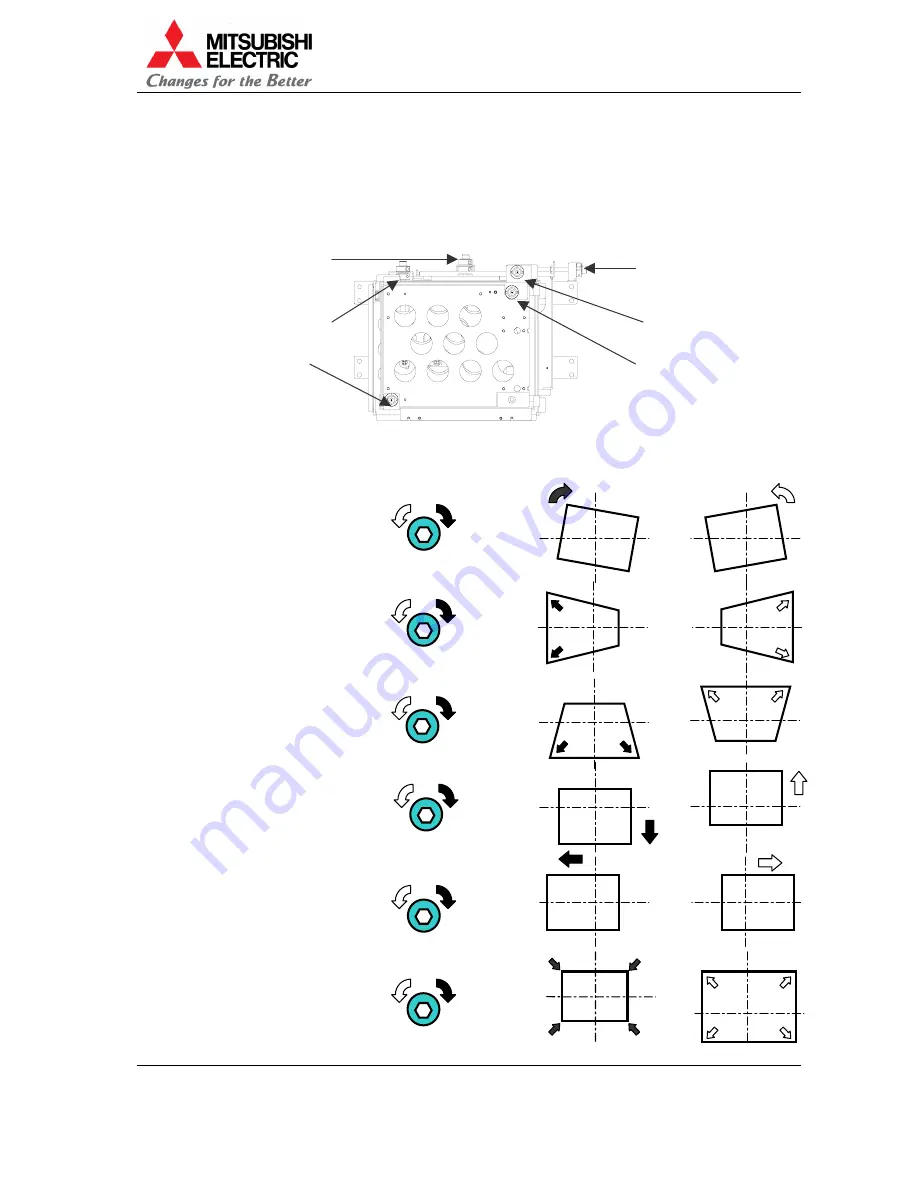
3.2.2. Adjusting 6 axes
(In the case of using optional 6-axis adjuster, S-050AXI)
Loosen the 6 lock screws with the hexagon wrench (2mm) before the adjustment.
Adjust each axis with the hexagon wrench (3mm).
View from the screen
Adjustment screw
Clockwise
Counterclockwise
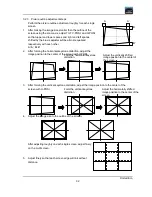
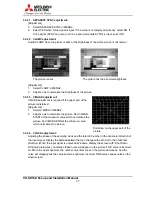
1. Tilt the image.
2. Form the vertical keystone
distortion.
3. Form the horizontal keystone
distortion.
4. Adjust the vertical position.
5. Adjust the horizontal position.
6. Scale up/down the image.
L
A: TILT
D: V-POSI
B: T/B PHASE
E: H-POSI
C: H-KEYS
A: TILT
C: H-KEYS
D: V-POSI
E: H-POSI
F: ZOOM
F: ZOOM
Summary of Contents for VS-SH10U
Page 1: ...DLPTM Projector VS SH10U Set up and Installation Manual August 30 2002...
Page 8: ...First edition 8 1 2 Outline drawings 1 2 1 Circuit Box unit mm...
Page 9: ...VS SH10U Set up and Installation Manual 9 1 2 2 Optical Unit unit mm...
Page 56: ...First edition 56 6 2 6 axis adjuster Model Screw holes VS SH10U c e h j...


