


VS-SH10U Set-up and Installation Manual
33
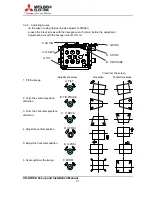
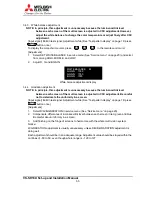
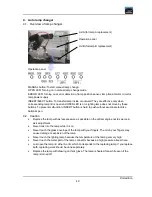
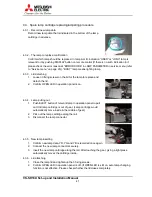
3.2.4. For
delivery
Tighten the 6 lock screws in each adjusting screw with the
hexagon wrench (3mm) before shipping the product.
Shipping the product without locking the adjuster may
cause breakage.
3.3. Dip switch setting
Setting set-up switch according to the system configuration before turning ON the main power.
See “Dip switch setting” on page 12 in Product Description. Be sure to turn OFF the main power
if you wish to change the setting in the middle of the operation. Only turning ON the main power
will renew the setting.
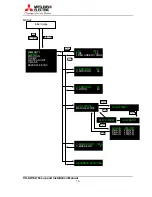
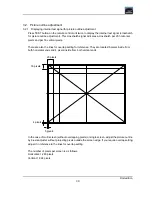
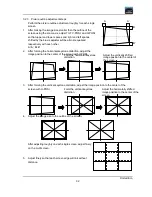
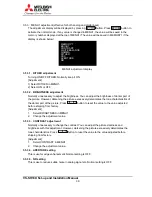
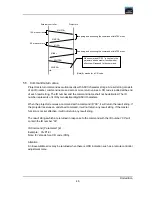
3.4. Multiple screen color space control (CSC) adjustment
Adjusting the luminance and tint between each screen of the multi screen. In principle, the
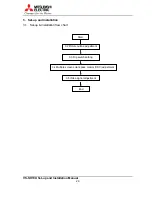
adjustment should be according to (2) CSC Adjustment, however, follow (1) Black level
adjustment, (3) White balance adjustment and (4) gradation adjustment, if necessary.
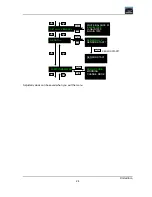
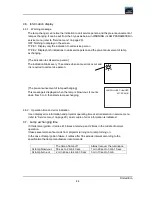
Multi-screen adjustment flow
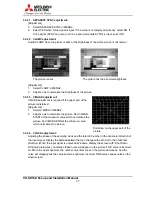
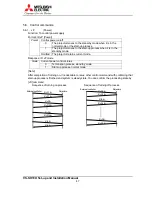
3.4.1. Black level adjustment
NOTE: This adjustment is not necessary unless the difference of the luminance and tint in
black is noticeable between each screen. Be careful not to deteriorate the contrast
because it can be adjusted only by increasing the black luminance level.
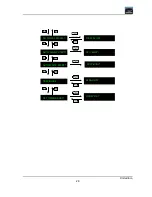
[Input signal] Built-in test signal: Black signal in the adjustment white. Press
TEST
TEST
TEST
TEST
button once
and press
R
R
R
R
G
G
G
G
B
B
B
B
buttons (See “Test pattern display” on page 16 and “RGB color
mute” on page 16).
[Adjustment]
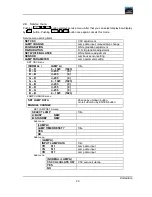
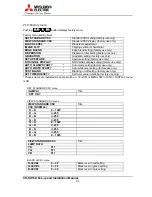
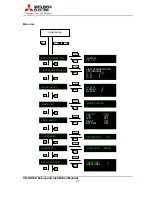
1) Display the factory menu (See “Factory menu” on page 25) and select BLACK LEVEL.
2) Adjust red, blue within the range of 0 to 3, green within the range of 0 to 2 approximately.
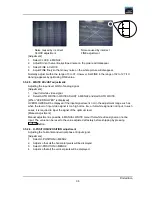
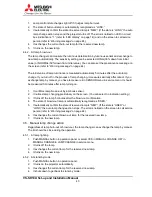
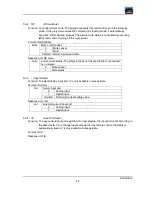
3.4.2. CSC
adjustment
* If you adjust CSC after lamp changing, please refer “CSC calculating” on page 42.
[Input signal] Built-in test signal: Adjustment white (See “Test pattern display” on page 16: press
TEST
TEST
TEST
TEST
button once)
Use
R
R
R
R
G
G
G
G
B
B
B
B
buttons on the remote control unit to display the monochrome color.
[Adjustment]
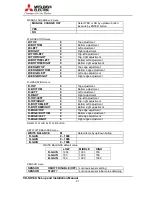
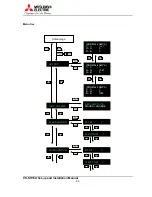
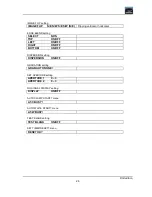
1. Select CSC in menu 1 (See “Projector information display” on page 15) and select NORM,
WHITE or RGB. (3 patterns of CSC data between the multi screen can be saved.)
2. Select SET CSC in service menu (See “Service menu” on page 20).
3. Display the monochrome red and adjust the luminance level finely by decreasing R – R of
the brighter screen, according to the darkest screen, if the luminance differs between each
CSC adjustment
See (2)
Black level adjustment
See (1)
White balance
adjustment See (3)
Lock screw (6 points)
Gradation adjustment
See (4)
Summary of Contents for VS-SH10U
Page 1: ...DLPTM Projector VS SH10U Set up and Installation Manual August 30 2002...
Page 8: ...First edition 8 1 2 Outline drawings 1 2 1 Circuit Box unit mm...
Page 9: ...VS SH10U Set up and Installation Manual 9 1 2 2 Optical Unit unit mm...
Page 56: ...First edition 56 6 2 6 axis adjuster Model Screw holes VS SH10U c e h j...


