

First edition
42
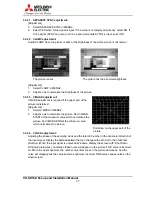
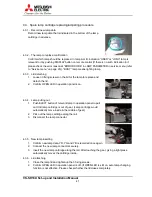
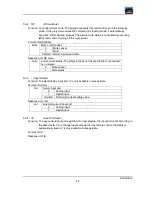
4.3.7. Lamp timer confirmation
Record lamp timer value as needed with pushing FUNC + DISPLAY button. The value means the
operation time of the replaced old lamp.
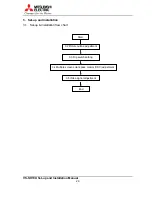
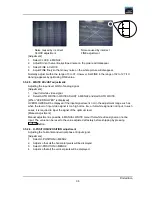
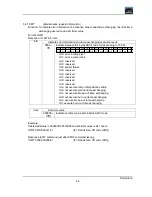
4.3.8. CSC
calculating
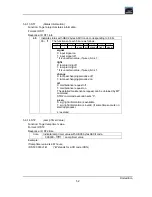
1. Select SET LAMP DATA in LAMP CHANGE in service menu.
2. Select replaced lamp A or B in SET LAMP DATA sub menu
3. Select YES in LAMP TIMER RESET?, then input recorded lamp data, YR, YG and YB in
INPUT LAMP DATA menu.
4. Pressing ENTER changes to CSC CALCULATE OK? and select YES.
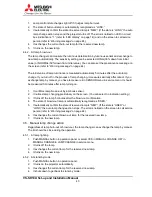
4.3.9. Lamp
exchanging
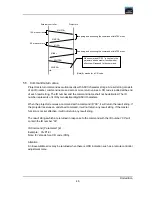
Push MANUAL button or select YES in MANUAL CHANGE? in MANUAL CHANGE in LAMP
CHANGE in service menu to exchange current lamp to new one for adjustment. Confirm the
exchanged lamp lights. Exchanging time takes about 50 seconds from old lamp turning off to
new image display (refer to “Lamp exchanging time” on page 44).
4.3.10. CSC manual adjustment
If necessary, adjust CSC finely according to the procedure in “CSC adjustment” on page 33.
4.3.11. Gradation adjustment
If necessary, adjust gradation finely according to the procedure in “Gradation adjustment” on
page 35.
4.3.12. Lamp exchanging
Lamp adjustment has finished. Put back current lamp in the same procedure as chapter 4.3.9.
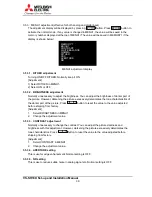
4.3.13. Error code erasing
1. Confirm error information in ERROR CODE in LAMP CHANGE in service menu. Any errors
except normal lamp change executing are displayed, please record the information and
timer value.
2. Reset the error code by pushing NORMAL button and ENTER button. (If it isn’t reset,
warning is continuously displayed.
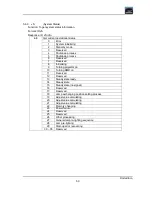
3. Confirm replaced lamp becomes NEW in lamp status menu by pushing DISPLAY button. (If
the status is “USED” or “JUNC”, lamp timer might not be reset. Please reconfirm the
operation of chapter 4.3.8 “CSC calculating.”
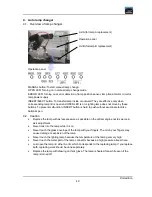
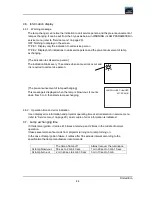
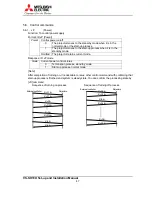
4.4. Auto lamp change action
4.4.1. At lamp burn-out
The lamp changer can detect lamp burn-out and exchange to new lamp automatically. It judges
by lamp drive circuit signal and luminous sensor after 2 times ignition to check burn-out or not.
The luminous sensor is effective 5 minutes after the projector’s turning on.
Summary of Contents for VS-SH10U
Page 1: ...DLPTM Projector VS SH10U Set up and Installation Manual August 30 2002...
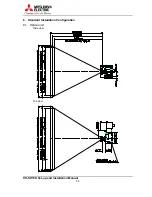
Page 8: ...First edition 8 1 2 Outline drawings 1 2 1 Circuit Box unit mm...
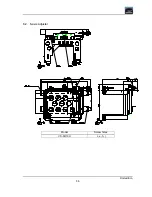
Page 9: ...VS SH10U Set up and Installation Manual 9 1 2 2 Optical Unit unit mm...
Page 56: ...First edition 56 6 2 6 axis adjuster Model Screw holes VS SH10U c e h j...


