
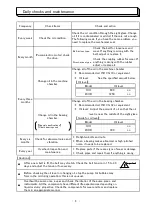
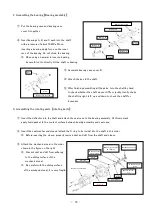
* Recommended oil: ISO VG 10 or equivalent
* Oil level:
See the specified amount below.
【Oil level】
* Recommended oil: ISO VG 32 or equivalent
* Oil level: Adjust the amount of oil so that the oil
level is near the middle of the sight glass.
【Guide for oil level】
*
*
*
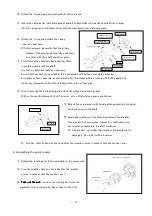
Replace parts if there are signs of wear or damage.
*
Check pipes and repair them if anything is wrong.
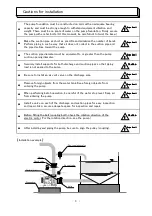
【Cautions】
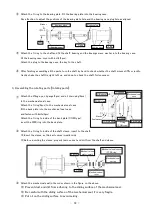
Check the oil condition.
Check the oil condition through the sight glass. Change
oil if it is contaminated or add oil if there is not enough.
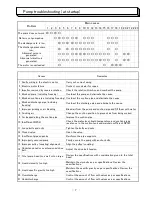
The following week, if you have the same problem, you
need to replace the mechanical seal.
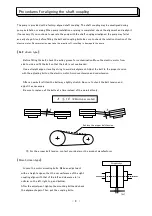
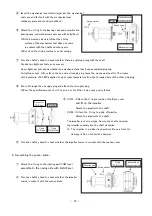
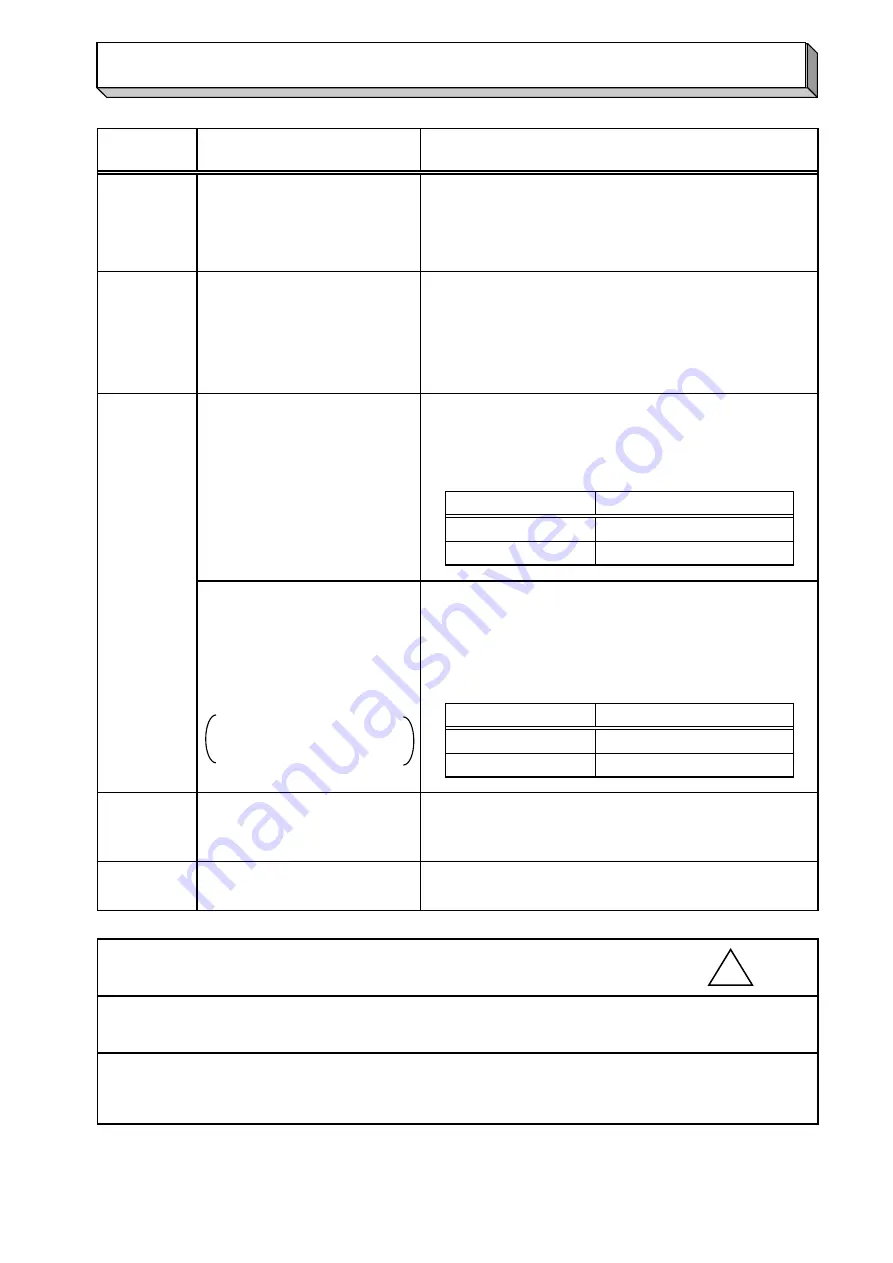
Belt-driven type:
- 6 -
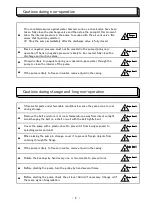
●
Before checking the oil level or changing oil, stop the pump. Air bubbles may
form in the oil during operation; this is not unusual.
300
After a new belt is fit, the belt may stretch. Check the belt tension in 15 to 30
days and adjust the tension if necessary.
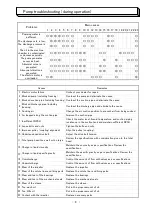
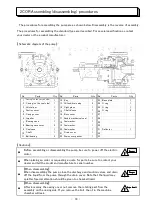
Frequency
Check and action
Check items
Check the coupling rubber for wear. If
anything is wrong with the rubber,
adjust or replace it.
Direct-driven type:
Every week
(Pump/electric motor) check
the drive.
Check the belt for looseness and
wear. If anything is wrong with the
belt, adjust or replace it.
Every month
1250
cc
Retighten bolts and nuts.
When a bearing makes abnormal or high-pitched
noise, it needs to be replaced.
●
Overhaul the pump once a year and check the interior of the pump, pipes, and
instruments. All the components have different life expectancies depending on
liquid or slurry properties. Check the components for wear and tear and replace
them in an appropriate manner.
Every six
months
●
cc
Overhaul/inspection and
maintenance
Check for abnormal noise and
vibration.
Change all of the oil in the machine chamber.
1CO
Model
1CO
2COR
Oil level
600
Every year
Model
cc
Change oil in the machine
chamber.
2COR
Every three
months
Change oil in the bearing
chamber.
Oil level
Change all of the oil in the bearing chamber.
cc
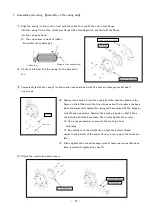
Daily checks and maintenance
【Special specifications】
Oil bath bearings only
!
!
!
!
Important
Important
Important
Important


