CHAPTER 4: GETTING STARTED
MODEL 250DP DUAL PULSE
RESISTANCE WELDING POWER SUPPLY
990-280
4-5
CAUTION:
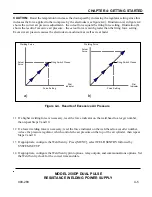
Resist the temptation to increase the downspeed by increasing the regulator setting since this
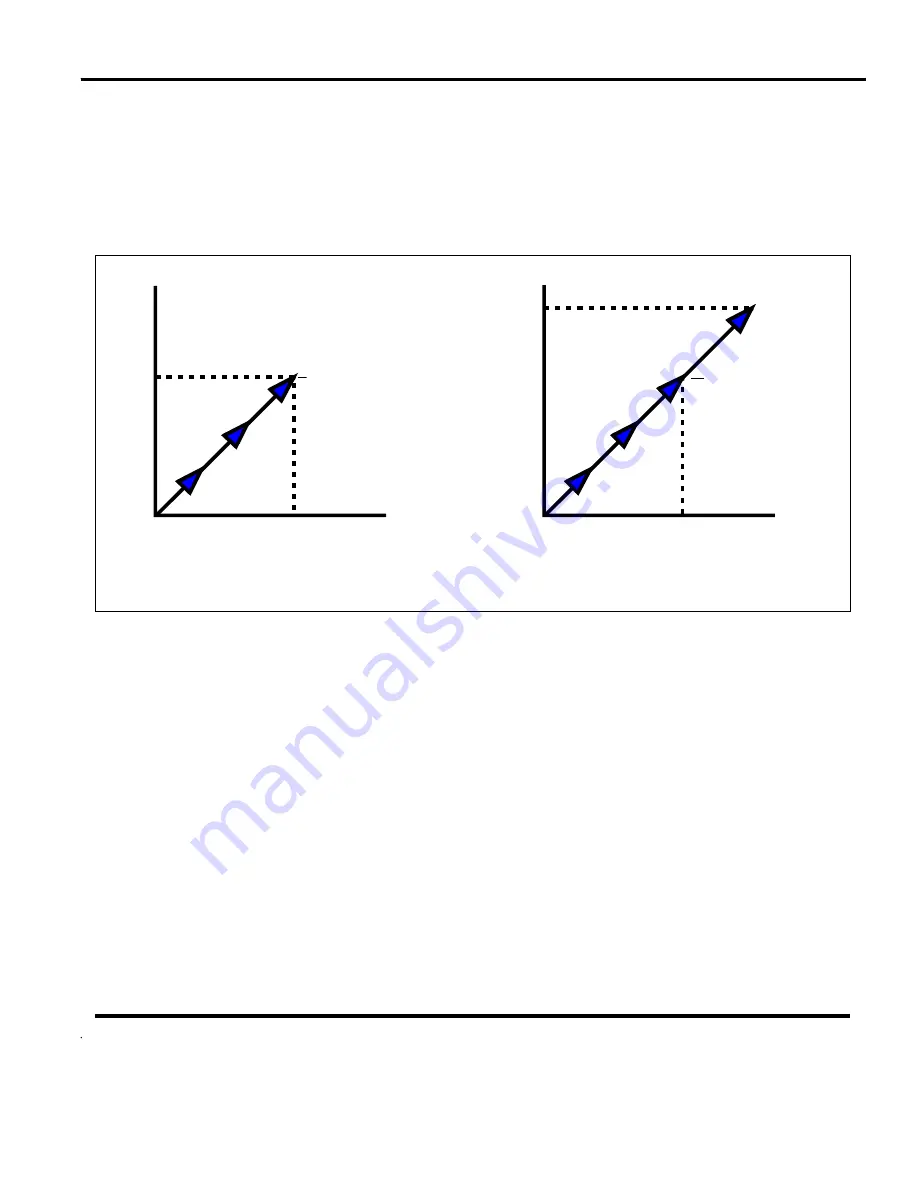
increases the force applied to the workpiece by the electrodes (see figure 4-4). Illustration (a) in figure 4-4
shows the correct air pressure adjustment – the
actual
force equals the firing force setting. Illustration (b)
shows the result of excessive air pressure – the
actual
force is much greater than the firing force setting.
Excessive air pressure causes the electrodes to mushroom as well as wear faster.
11 If a higher welding force is necessary, reset the force indicator on the weld head to a
larger
number,
then repeat Steps 9 and 10.
12 If a lower welding force is necessary, reset the force indicator on the weld head to a
smaller
number,
reduce
the pressure regulator, which controls the air pressure on the top of the air cylinder, then repeat
Steps 9 and 10.
13 If appropriate, configure the Weld Sentry. Press [MENU], select WELD SENTRY followed by
SYSTEM SETUP.
14 If appropriate, configure the Weld Sentry print options, relay outputs, and communications options. Set
the Weld Sentry clock for the correct time and date.
Welding Force
Actual
Force
Force Setting
Dial
Indicator
Welding Force
Firing Switch Closes
Force Setting
Dial
Indicator
Firing Switch Closes
Actual
Force
a)
b)
Figure 4-4. Results of Excessive Air Pressure


