background image

9

CX-3E1                                                                                                         SAFETY

WARNING

In order to prevent electrical shock and injury, the following electrical safety precautions and symbols 

should be followed at all times!

In case of a malfunction or breakdown, grounding provides a path of least resistance for electrical 

current to reduce the risk of electric shock. This tool is equipped with an electric cord which has an 

equipment-grounding conductor and a grounding plug. The plug must be plugged into a matching 

outlet that is properly installed and grounded in accordance with all local codes and ordinances.

•   DO NOT modify the plug provided - if it will not fit the outlet, have the proper outlet 

  installed by a qualified electrician.

•   Improper connections of the equipment-grounding conductor can result in a risk of electric  

  shock. The equipment-grounding conductor is the insulated conductor that has an outer  

  surface that is green, with or without yellow stripes. If repair or replacement of the electric  

  cord or plug is necessary, DO NOT connect the equipment-grounding conductor to a live  

  terminal.

•   Check with a qualified electrician or service personnel if the grounding instructions are not  

  completely understood, or if in doubt as to whether the tool is properly grounded.

•   Use only 3-wire extension cords that have 3-prong grounding plugs and 3-pole receptacles  

  that accept the tool’s plug.

•   Repair or replace a damaged or worn cord immediately.

ELECTRICAL REQUIREMENTS AND GROUNDING INSTRUCTIONS

ON

(

(

)

)

CAUTION

DO NOT EXPOSE TO RAIN

For maintenance care and operation of the electric motor, refer to your electric motor instruction book-

let furnished with the electric motor. Protect the electric motor from dust as much as possible and keep 

ventilating openings clean. Before plugging in the machine, make sure that the outlet voltage is within 

the voltage marked on the machines's data plate.

DO NOT spray water on the electric motor. DO NOT touch the plug with wet hands. To reduce 

the risk of electrocution, keep all connections dry and off the ground. 

ELECTRIC MOTOR SAFETY

DO NOT operate electric motor in an explosive environment.

DO NOT expose to rain or use in damp locations.

ON

(

(

)

)

ON

(

(

)

)

ON

(

(

)

)

Summary of Contents for CX-3E1

Page 1: ...ATING INSTRUCTIONS www mkdiamond com Caution Read all safety and operating instructions before using this equipment This owner s manual MUST accompany the equipment at all times Revision 100 Manual Pa...

Page 2: ...and maintain your CX 3E1 Concrete Saw safely and correctly Please take the time to famil iarize yourself with the CX 3E1 Concrete Saw by reading and reviewing this manual Read and follow all safety op...

Page 3: ...oduct Specifications 13 UNPACKING TRANSPORT and ASSEMBLY Unpacking 14 Contents 14 Transport 15 Assembly 16 17 STARTUP OPERATION and SHUTDOWN Startup 18 Operation 19 Shutdown 20 Cleanup 21 MAINTENANCE...

Page 4: ...ol and one of three words DANGER WARNING or CAUTION DANGER You WILL be KILLED or SERIOUSLY INJURED if you do not follow directions WARNING You CAN be KILLED or SERIOUSLY INJURED if you do not follow d...

Page 5: ...st removal Use dust collection system when applicable NEVER operate the machine in an explosive atmosphere or near combustible materials Sparks from the cutting action of this machine can ignite flamm...

Page 6: ...rous or hazardous environments DO NOT use power tools in damp or wet locations nor expose them to rain Always keep the work area well lighted REMOVE ADJUSTING KEYS AND WRENCHES KEEP WORK AREA CLEAN DO...

Page 7: ...ty devices These devices are intended for operator safety Disconnection of these devices can cause severe injury bodily harm or even death Disconnection of any of these devices will void all warrantie...

Page 8: ...cially designed to filter out microscopic particles Where use of a dust extraction device is possible it should be used To achieve a high level of dust collec tion use an industrial HEPA vacuum cleane...

Page 9: ...is necessary do not connect the equipment grounding conductor to a live terminal Check with a qualified electrician or service personnel if the grounding instructions are not completely understood or...

Page 10: ...outdoor use These extension cords are identified by a marking Acceptable for use with outdoor appliances store indoors while not in use Use only extension cords having an electrical rating not less th...

Page 11: ...mond warns that equipment returned to us showing signs of being run in a low voltage condition through the use of undersized extension cords will be repaired or replaced totally at the customer s expe...

Page 12: ...orities have listed respirable crystalline silica as a substance known to cause cancer CAUTION DO NOT operate without guards in place Read entire operator s manual before operating this machine Unders...

Page 13: ...1 diameter blade shaft with self aligning bearings Hinged blade guard provides easy access for blade changes and inspection Folding handle bar for compact transport Poly V belt for positive power tran...

Page 14: ...TH LEESON 1 5HP MOTOR WALK BEHIND CONCRETE SAW PARTS LIST EXPLODED VIEWS www mkdiamond com Caution Read all safety and operating instructions before using this equipment This parts list MUST accompany...

Page 15: ...me near console and one person will lift by grasping the front of the CX 3E1 C Install one Tri Knob Washer onto each Tri Knob Install Tri Knobs through the Handlebar and into the threaded holes on the...

Page 16: ...uard lock Push Lock Button Open the Blade Guard cover D Install the Diamond Blade onto the Blade Shaft Ensure arrow is pointed in direction of rotation E Install the Outer Flange Verify it is seated a...

Page 17: ...olt on Pointer into mount ing flange next to Blade Guard B Thread Crank Wheel Handle onto bolt B Install limiting bracket onto bolt as shown C Hold crank wheel handle and tighten bolt with Allen wrenc...

Page 18: ...e is worn replace the blade before starting work Pre Start Inspection A Inspect Blade for damage for cracks Verify the Blade is correct for the material being cut B Inspect the CX 3E1 for general dama...

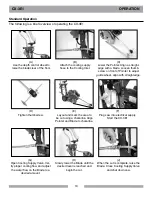
Page 19: ...f Pointer to adjust guide wheel align with straightedge E Layout and mark the area to be cut using a chalk line Align Pointer and Blade to chalk line D Tighten thumbscrew F Plug saw into electrical su...

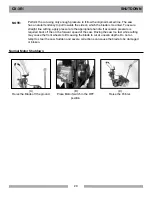
Page 20: ...tendency to pull towards the side on which the blade is mounted To assure straight line cutting apply pressure to the appropriate handle If excessive pressure is required back off the on the forward...

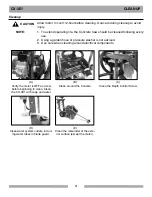
Page 21: ...Using a garden hose or pressure washer is not advised 3 Use care when cleaning around electrical components NOTE A Verify the motor is off and cool before beginning to clean Clean the CX 3E1 with soa...

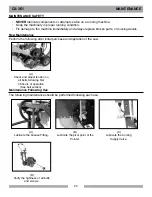
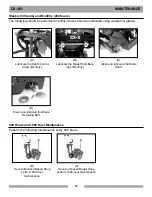
Page 22: ...nce Perform the following after initial purchase and operation of the saw A Check and adjust tension on all belts following first 48 hours of operation See belt section Maintenance Following Use The f...

Page 23: ...he Depth Control Screw Monthly B Lubricate the Blade Shaft Bear ings Monthly C Clean and lubricate the Blade Shaft D Clean and lubricate the Blade Retaining Bolt 500 Hours and 1000 Hour Maintenance Pe...

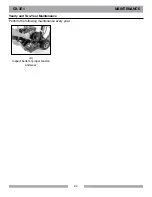
Page 24: ...24 CX 3E1 MAINTENANCE Yearly and Two Year Maintenance Perform the following maintenance every year A Inspect belts for proper tension and wear...

Page 25: ...moval E Install the new Blade Retaining Bolt and Outer Flange C Remove the Blade Retaining Bolt and the Outer Flange D Remove blade CX 3E1 MAINTENANCE Handlebar Repositioning for Storage A Loosen the...

Page 26: ...the Blade Guard Retaining Bolts and remove the Blade Guard D Locate the three Blade Guard Retaining Bolts F Locate the Blade Shaft Cover Retaining Bolts G Remove the Blade Shaft Cover Retaining Bolts...

Page 27: ...itch orange Pointer wheel to align with blade Belt Adjustment and Replacement In order to ensure the CX 3E1 operates at peak efficiency the power transmission belt should be in spected monthly and cha...

Page 28: ...nuts on both ends of the CX 3E1 motor and loosen CX 3E1 MAINTENANCE G Loosen the Motor Tension Arm Push the Motor forward to loosen the belt H Remove the old belt from the Engine and Blade Shaft Pull...

Page 29: ...i mately 1 8 inch deflection of the belt N Repeat Steps L and M until Proper Tension is achieved O Tighten the Engine Mounting Bolts CX 3E1 MAINTENANCE P Install the Belt Guard and Belt Guard Retainin...

Page 30: ...ium Grade for Cured Concrete 3 159617 MK AX10 12 x 125 x 1 Premium Grade for Asphalt 4 159618 MK AX10 14 x 125 x 1 Premium Grade for Asphalt 5 159619 MK GX10 12 x 110 x 1 Supreme Grade for Green Concr...

Page 31: ...31 NOTES...

Page 32: ...12 months Have the Model Number of the saw Have the Serial Number of the saw Have the location of where the saw was purchased Have the date when the saw was purchased Contact Customer Service for appr...

Page 33: ...time of approval for printing MK DIAMOND PRODUCTS INC will guarantee every machine they build to be free from defects in material and workmanship for 1 one year from date of purchase The obligation o...

Page 34: ...34 NOTES...

Page 35: ...35 NOTES...

Page 36: ...MK Diamond Products Inc 1315 Storm Parkway Torrance CA 90501 Toll Free 800 421 5830 Phone 310 539 5221 Fax 310 539 5158 www mkdiamond com CX 3E1 Concrete Saw OWNER S MANUAL OPERATING INSTRUCTIONS...

Reviews: