DVX-POD User Manual
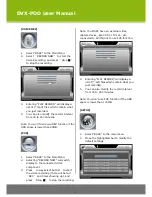
[
VOICE REC]
1. Select “BACK” to the Main Menu.
2. Select
“
RECORD NOW
”
to start the
Voice Recording, and press
“
Stop
■”
to stop the recording.
3. Entering “PLAY RECORD” will display a
list of (*.mp3) files which contain what
you just recorded.
4. You can also modify the record interval
from 30 to 240 minutes.
Note: You won’t use Voice REC function if the
HDD space is lower than 20MB.
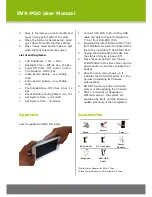
[
PVR]
1. Select “BACK” to the Main Menu.
2. Selecting “RECORD NOW” will switch
display to the connected video
component.
3. Press
“
3-way select button
”
to start
the video recording (there will be red
“
REC
”
and timer showing up), and
press
“
Stop
■”
to stop the recording.
Note: You MUST have an external video
capture device, like CCD or TV set… etc,
connected to AV/IN jack to use PVR function.
4. Entering “PLAY RECORD” will display a
list of (*.asf) files which contain what you
just recorded.
5. You can also modify the record interval
from 30 to 240 minutes.
Note: You won’t use PVR function if the HDD
space is lower than 100MB.
[
SETUP]
1.
2.
Select “BACK” to the main menu.
Move the highlighted bar to modify the
default settings.
3
Summary of Contents for DVX-POD
Page 1: ...DVX POD User Manual...


