30
31
ENGLISH
ENGLISH
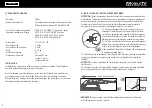
3.4 SAFETY DURING ASSEMBLY
For the assembly operations that imply the risk of fall, the necessary safety precautions
must be adopted: for instance, a work bridge to be used when operating on the vehicle
roof. Make sure that the roof of the vehicle has sufficient carrying capacity for the assembly
operations.
Moreover, during assembly make sure that:
- The device is disconnected from the electric mains
- The person in charge of the assembly does not suffer from vertigo
- The person in charge of the assembly wears non-slip and accident-prevention shoes.
- Nobody is under the satellite dish during assembly.
- The lifting apparatus is non-slip and dry.
- The bridge and ladder are sufficiently stable and robust
4.1 DESTINATION OF USE
The satellite dish is manufactured for the reception of digital TV and radio signals from
a satellite only when the vehicle is stationary. The reception unit allows for the reception
of satellite TV and radio signals whose frequency is included between 10.7 GHz. and
12.75 Ghz. Any different use renders the warranty void.
CAUTION: CAPTURE 65 does not accept any liability for damage caused by:
- Wrong use that does not comply with the intended use of the device
- Repairs not performed by authorised service centres
- Tampering with any mechanical components
- Use of non-original spare parts and fittings
- Non-observance of the instructions in this manual
IN THE ABOVE-MENTIONED CASES THE WARRANTY IS VOID!
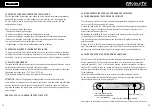
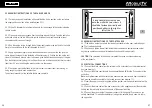
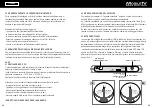
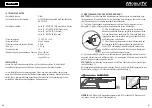
4.2. DESCRIPTION OF THE 2P CONTROL PANEL
SWITCHING ON
To switch on the system press the on/off (3) button on the control panel. When this button
is pressed the red and green LED will simultaneously be switched on to check that the
LEDS are working correctly. After a few seconds the LED to the selected sat start to flash,
to show that the system is searching for the satellite. Once the satellite has been found
and confirmed the LED of selected sat will stop flashing and remain fixed The LED will then
begin to flash very quickly when the signal is recognized and will go back to fixed mode as
soon as the satellite is acknowledged.
PLEASE NOTE: For any warning signals you must read paragraph 6.4.1.
4.2.
Description of the 2P control panel
Switching on
To switch on the system press the on/of (3) button on the control panel. When this but -
ton is pressed the red and green LED will simultaneously be switched on to check that
the LEDS are working correctly.
After a few seconds the LED to the selected sat
start to flash, to show that the system is searching for the satellite. Once the satellite
has been found and confirmed the LED of selected sat will stop flashing and remain
fixed The LED will then begin to flash very quickly when the signal is recognized
and will go back to fixed mode as soon as the satellite is acknowledged.
Please note that for any warning signals you must read paragraph 6.4.1
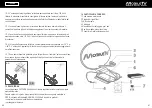
ON/OFF BUTTON (3)
USB PLUG FOR
REPROGRAMMING
SATELLITE WORKING
POWER / ALARM
14
GB
4

