Pag.
18
/
64
i-class
Manuale di Installazione e Service
REV
01
27/02/2018
Fitting and Service Handbook
Mobility Networks
12 Estuary View Business Park, Whitstable, Kent, CT5 3SE, UK
Tel: +44 (0)1227 505022 Fax: +44 (0)1227 505023 www.mobilitynetworksgroup.com
Mobility Networks is a trading name of Mobility Networks (Holdings) Ltd. Registered in England & Wales number 08295602
5. POSIZIONAMENTO E FISSAGGIO DEL
SOLLEVATORE
Di seguito vengono riportate le indicazioni necessarie
per l’installazione del sollevatore di sedie a rotelle
“i-
Class
”
su una larga maggioranza di veicolo in
commercio.
Non riuscendo comunque a coprire tutte le casistiche
di installazione possibili, si consiglia di contattare
sempre
Mobility Networks Holdings Ltd.
.
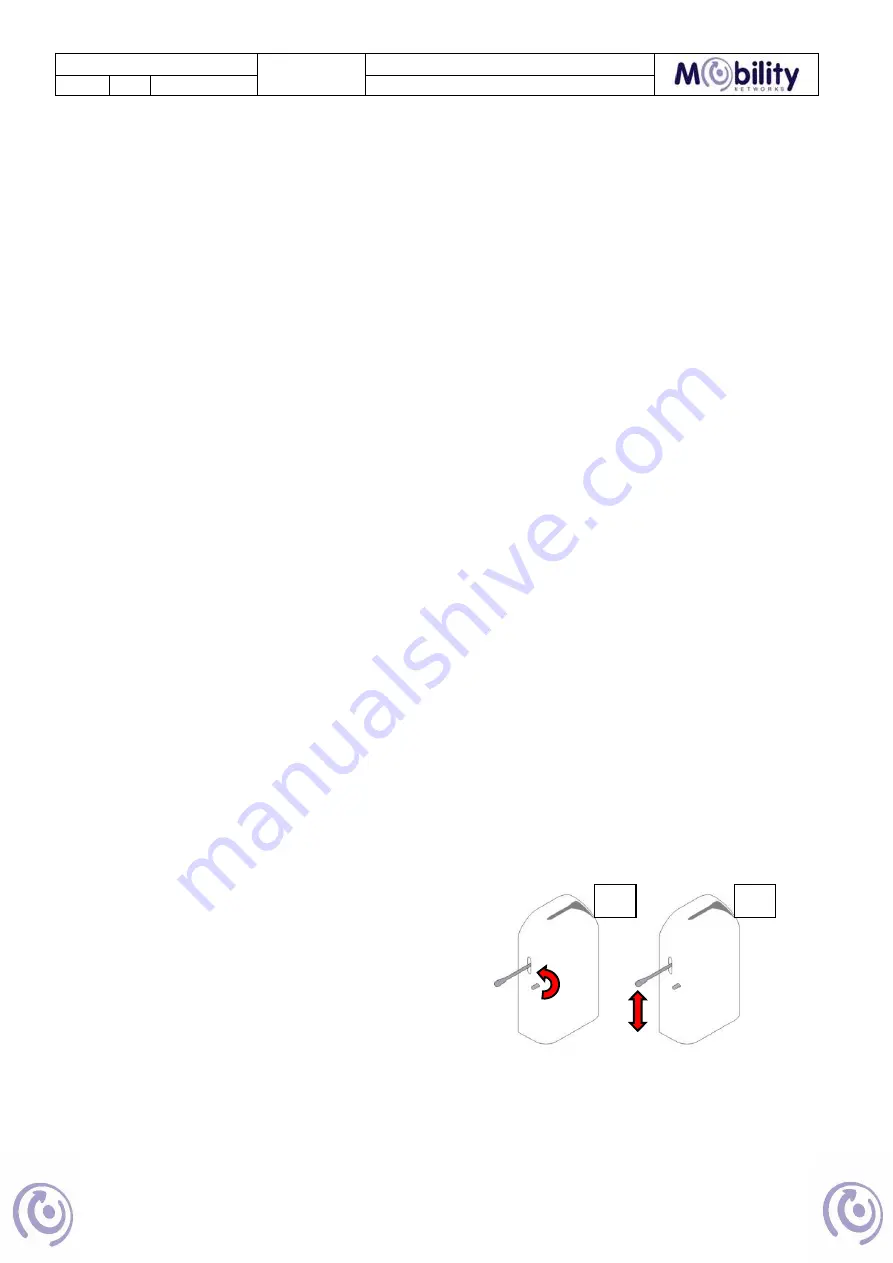
Pressurizzare l’impianto idraulico del sollevatore
tramite la pompa a mano, come descritto di
seguito: avvitare la leva fornita a corredo
nell’apposita sede sul box centralina idraulica
(
Fig.4
) e azionare la pompa manuale con
movimento alternato verticale (
Fig.4b
) fino a
quando la pompa offre una resistenza tale da
bloccare il sollevatore in posizione di chiusura.
Aprire la/le porta/e del veicolo in cui il sollevatore
verrà posizionato e bloccarla/e in posizione
aperta. Misurare l’altezza e la larghezza del vano
e verificare che siano maggiori degli ingombri del
sollevatore (
Fig.5
).
Utilizzando un carrello a forca o un mezzo
equivalente, avente una portata maggiore del
peso totale del sollevatore (vedere specifiche
tecniche), posizionare quest’ultimo all’altezza del
piano del veicolo (sede di alloggio). Spingere il
sollevatore
all’interno del veicolo mantenendolo
centrato rispetto alla larghezza del vano. Allineare
il filo esterno della base del sollevatore
parallelamente al bordo di chiusura della/e
porta/e.
Posizionare il sollevatore in modo che il filo
esterno della sua base
si trovi alla distanza “B”
(ricavata al
Cap
.4) dal bordo posteriore del
paraurti.
Verificare sia dall’esterno che dall’interno del
veicolo che la/e porta/e dello stesso si chiudano
correttamente senza interferire con il sollevatore.
Misurare la distanza minima tra il sollevatore e le
porte; se tale misura risulta superiore a 40 mm
(distanza minima) (
Fig.6
) è possibile avvicinare il
sollevatore alle porte fino al raggiungimento della
distanza minima, facendo sempre attenzione a
garantire il parallelismo tra il filo esterno della
base del sollevatore e il bordo di chiusura della/e
porta/e, la centratura del sollevatore all’interno
della larghezza del vano e soprattutto che sia
verificata la stabilità del veicolo.
5.
LIFT POSITIONING AND FIXING
Here are all the necessary instructions for the
installation of the
“i-Class”
wheelchair lift for the vast
majority of vehicles on sale. Not being able to cover
all possible cases, we advise you to contact
Mobility
Networks Holdings Ltd.
for any further information.
Pressurize the hydraulic system of the lift by using
its hand pump as follow: screw the provided lever
in its proper place in the hydraulic control unit
(
Fig.4b
) and put the hand pump into action with
an alternate vertical movement until the p
ump’s
resistance blocks the lift in the “closed” position.
Open the door(s) of the vehicle, where the lift will
be placed, and block them on the “open” position”.
Measure the height and the width of the
compartment and verify that they are bigger than
the overall dimensions of the lift (
Fig.5
).
Using a forklift or an equivalent means with a
bigger capacity than the total weight of the lift (see
technical specifications), place it at the same
height as the surface of the vehicle (placing
compartment). Push the lift inside the vehicle in a
central position in respect to the volume of the
compartment. Align the external edge at the base
of the lift parallel to the closing edge of the
door(s).
Position the lift in order to its base external edge
is at distance “B” (calculated in
Chapter
4) from
vehicle bumper external edge.
Verify, both on the inside and the outside of the
vehicle, that the doors of the vehicle close
correctly, with no interference from the lift.
Measure the minimum distance between the
doors and the lift; if it is more than 40 mm
(minimum distance) (
Fig.6
) it is possible to draw
up the lift to the doors until it reaches the
minimum distance. Pay attention to keep the
external edge at the base of the lift and the
closing edge in a parallel position. Also pay
attention to the centering of the lift inside the width
of the compartment.
Fig. 4
a
b


