background image

10

Mini Twister Scale Instruction Manual

TRIMMING THE HELICOPTER (MODE 2)

Gently apply throttle until the rotor blades start to turn, keep advancing the throttle 

until the helicopter leaves the ground and begins to hover.

The model should be stable and centred in the hover to produce the best flight 

performance.  If you find that your model has a tendency to drift out of the hover then 

you can use the trim buttons detailed on page 5 to correct it.

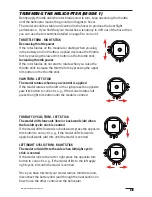
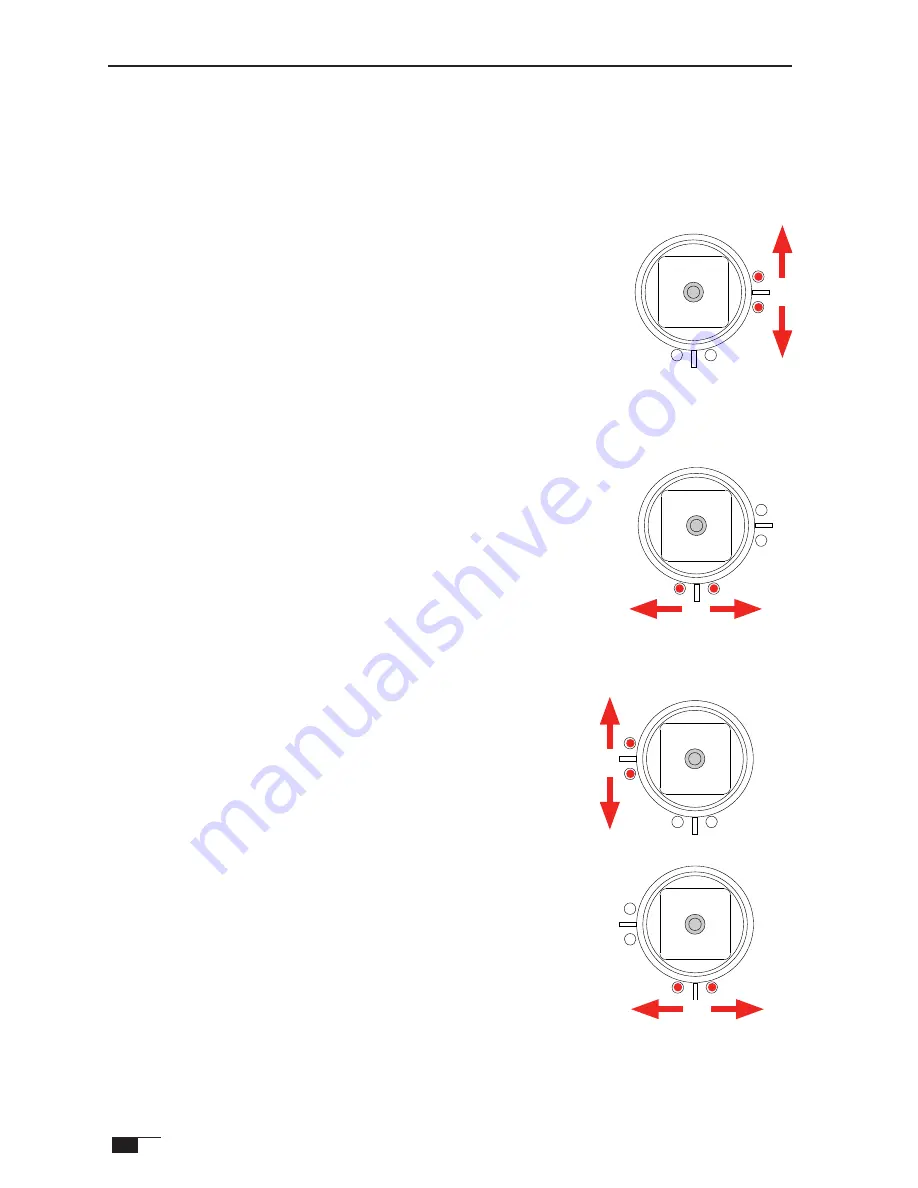
THROTTLE TRIM - LEFT STICK
Decreasing throttle power

If the rotor blades on the model are rotating when you plug 

in the battery and no throttle is applied decrease the throttle 

trim by pressing the lower trim button on the throttle stick

Increasing throttle power

If the rotor blades do not start to rotate when you raise the 

throttle stick increase the throttle trim by pressing the upper 

trim button on the throttle stick.

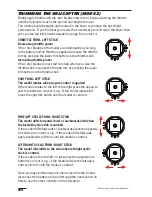
YAW TRIM - LEFT STICK
The model rotates when no yaw control is applied

If the model rotates to the left or the right press the opposite 

yaw trim button to correct it, e.g., If the model rotates left 

press the right trim button until the model is centred.

FORE/AFT CYCLIC TRIM - RIGHT STICK
The model drifts forwards (fore) or backwards (aft) when 

the fore/aft cyclic stick is centred

If the model drifts forwards or backwards press the opposite 

trim button to correct it, e.g., if the model drifts forwards 

apply backwards (aft) trim until the model is centred.

LEFT/RIGHT CYCLIC TRIM - RIGHT STICK
The model rolls/drifts to the side when left/right cyclic 

stick is centred

If the model rolls to the left or right press the opposite trim 

button to correct it, e.g., if the model drifts to the left apply 

right cyclic trim until the model is centred.

Once you have trimmed your model reduce throttle to land, 

disconnect the battery and read through the next section on 

how to use the other controls on the helicopter.

Summary of Contents for Mini Twister Sport

Page 1: ...asily direct from a USB port 7 8 minute flight times Silky smooth stable hovering Full 4 channel control for full indoor fun Adjustable digital trims Efficient stable under slung flybar Bell Hiller mi...

Page 2: ...TENTS Introduction 3 New to R C helicopters 3 Specifications 4 Welcome 4 A Kit contents 4 B Transmitter part names 5 C LCD display 5 Flight controls 6 Beginner and Advanced mode 6 Binding transmitter...

Page 3: ...we do not guarantee that by following the information included with this product you will be bound to achieve successful helicopter flight Neither do we guarantee you will not break anything ABOUT TH...

Page 4: ...Range 25 metres for indoor use only Required Transmitter batteries 4 x 1 5V AA batteries WELCOME 1 Carefully remove the model and other items from the packaging and check all items are included 2 Inse...

Page 5: ...stick can be pressed like a button and is used to perform the following functions Binding the transmitter and helicopter if it comes unbound see page 7 Switching between advanced and beginner mode se...

Page 6: ...all 4 axes of flight See above BEGINNER AND ADVANCED MODE The Mini Twister Scale features beginner and advanced mode With the transmitter and helicopter both ON press firmly down on the top of the th...

Page 7: ...mitter with your receiver once more proceed as follows HOW DO I RECOGNISE WHEN MY RECEIVER IS NOT BOUND Upon connecting the battery in the model the internal LED will flash on and off slowly regardles...

Page 8: ...ng the ON OFF switch of the transmitter to ON make sure the throttle stick is down in its lowest position 2 Set the ON OFF switch of the transmitter to ON The LED above the ON OFF switch will glow RED...

Page 9: ...im button on the throttle stick YAW TRIM LEFT STICK The model rotates when no yaw control is applied If the model rotates to the left or the right press the opposite yaw trim button to correct it e g...

Page 10: ...per trim button on the throttle stick YAW TRIM LEFT STICK The model rotates when no yaw control is applied If the model rotates to the left or the right press the opposite yaw trim button to correct i...

Page 11: ...ant height 4 If you get into trouble or loose orientation slowly move the throttle stick to its lowest position and the helicopter rotors will slow down and stop spinning and the helicopter will land...

Page 12: ...s you get more confident you can combine movements at the same time to fly circles figure eights climbing and descending circles nose in flying and precision landings on objects The possibilities are...

Page 13: ...13 www modelengines com au EXPLODED DIAGRAM...

Page 14: ...ub 1 6605715 012 Swashplate 1 6605640 013 Pushrod 2 6605650 014 Main shaft retaining collar 1 6605630 016 Main motor 1 6605620 017 Pinion gear 1 6605620 018 Main chassis 1 6605670 019 Receiver board 1...

Page 15: ...SWASH PLATE 1 12 6605645 UPPER LINK 4 4 10 6605650 SERVO LINK 2 13 6605655 FLYBAR 1 1 3 6605660 MAIN BLADES WITH SCREWS SET 8 6605665 LANDING GEAR SET 24 6605670 MAIN CHASSIS 18 6605675 O RINGS CANOPY...

Page 16: ...gets too hot If the battery becomes hot to the touch during charging disconnect immediately from the end that plugs into the USB slot on the computer Extinguish fires with sand If something goes wron...

Reviews: