2
Step 5 -
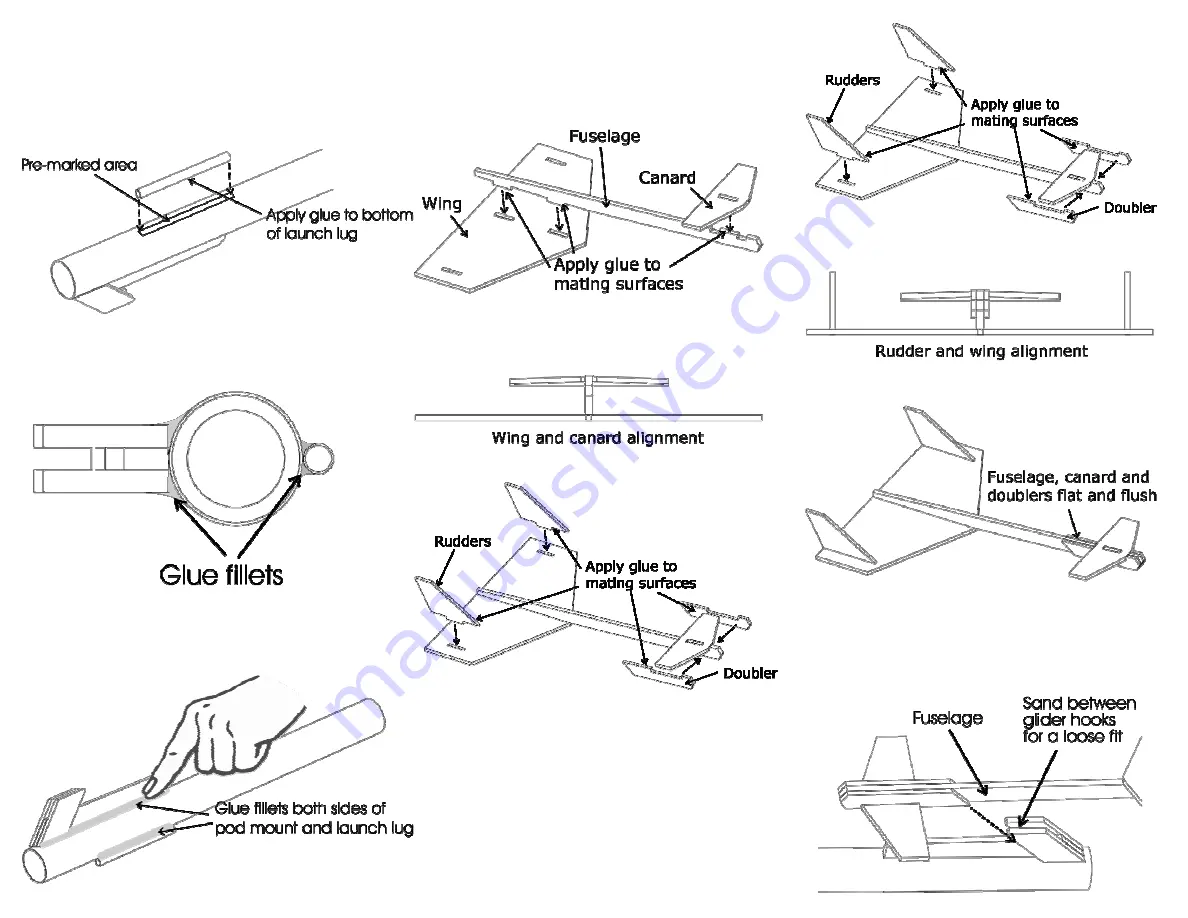
Apply a thin line of glue along the
length of the launch lug and attach to the
body tube where the launch lug location is
pre-marked on the opposite side of the body
tube from the pod mount.
While drying, keep the pod mount and launch
lug aligned on the pre-marked areas on the
body tube and 180 degrees apart as shown.
Step 6 -
Apply a glue fillet on both sides of
the pod mount and launch lug and smooth out
using your finger. Set aside to dry.
Assembling the Glider
Step 1 -
Apply glue where the slots in the
wing come in contact with the tabs on the
underside of the fuselage. Attach the wing to
the fuselage.
Step 2 -
Apply glue where the slots in the
canard come in contact with the tab on the
front top of the fuselage. Attach the canard to
the fuselage.
Align the canard horizontally to the wing by
referring to the alignment view. Set aside to
dry for a few minutes.
Step 3 -
Apply glue where the slots in the
wing come in contact with the tab on the
bottom of the rudders. Attach the rudders to
the wing.
Step 4 -
Apply glue to the surfaces where
the doublers come in contact with the sides of
the fuselage. Attach the doublers to the sides
of the fuselage just beneath the canard.
Align the rudders vertically to the wing by
referring to alignment view below.
The doublers should also be flat or flush with
the top of the fuselage and the canard. Set
aside to dry
Step 5 –
Using 240 grit sandpaper, sand
between the glider hooks until the fuselage
fits in between easily. The glider should be
able to fall off the mount when turned upside
down.


