34
e)
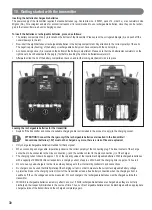
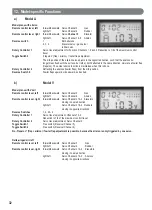
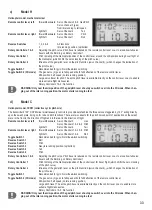
Model C1
Helicopter model, CCPM
Same functions and allocation as Model C, with pitch reversal for a pitch servo on the
opposite side of the swash plate.
If you want to fly with the control sticks assigned with the factory settings as described above, then you can skip this section. However, if
want to exchange the control of the pitch and roll functions with one another on the transmitter, then it is possible to convert the transmit-
ter accordingly. To do so, however, some experience is required dealing with remote control transmitters and a bit of mechanical skill.
First remove the batteries from the battery compartment.
Use a Phillips screwdriver to remove the four screws from the rear cover of the transmitter and carefully lift off the back cover.
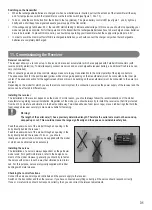
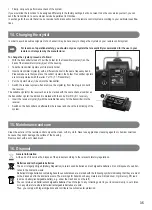
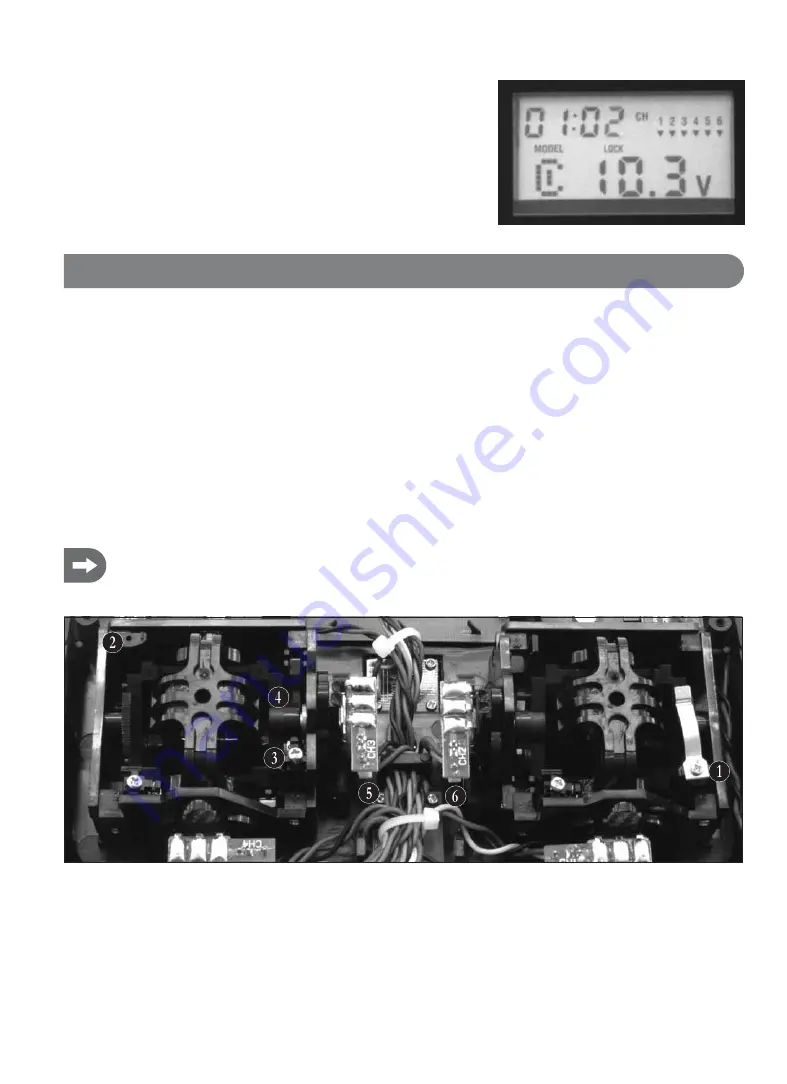
Remove the catch spring (1) on the right-hand control stick unit (seen from the rear), and screw it back tight on the left-hand control
stick unit (seen from the rear) on the retainer prepared for it, doing so in mirror-inverted fashion.
Unscrew the adjusting screw (3) that provides restoring force to the pitch control stick, and do so to the point that the tension spring is
under as little tension as possible.
You can then lift the screw upward slightly together with the adjusting mechanism. Unhook the tension spring (4) and then remove
completely from the guide element.
Finally, take out the restoring lever (4) together with the tension spring.
Be sure to note:
Before you put in the restoring lever together with the tension spring on the right-hand control stick unit (seen from
the rear), in actual practice it has proven a good idea to secure the spring to the restoring lever with some glue.
That way it will then later remain exactly at a 90° angle to the lever and be easier to hook back in.
The easiest way to hook in the tension spring is with a thin wire or a needle, on which a little „catching hook“ has been bent with a pair
of needle-nose pliers.
After completing the conversion and adjustment of the restoring force, the two connecting cables (5) & (6) for the control potentiome-
ters have to be unsoldered, and then swapped out and soldered back on.
Be very sure to mind the correct connection order of the coloured wires.
•
•
•
•
•
•
•
•
•
13. Changing the allocations of the transmitter/control sticks

