


18
•
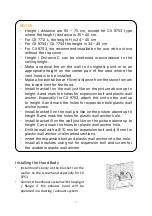
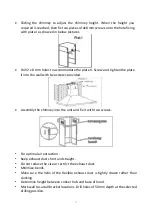
Insert the expansion tubes to fix the bracket onto the wall.
•
Install the flow exit to the hood and follow by connecting the flexible exhaust
duct to the flow exit.
•
Strengthened the connection between the flow exit and the flexible exhaust
duct with screws.
•
Lift and hang the hood to the wall bracket and please ensure it sits firmly on the
bracket.
•
Direct the other end of the flexible exhaust duct to the outlet or wall.
•
Fit in the safety baffle of the hood onto the wall to strengthen the position and
to reduce vibration when the hood is switched on.
•
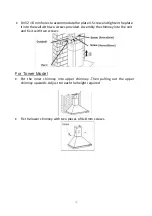
Chimney extension can be installed to the ceiling or wall.
•
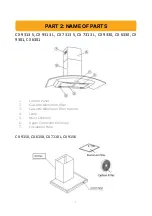
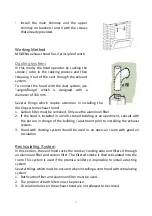
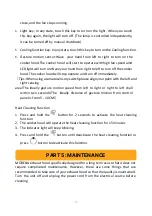
Ensure the oil collection container is in place before the hood is being used. To
remove it for cleaning, slide the oil collection container from front to rear, vice
versa for inserting it into position
•
Ensure there is proper ventilation in the cooking area.
•
Instructions concerning the discharge of air have to be followed.
•
Does not use flame under the range hood.
•
Avoid using materials which could cause spurts of flame near the range hood.
•
Never touch the lamp when it is on.
•
Do not dismantle, repair or modify the range hood on your own.
Summary of Contents for Cessena Series
Page 5: ...5 CX 9753 CX 9356 ...
Page 32: ...11 20 ...


