8
Installation Instruction
This electric storage water heater shall be installed on a solid wall. If
the strength of the wall cannot bear the load equal to two times of
the total weight of the water heater filled fully with water, it is then
necessary to install a special support. In case of the hollow bricks
wall, ensure to fill it with concrete cement completely, and use
anchor fastener bolt (expansion bolt) in case of the hebel wall.
Before determined the location of the holes for the bolt, make sure
that the right side of the water heater has more than 200 mm (0.2
m) distance from the floor (ground), so that there is a space for the
repair process (if necessary).
After selecting a proper location for the bolts holes, install the
bracket to a solid wall.
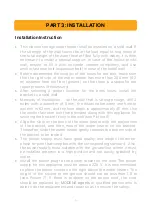
Methods of installation : on the wall that is strong enough, drill 2
holes with a diameter of 8 mm, the distance between one hole to
another is 62 mm, and the hole depth is approximately 45 mm. Use
the anchor fastener bolt that provided along with this appliance for
securing the bracket firmly in the wall (see Picture 6)
Align the slots on the back of the water heater with the projections
of the bracket, and then, mount the water heater on the bracket.
Thereafter, slide the water heater gently towards the bottom side of
the bracket to be locked.
The power supply must have good quality and adopts the mono-
phase tri-pole that complies with the corresponding standard. Also,
the power supply must suitable with the
ground
line where it must
be installed properly in a high position and not easily splashed by
water.
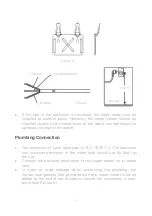
Install the power plug to the power socket on the wall. The power
supply for this appliance must be around 220 V. It is recommended
to place the power socket on the right above the water heater. The
height of the socket to the ground should not be less than 1.8 m
(see Picture 7). If there is problem on the power cord, the cord
should be replaced by
MODENA agents
or qualified person who is
able to do the replacement and repair so as to ensure the safety.
PART 3: INSTALLATION
Summary of Contents for Disteso Series
Page 21: ...12 20 ...


