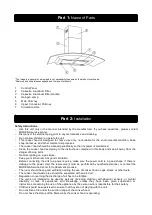
* The image is a general overview and is not necessarily the same as the product you receive.
* Features and completeness depends on the type of products
1
Cont rol Panel
2
Cassette Aluminum Filter
3
Cassette Aluminum Filter Handle
4
Halogen Lamp
5
6
7
Main Chimney
Upper Connector Chimney
Circulation Hole
Safety Instructions
-
Use this unit only in the manner intended by the manufacturer. If you have questions, pleas e contact
MODE NA servic e center.
-
Disconnect the electrical plug prior to any maintenance and cleaning.
-
Do not allow children to operat e the unit.
-
This cooker hood is designed for home use only, not suitable for the environmental condition, bake
shop, barbec ue, and other commercial purpos es.
-
The cooker hood should be cleaned periodically so that its power is maintained.
-
Clean the cooker hood according to the instructions contained in this book and keep it away from the
danger of being burnt.
-
No direct grilling on a gas stove.
-
Keep your kitchen remains good circulation.
-
Before connecting the unit to a power source, make sure the power cord is in good shape. If there is
damage to the power cord, the replacement must be performed by qualified personnel or cont act the
MODE NA Service Center for replacement process.
-
The room should have good ventilation during the use of cooker hood on gas stoves or other fuels.
-
The cooker hood waste pipe should be separated with an air-duct.
-
Regulation concerning the discharg e of air has to be fulfilled.
-
The unit is not intended t o be used by persons (including children) with physical, sensory, or mental
disability, or lack of experience and knowledge, unless they have been given supervision or
instructions concerning the use of the appliance by the person who is responsible for their safety.
-
Children should be supervised to ensure that they are not playing with the unit.
-
Do not strike a fire under the suction range of the cook er hood.
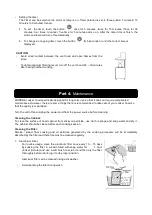
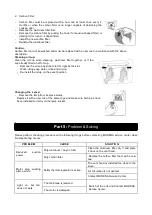
-
Do not check the status of the filters while the cooker hood is operating.
Part 1:
Name of Parts
Part 2:
Installation

