
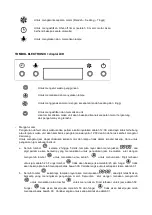


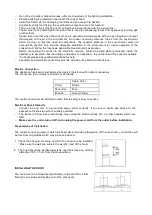

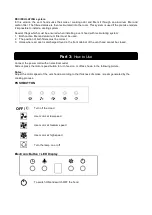


To adjust the speed level (Low
– Medium – High)
To activate the Shut-off timer (A fter 9 minuttes motor will s witch off
automatically)
To switch ON and switch OFF the Lamp
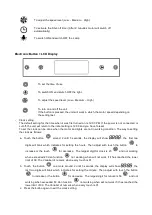
Electronic LCD Display
To set the time of use
To switch ON and switch OFF the light
To adjust the speed level (Low
– Medium – High)
To turn on and off the unit
If the button is pressed, the unit will work in which t he motor speed depending on
the setting last.
-
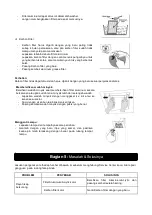
Clock setting
The default setting for the time when it was first turned on is 12: 00 PM. If the power is not connected or
cut off, the unit will return to the initial setting is 12:00 and you have to reset.
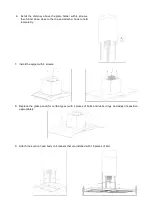
To set the clock can be done when the motor and lights are not in working condition. The way to setting
the clock as follows:
a. Touch the button
around 2 until 5 seconds, the display will show
, the first two
digits will blink which indicates for setting the hours. Then adjust with touc h the button
to
increase or the touch
for decrease. The largest digit for clock is 23
and not working
when exceeded 23 dan function
not working when will not work if it has reached the lower
limit of 00. The V ariabel of numeric when every touch is 01.
b. Touch the button
one more around 2 until 5 s econds, the display will show
, the
last two digits will blink whic h indicates for setting t he minute. Then adjust with touch the button
to increase or the button
for decrease. The largest digit for minut e is 59
and not
working when exceeded 59 dan function
not working when will not work if it has reached the
lower limit of 00. The Variabel of numeric when every touch is 01.
c. Press the button again to exit the clock setting.


