
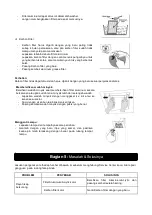


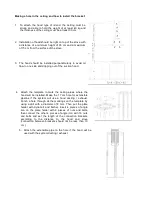

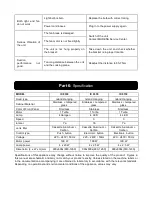

2. Carbon Filter :
-
Carbon filter must be replaced with a new one at least once every 4
months or when the carbon filter is no longer capable of abs orbing the
cooking odor.
-
Remove the aluminum filter first.
-
Remove the carbon filter by pulling the hook ( for square-shaped filter) or
rotating it (for round
– shaped filter).
-
Install the new carbon filter.
-
Reinstal the aluminum filter.
Caution:
Carbon filter cannot be washed and must be replaced with a new one in accordance wit h the above
description.
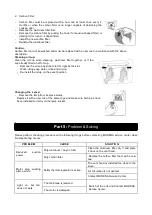
Cleaning oil cup:
Clean the oil cup when cleaning aluminum filter together, or if the
cup already filled a half of cup.
- Remove the oil cup by slide to left or right as the slot.
- Wash using soap water, rinse and drying.
- Re-install the oil up on the exact position.
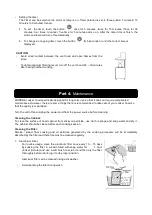
Changing the Lamp:
-
Remove the lamp from its place slowly.
Replace it with a new one of the same type and make sure both pins have
been installed correctly on the lamp socket.
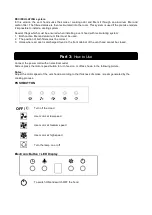
Please perform checking procedure on the following thin gs before contacting MODENA s ervice cent er when
troubleshooting occurs:
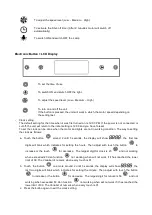
PROBLEM
CAUS E
SOLUTION
Reduced
suction
power
Dirty aluminum / acrylic filter
Clean the aluminum filter, dry it and place
it back on the vent hood.
Dirty carbon filter.
Replace the carbon filter foam with a new
one.
Motor stop working
after a while
Safety thermal regulator is active.
The vent hood is installed too close to the
stove.
Air circulation is not optimal
Cont act MODENA Service Center.
Light on, but fan
does not work
The fan blade is jammed.
Switch of the unit and Contact MODE NA
Service Center.
The motor is damaged.
Part 5:
Problem & Solving


